

Affiliate disclosure: Some links in this guide may be paid referral links. If you purchase or sign up through one, One Stop Side Hustles may earn a commission. How our affiliate links work.
APP DEVELOPMENT STARTER GUIDE VERSION 10.2
Turn your ideas into apps—and apps into income. Whether you want to build your own products or freelance for clients, app development offers multiple paths to earning. Create once, sell repeatedly, and scale globally.
2. Why Choose App Development?
3. Choose Your Niche & App Style
4. Earnings, Pricing & Offer Selection
5. Essential Tools & Your Starting Setup
6. Find Clients & Reach Your Audience
7. How to Start: Your Beginner Roadmap
8. Build Trust & Improve Results
9. Learning Resources & Templates
10. Your First 6 Months in App Development
11. Get the App Development Starter Kit
12. Frequently Asked Questions
Quick Snapshot
Earn: $500–$10,000+/mo from a single successful app
Work: Build on your own schedule with no-code tools or code
Start: Medium cost — begin free with no-code builders
Best for: Problem-solvers who enjoy building products
Grow: One app → portfolio + recurring subscriptions
1. What Is App Development?
App development means designing and building mobile or web applications that people use to solve problems, stay entertained, or manage daily life 🧠💻.
🚀 The Opportunity
📱 7+ billion smartphone users and millions of downloads every day — even a simple app can change your life.
🛠️ Two Main Paths
- 👨💻 Product Builder: Create your own apps and earn from downloads/subscriptions
- 🤝 Freelance Developer: Build for clients and get paid per project
💡 PRO TIP
Many devs do both — freelancing funds your own app ideas.

2. Why Choose App Development?
App development is powerful because it lets you build digital assets that can earn repeatedly, improve over time, and reach users far beyond your local market.
💰 Strong income potential
One useful app can generate $500–$10,000+/month from multiple revenue streams:
- Subscriptions
- In-app purchases
- Ads
- Paid downloads
- B2B licensing or custom versions
Best long-term path: recurring subscriptions + good retention.
🌍 Global distribution from day one
App stores and web platforms give you immediate access to users around the world.
Why this matters:
- One launch can reach many countries
- You are not limited to one city or local client base
- Good products can scale without physical expansion
🤝 Low overhead, high margins
Once the app is built, ongoing costs are usually much lower than physical businesses:
- App store fees
- Hosting or backend tools
- Maintenance and support
- Occasional feature updates
There is no inventory, shipping, or warehouse cost.
🕒 Build once, earn repeatedly
Apps can work for you 24/7 after launch.
What makes this attractive:
- Users can download anytime
- Revenue is not tied only to hours worked
- Updates can improve one asset instead of starting over
- A strong app can keep earning long after the first build

🧠 High-value skill with long-term leverage
App development is not just a side hustle — it is a skill stack that can open multiple income paths:
- Freelancing
- SaaS products
- Startup projects
- Portfolio pieces
- Better-paying technical roles
🎯 Great apps solve expensive problems
Users are most willing to pay for apps that:
- Save time
- Reduce friction
- Improve productivity
- Help organize work or life
- Help people earn, save, or protect money
Clear pain points usually lead to clearer marketing and better conversions.
⚡ Beginner-friendly starting options
🚀 AI can speed up the build cycle
AI tools can help you move faster by assisting with:
- Brainstorming features
- Generating starter code
- Debugging errors
- Writing documentation
- Improving copy and onboarding text
Faster learning loops usually mean faster progress and better products.
3. Choose Your Niche & App Style
App development can range from simple niche tools to higher-value subscription products and client-facing business software. The smartest beginner move is to start with smaller, more focused apps, then expand into deeper workflows once you understand users, retention, and monetization.
You do not need to build everything at once. Focus first on app types you can design clearly, launch quickly, and improve based on feedback.
📱 Beginner-Friendly Consumer App Categories
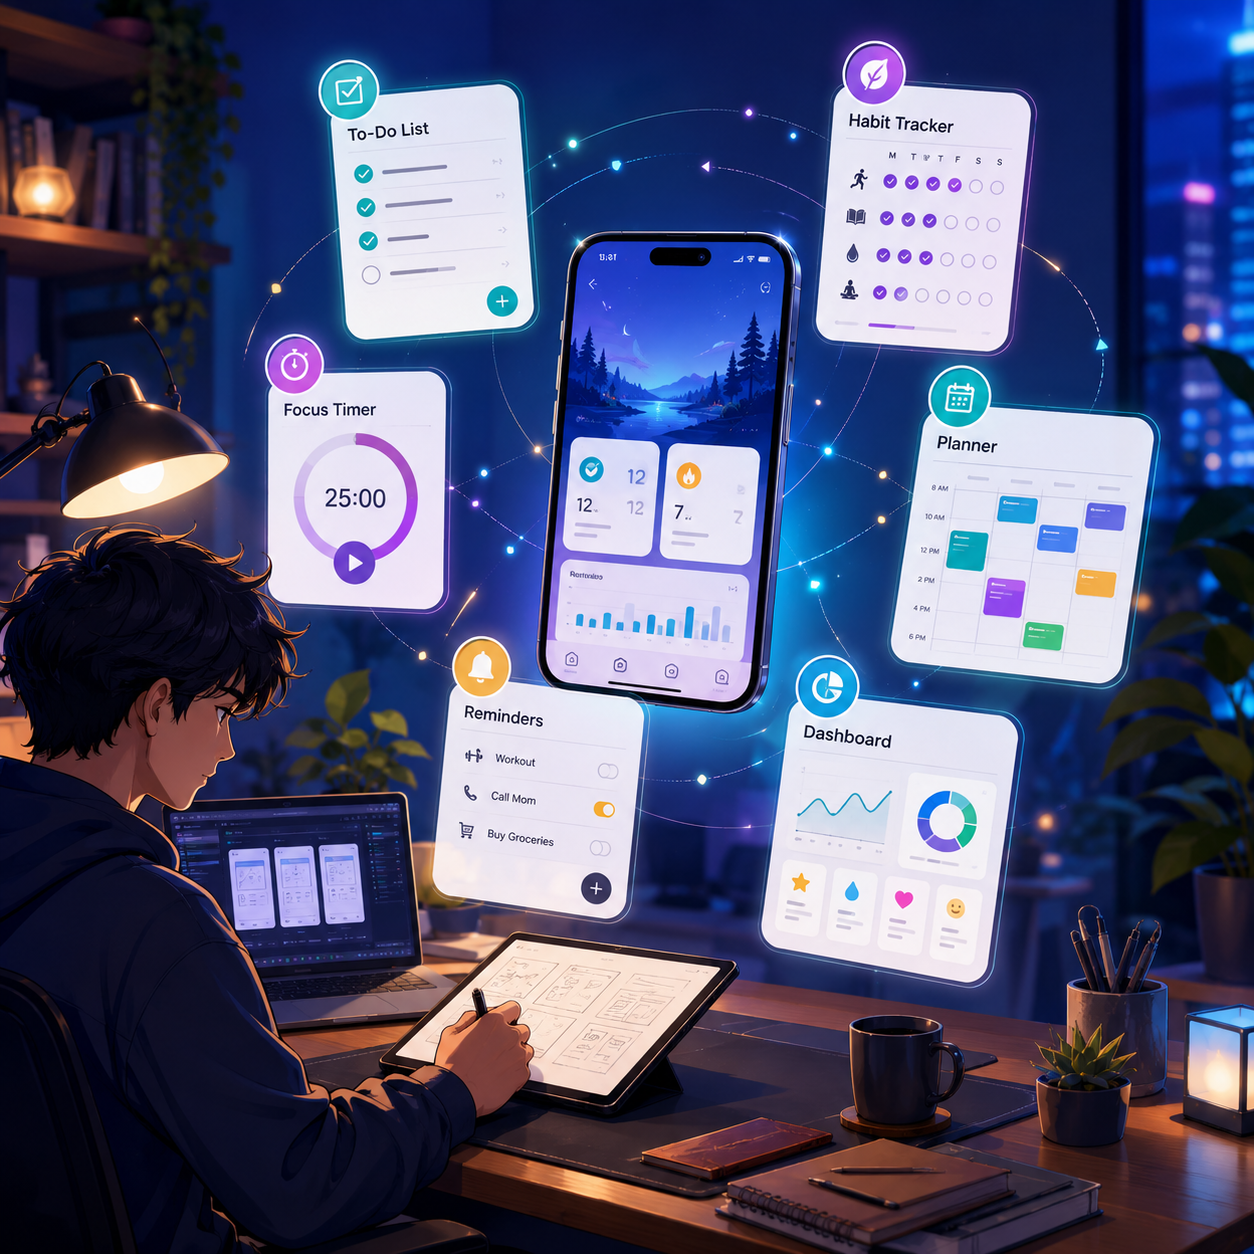
⏱️ Productivity & Habit Apps
- 🧠 What it includes: To-do lists, habit trackers, focus timers, simple planners, reminder tools, and personal dashboards
- 💰 Monetization: Freemium upgrades, subscriptions, premium templates, or one-time pro unlocks
- ✅ Best for: Beginners who want repeat-use products with clear daily value
- 🔥 Why it works: These apps solve visible routine problems and can become part of a user’s weekly or daily workflow
💡 PRO TIP
One clear workflow usually beats a bloated all-in-one productivity app.
🧘 Lifestyle & Wellness Apps
- 🌿 What it includes: Fitness trackers, meal planners, sleep tools, water reminders, mood journals, and simple self-care systems
- 💰 Monetization: Subscriptions, premium plans, paid routines, coaching upsells, or affiliate offers
- ✅ Best for: Developers interested in habits, routines, health, and personal improvement
- 🔥 Why it works: Lifestyle apps can retain users well when they fit into everyday behavior and deliver quick wins
💡 PRO TIP
Trust matters in this category, so keep the experience simple and the promise realistic.
🎓 Learning & Skill-Building App Opportunities
📚 Educational Apps
- 📚 What it includes: Flashcards, quiz tools, study planners, language practice, exam prep, and subject-specific learning apps
- 💰 Monetization: Subscriptions, school licenses, premium packs, paid question banks, or tutoring upsells
- ✅ Best for: Developers who understand a topic, audience, or learning problem well
- 🔥 Why it works: People are willing to pay for tools that help them learn faster, stay organized, and perform better
💡 PRO TIP
Narrow learning tools are often easier to market than broad “learn everything” apps.
🏋️ Skill Practice Apps
- 🛠️ What it includes: Coding drills, writing prompts, interview prep, typing tools, music practice trackers, and challenge apps
- 💰 Monetization: One-time purchases, subscriptions, paid content libraries, or premium progress tracking
- ✅ Best for: Builders who want focused products with clear outcomes and repeat sessions
- 🔥 Why it works: Practice apps are usually easier to scope than full learning platforms and can still drive strong retention
💡 PRO TIP
Repetition, reminders, and visible progress are often more valuable than endless content.

💼 Business & B2B App Categories
🏢 Business Tools
- 💼 What it includes: Scheduling tools, client portals, invoicing systems, CRMs, team checklists, inventory trackers, and internal dashboards
- 💰 Monetization: Monthly subscriptions, per-seat pricing, setup fees, or licensing deals
- ✅ Best for: Developers who want higher-value users and clearer business ROI
- 🔥 Why it works: Business customers will often pay more when the app saves time, reduces mistakes, or improves revenue
💡 PRO TIP
B2B tools do not need flashy design if they solve a painful workflow clearly.
🏭 Industry-Specific Apps
- 🏢 What it includes: Tools for tutors, cleaners, handymen, coaches, agencies, pet sitters, creators, or other specific service businesses
- 💰 Monetization: Subscriptions, paid templates, one-time upgrades, or small business bundles
- ✅ Best for: Developers who understand one niche audience and its language well
- 🔥 Why it works: Niche apps often beat generic tools because they match real workflows, terminology, and day-to-day pain points
💡 PRO TIP
If a niche still runs important work with spreadsheets, notes, and reminders, there may be room for an app.

🧰 Utility & Micro-SaaS Paths
🔧 Simple Utility Apps
- ⚙️ What it includes: Calculators, timers, checklists, converters, reminder tools, generators, trackers, and lightweight helpers
- 💰 Monetization: Ads, pro versions, premium themes, one-time purchases, or small subscriptions
- ✅ Best for: Beginners who want a smaller first product and faster launch cycle
- 🔥 Why it works: Utility apps are easier to build, easier to test, and useful for learning launch, retention, and monetization basics
💡 PRO TIP
Specific tools usually perform better than generic ones.
☁️ Micro-SaaS Products
- 🧩 What it includes: Small web apps, client intake systems, report generators, automation helpers, niche dashboards, and workflow tools
- 💰 Monetization: Recurring subscriptions, usage-based pricing, lifetime deals, or small-team plans
- ✅ Best for: Developers who want recurring revenue without managing a huge consumer audience
- 🔥 Why it works: Micro-SaaS products can earn meaningful revenue with fewer users when the workflow is painful enough
💡 PRO TIP
The tighter the problem definition, the easier the product is to explain and sell.

🧭 App Selection Strategy
🥇 Best First App Path
- 🌱 Recommended focus: Start with one clear user, one painful problem, and one core workflow
- 📌 Strong starter ideas: Niche calculators, trackers, reminders, planners, or simple business tools
- ✅ Best for: Builders learning product scope, user feedback, and monetization fundamentals
- 🔥 Why it works: Smaller apps help you finish faster, launch sooner, and learn more from real usage
💡 PRO TIP
Shipping one useful app teaches more than outlining ten ambitious ones.
🚀 Higher-Upside App Path
- 🚀 Recommended focus: Move into subscriptions, B2B tools, or workflow apps once you understand user behavior and retention
- 📌 Higher-upside ideas: Team dashboards, client systems, niche SaaS apps, education subscriptions, or recurring-use utilities
- ✅ Best for: Developers ready to handle onboarding, analytics, support, and monetization systems
- 🔥 Why it works: Recurring-use apps with clear ROI usually have better long-term income potential than one-time novelty builds
💡 PRO TIP
The best income path is rarely the most complex idea — it is usually the clearest useful one.

🎯 Choose Your First App
🎯 KEY TAKEAWAY
Start with a utility app, niche productivity tool, small learning app, or focused business workflow. These are easier to launch than broad social, finance, or community platforms and give you faster feedback on what users actually want.
🚀 ACTION STEP
Write a focused first plan:
- User & problem: Identify one target user and one workflow worth improving.
- Minimum scope: List the essential screens and one usable outcome for the first version.
- Validation: Show a simple prototype to likely users and record their feedback.
- Launch plan: Choose a platform, define a small release milestone, and test your monetization assumptions.
4. Earnings, Pricing & Offer Selection
App development can earn through your own products, paid client projects, or a combination of both. Your results depend on who you serve, what problem you solve, how you reach customers, and whether revenue covers the cost of delivering the app.
Use this chapter to choose a monetization model, set a first price, understand what you actually keep, and plan your next earning milestone. Downloads are not income, revenue is not profit, and experience alone does not guarantee higher earnings.
🧠 Reality Check (Set Realistic Income Expectations)
Your first app may earn nothing—or cost more to run than it brings in. Treat early development as a validation project, not a guaranteed monthly paycheck.
- Learning stage: Focus on completing a useful app and testing it with the intended audience.
- First paid validation: Look for a genuine purchase, paid pilot, or client deposit—not just encouraging comments.
- Repeatable income: Build evidence that people keep using the app, renew, or refer new customers.
- Growth stage: Increase distribution only when the product works reliably and the economics justify spending more.
There is no reliable “beginner → professional” monthly-income ladder that applies to every developer. Consumer apps, business software, and freelance services have different economics and timelines.
📝 QUICK NOTE
All dollar amounts in this chapter are USD. Worked examples and starting-price ideas are planning illustrations—not industry averages, promised earnings, or deadlines for success.

🛤️ Choose Your Earning Path
📱 Build Your Own App
Sell a product to multiple users through paid downloads, upgrades, subscriptions, advertising, or business licenses.
- Best fit: You understand a specific audience and can keep improving a product after launch.
- Income pattern: Uncertain at first; repeat purchases or renewals can create recurring revenue.
- Your responsibility: Development, distribution, support, maintenance, privacy, and ongoing costs.
- First move: Test a small paid offer before committing to a large feature set.
💡 PRO TIP
A focused tool with a clear reason to pay is a better first pricing experiment than a large app with no defined customer.
🤝 Build Apps for Clients
Charge for a defined deliverable: a prototype, internal tool, small feature, integration, or complete project within your capabilities.
- Best fit: You can scope work clearly, communicate reliably, and deliver what you promise.
- Income pattern: Project-based payments; maintenance agreements can add recurring income.
- Your responsibility: Sales, estimates, revisions, handover, deadlines, and contract terms.
- First move: Offer one tightly scoped service supported by a working example.
⚠ COMMON MISTAKE
Freelancing does not guarantee income. You still need paying clients, controlled scope, and successful delivery.
🧮 Understand Revenue, Costs & What You Keep
📉 Monthly Revenue Is Only the Starting Point
For a simple monthly subscription plan:
Active paying accounts × monthly price = gross recurring revenue
For a practical cash-planning estimate:
Gross revenue − fees − refunds − operating costs − marketing = cash remaining before tax and paying yourself
Annual subscription cash receipts are not the same as monthly recurring revenue. Spread annual plan value over its covered months when tracking MRR, and keep one-time project payments separate.
📋 REAL-WORLD EXAMPLE
Illustrative monthly subscription app:
- 200 paying accounts × $10/month = $2,000 gross revenue
- Assumed platform/payment fee of 15% = $300
- Refunds = $50
- Hosting, tools, and APIs = $150
- Marketing = $100
- Cash remaining = $1,400 before tax and paying yourself
This simplified example applies the assumed fee to gross billings. Actual settlements can handle taxes, refunds, and fees differently. It also excludes initial build costs and does not predict how many customers you will acquire.
💡 PRO TIP
Track active paying customers, renewals, and cash remaining each month. Downloads and total registered users can rise while the business still loses money.
💳 Platform Fees Need a Separate Check
Do not assume every app-store sale has a flat 30% fee, or that web payments are free.
- Apple: Eligible developers who enroll in the App Store Small Business Program can receive a 15% commission rate on paid apps and in-app purchases under the program’s terms.
- Google Play: Service fees depend on the transaction, market, billing arrangement, and applicable program. Check the current terms for your exact setup.
- Web payments: Budget for payment-processing charges, refunds, disputes, and any applicable tax-handling costs.
Check the rules for in-app digital purchases before choosing a checkout method. An external payment processor is not automatically an allowed substitute for store billing.

💸 Match the Monetization Model to the Value
🛒 One-Time Purchase or Pro Unlock
Use this when the app provides a defined benefit without substantial ongoing service costs—for example, a focused offline utility.
- Let the store listing or free version demonstrate the result clearly.
- Specify exactly what the purchase unlocks.
- Budget for future bug fixes and platform updates.
- Avoid promising unlimited lifetime service when every user creates recurring costs.
🔓 Freemium Upgrades
Offer a genuinely useful free experience, then charge for added value such as exports, saved history, automation, or advanced workflows.
- Identify the point where an engaged user needs more capability.
- Keep the upgrade easy to understand.
- Track the cost of supporting free users as well as conversion to paid.
💡 PRO TIP
Freemium is an access strategy, not a separate payment model. The paid upgrade can be a one-time purchase or a subscription.
🔒 Subscriptions and Business Plans
Use recurring pricing when the customer receives recurring value: synchronization, fresh content, ongoing automation, collaboration, or a business-critical workflow.
- Start with one clear paid plan rather than several confusing tiers.
- Choose a billing unit that matches value: per account, seat, location, or usage.
- Make limits, renewal terms, and cancellation clear.
- Watch renewal behavior and support workload—not just initial signups.
📢 Advertising and Usage-Based Pricing
Advertising earns from monetized impressions, not simply from having users. Usage-based pricing can help cover variable costs such as AI requests, storage, or report generation.
- For ads, assess session frequency, placement, audience, and the effect on user experience.
- For metered features, use clear allowances and spending limits.
- Avoid an “unlimited” plan if heavy usage could make each customer unprofitable.
⚠ COMMON MISTAKE
Do not force a subscription onto a one-off problem or assume ads will fund a small, infrequently used app.
🚀 Build Your First Paid Offer
Start with one customer, one valuable outcome, and one clearly scoped way to get paid. Choose the smallest offer you can deliver reliably, price it to cover real costs and time, and validate demand before expanding the product or service.
🎯 Set Your First Price in Five Steps
🎯 1. Define the Paid Outcome
Finish this sentence: “This app helps [specific customer] achieve [useful result] without [current frustration].”
Identify what the customer uses today, what it costs, and why switching would be worthwhile.
🔍 2. Research Relevant Alternatives
Compare a few direct competitors and substitutes—not just apps with similar screens. Record their pricing, limits, billing periods, and customer complaints. Free tools and spreadsheets are alternatives too.
🧮 3. Work Out Your Cost Floor
Estimate hosting, database usage, APIs, payment fees, support, maintenance, and customer acquisition. Include the cost of free users where relevant.
A price that covers infrastructure but leaves no room for your time may still be a poor business.
🧪 4. Test One Simple Offer
Choose a price and a clear package. Ask target customers to buy or join a paid pilot where appropriate. “Would you pay?” is weaker evidence than an actual transaction.
Start with a monthly plan if ongoing value is still unproven. Consider annual billing once you can explain the long-term benefit and honor the commitment.
✅ 5. Review the Whole Result
Track paid conversion, renewals, refunds, usage costs, and support requests. Change one major element at a time so you can tell whether the price, packaging, or product changed the result.
⭐ ADVANCED STRATEGY
Raise prices when the paid outcome becomes more valuable or costly to deliver—not simply because you added more features. Handle existing-customer changes transparently and follow platform requirements.
🤝 Price Client Work Without Losing Your Margin
🧾 Build a Defensible Quote
- Define the deliverable: Specify screens, workflows, integrations, supported platforms, and acceptance criteria.
- Estimate the full workload: Include discovery, design, development, testing, meetings, deployment, and handover.
- Add uncertainty: Allow for unfamiliar integrations and technical risks instead of quoting the best-case build time.
- Choose the pricing format: Fixed fee for clear scope; hourly, daily, or paid discovery when the scope is uncertain.
- Protect payment: Agree a deposit or milestone schedule and written approval points before starting.
A working estimate is total expected hours × your sustainable rate + separately charged project costs + risk allowance. Check whether the resulting quote fits the customer’s value and your actual capability.
📝 Put the Boundaries in Writing
- What is included—and explicitly excluded
- Number of revision rounds
- How changes are priced and approved
- Who pays for hosting, APIs, and store accounts
- What happens when the client delays feedback
- Ownership, licenses, and account access
- Handover requirements and post-launch support
Track project receipts minus direct costs, divided by all project hours to understand your effective pre-tax return. Include sales, meetings, revisions, and administration—not just coding.
⚠ COMMON MISTAKE
“Unlimited revisions” and indefinite free maintenance can turn a reasonable project fee into poorly paid ongoing work. Offer a separate, clearly limited maintenance agreement.
🎯 KEY TAKEAWAY
The strongest beginner goal is one useful offer that someone genuinely pays for. Choose a model that fits the problem, price it to cover delivery, and improve retention or repeat business before chasing scale.
Meaningful app income can come from a focused audience—but it still requires demand, distribution, reliable delivery, and ongoing work.
🚀 ACTION STEP
Write a one-page earning plan:
- Customer: Who pays, and what result do they need?
- Offer: What exactly is included in the first version or project?
- Price: What will you charge, and how often?
- Costs: What fees, usage costs, and support time must you cover?
- Validation: What paid test will you run, and what would justify continuing, adjusting, or stopping?
📋 Pricing & Revenue Planning Reference
Use these tables as a starting framework. Pick one model and one next milestone; do not treat the examples as a forecast.
📖 How to Use These Tables
- Start with the model that fits the customer’s buying behavior.
- Adjust example prices for your audience, geography, feature limits, and costs.
- Judge progress by paid demand and delivery quality—not a fixed month count.
- Separate product recurring revenue from one-off client receipts.
- Set a spending limit before testing paid acquisition.
📝 QUICK NOTE
For market context, the RevenueCat subscription-app report examines revenue, pricing, conversion, and retention. Its sample covers subscription apps using RevenueCat; it is not an earnings forecast for all app developers or freelance work.

🧾 Monetization Models & Starting Tests
💡 Model | 🧪 Illustrative Starting Test | 📌 What to Validate |
One-time purchase / pro unlock | Test a $9 unlock for a focused utility. | Can you demonstrate value before purchase and fund future maintenance? |
Consumer subscription | Test a $5/month plan for a recurring workflow. | Do customers keep using and renewing after the first billing period? |
Business subscription | Test a $29/month account plan for one narrow business task. | Does the outcome justify the price and the expected support load? |
Usage-based pricing | Offer a defined allowance plus clearly priced additional usage. | Do allowances and overage prices cover variable delivery costs? |
Advertising | Test a small number of placements without disrupting the core task. | Measure revenue per monetized impression and any effect on repeat use. |
Client project / licensing | Quote a limited paid pilot after discovery; price broader rollout separately. | Are scope, acceptance, payment, support, and ownership clear? |
📈 Revenue Milestones Without a Guaranteed Timeline
🚀 Stage | ✅ Evidence to Look For | 🎯 Next Priority |
Learning & prototype | A working core task and useful feedback from target users; revenue may be zero. | Finish the smallest usable version and test the problem. |
First paid validation | A real purchase, paid pilot, or client deposit. | Deliver the promised result and learn why the customer paid. |
Repeatable demand | Renewals, repeat purchases, referrals, or a repeatable source of qualified clients. | Improve onboarding, retention, delivery, and pricing. |
Sustainable operation | Receipts cover recurring costs, with acceptable support time and reliable delivery. | Track your return on time and strengthen maintenance systems. |
Controlled growth | Acquisition and delivery remain viable as customer numbers increase. | Expand one proven channel or offer without sacrificing reliability. |
5. Essential Tools & Your Starting Setup
A strong app workflow combines development tools, design, backend services, analytics, and publishing systems. Start with the simplest stack that helps you build and test.
To succeed as an app developer, you need the right combination of tools + technical skills + setup. The good news? You can start for free.
Free learning and prototyping do not necessarily mean free production hosting or app-store publishing. Choose one development path, finish a small working app, and add services only when the app needs them.
🧰 Your Minimum Viable App Development Setup
💡 Beginner Setup Path
Start simple:
- Build a calculator, to-do list, or small utility app first
- Use beginner-friendly tools to learn app logic before chasing complex features
- Finish one small project before scaling into advanced builds
- Move into larger apps only after your first build is working
🧰 Start With What You Already Have
- Computer: Use a reliable laptop or desktop that meets your chosen builder or development environment’s requirements.
- Development tool: Choose one visual builder or one coding stack—not several at once.
- Planning workspace: Keep your user problem, screen sketches, tasks, and bug list together.
- Design: Use paper sketches or a simple Figma prototype before polishing graphics.
- Testing: Use a browser, emulator, or available phone; test on real target devices before release.
- Backups: Use Git for code projects or the builder’s supported versioning and export features.
💡 PRO TIP
Build one complete workflow before buying more tools. A user should be able to open the app, complete its main task, and see a useful result.
🧭 Choose One Development Path
No-code / low-code: Use a visual builder to prototype a focused workflow. Check publishing options, data limits, export capabilities, and paid-plan requirements before committing.
Web-first: Build a browser-based app when an accessible link is enough to deliver the outcome. Start with the interface and add a backend only when persistent or shared data is necessary.
Mobile-first: Choose native development or a cross-platform framework when device features or app-store distribution matter. Confirm operating-system, SDK, signing, and build requirements early; local native iOS development typically requires macOS and Xcode.
🎯 KEY TAKEAWAY
One target user, one core task, and one workable development path are enough for a first prototype. You do not need every service in the tables below.
⚙️ Set Up Your Workflow in 5 Steps
🎯 1. Define the Smallest Useful App
Write down who the app serves, the problem it solves, and the result a user should achieve. Sketch the essential screens and separate must-have functionality from later ideas.
First milestone: One working task—not a complete product ecosystem.
🧰 2. Prepare Your Build Environment
Create a project in your chosen builder or install the required editor, runtime, SDK, and tooling for your stack. Follow its official starter guide and run the basic project before adding features.
- Keep a short setup note so you can reproduce the environment.
- Save a working baseline with version control or supported project backups.
- Keep account credentials and private keys out of public repositories and shared planning pages.
🔐 3. Plan Data and Access
Decide what information the app actually needs to store. A local utility may not need accounts or a cloud database; a shared business tool may need both.
- Collect only the data required for the core task.
- Define who can read, change, or delete each kind of record.
- Use established authentication services when accounts are necessary.
- Enforce access permissions in the backend—not just by hiding interface buttons.
- Keep privileged credentials server-side and test that one user cannot access another user’s private records.
🧪 4. Build, Test, and Measure
Complete the main workflow, then test normal use and failure cases. Check empty inputs, invalid values, slow connections, saving and reopening data, and basic accessibility.
Use a simple bug list and error reporting appropriate to your stack. If you add analytics, define a few meaningful events, such as completing the main task, and avoid sending sensitive personal information. Address relevant privacy and consent requirements before collecting real-user data.
🚀 5. Prepare a Small Release
Share a limited test release first. Record what users struggle with and fix blockers before expanding distribution.
💸 Keep Your Tool Budget Lean
⚠ COMMON MISTAKE
Paying for several builders, backend services, design subscriptions, and store accounts before choosing a platform or finishing a prototype.
Before upgrading, identify the exact limitation you need to remove. Check publishing permissions, commercial-use terms, usage limits, renewal costs, and export options. Free tiers are useful for learning but may not fit a production app.
🚀 ACTION STEP
Choose one development path and set up a small project today:
- Name the target user and core task.
- Sketch the essential screens.
- Run a starter project in your chosen tool.
- Save a working backup.
- Schedule a build-and-test session for the first complete workflow.
Add paid services only when a clear requirement justifies them.
📋 Tool, Skill & Platform Reference
🛠 TOOLS & RESOURCES
Use the existing tables below as a reference library—not a requirement to learn or purchase everything. Choose the tools and skills relevant to your first app.
📝 QUICK NOTE
The original comparison entries are retained. Treat listed prices, learning timelines, market descriptions, and revenue splits as indicative notes rather than verified current terms. Check official availability, pricing, commercial-use limits, and publishing requirements before making a decision. Store fees vary by program and transaction; web payments and hosting may also carry costs.
🧰 No-Code / Low-Code Tools (Best for Beginners)
If you’re starting from zero, these let you build apps without coding:
Tool | Best For | Cost | Learning Curve |
Mobile & web apps with drag-and-drop | Free-$45/mo | ⭐⭐ Easy | |
Complex web applications | Free-$29/mo | ⭐⭐⭐ Moderate | |
Visual builder for Flutter apps | Free-$30/mo | ⭐⭐ Easy-moderate | |
Simple mobile apps from spreadsheets | Free-$99/mo | ⭐ Very easy | |
Build from Airtable databases | Free-$59/mo | ⭐ Very easy |
💡 PRO TIP
Spend 1–2 months here to understand app logic before learning to code.
This is a suggested learning path, not a required waiting period. You can begin coding sooner or remain with a visual builder if it fits your goals.
🎨 Design Tools
🧠 Core Skills You’ll Need
Skill | What It Is | Time to Learn | Priority |
Basic coding | HTML, JavaScript, or Swift | 2-4 months | 🔥 Critical |
UI/UX design | Creating clean, usable layouts | 1-3 months | 🔥 Critical |
Problem-solving | Breaking down complex challenges | Ongoing | 🔥 Critical |
Version control for code | 1-2 weeks | ⭐ High | |
Connecting to external services | 2-4 weeks | ⭐ High | |
Debugging | Finding and fixing errors | Ongoing | ⭐ High |
🪜 Intermediate Skills (Level Up)
Skill | What It Is | Time to Learn | Priority |
Database management | Storing, organizing, and retrieving user data | 1–2 months | 🔥 Critical |
Authentication | User login systems (email, Google, etc.) | 2–4 weeks | 🔥 Critical |
App Store Optimization (ASO) | Improving app visibility in app stores | 2–4 weeks | ⭐ High |
Analytics | Tracking user behavior and app performance | 2–4 weeks | ⭐ High |
Monetization strategy | Choosing pricing models (ads, subscriptions, etc.) | Ongoing | ⭐ High |
💻 Coding Frameworks (Level Up)
If you want full control and scalability:
Framework | Platform | Language | Learning Curve | Job Market |
iOS, Android | Dart | ⭐⭐⭐ Moderate | 🔥 Growing fast | |
Android only | Kotlin | ⭐⭐⭐ Moderate | 💰 High-paying | |
iOS, Android, Web | JavaScript | ⭐⭐⭐ Moderate | 🔥 Excellent | |
iOS only | Swift | ⭐⭐⭐⭐ Hard | 💰 High-paying | |
Browser-based apps | HTML/CSS/JS | ⭐⭐ Easy | 🔥 Huge market |
🚀 ACTION STEP
Start with React Native or Flutter to build for multiple platforms at once.
Choose this route when cross-platform mobile development fits your app. Shared code does not eliminate platform-specific setup, testing, signing, or publishing requirements.
🗄️ Backend & Database Tools
Tool | Purpose | Cost | Difficulty |
Authentication, database, hosting | Free-$25/mo | ⭐⭐ Easy | |
Open-source Firebase alternative | Free-$25/mo | ⭐⭐ Easy | |
Full backend services | Pay per use | ⭐⭐⭐ Moderate | |
NoSQL database | Free-$57/mo | ⭐⭐⭐ Moderate |
🚀 Publishing Platforms
Platform | Cost | Revenue Split | Best For |
$99/year | 70/30 (you/Apple) | iOS apps | |
$25 one-time | 70/30 (you/Google) | Android apps | |
Free-$20/mo | Keep 100% | Web apps |
📊 Analytics & Monetization
Tool | Purpose | Cost |
Track user behavior | Free | |
Mobile app analytics | Free | |
Mobile advertising platform | Free (rev share) | |
Payment processing | 2.9% + $0.30 per transaction | |
Subscription management | Free-$250/mo | |
iOS publishing & analytics | Free with $99/year dev account |
6. Find Clients & Reach Your Audience
Finding users is a distribution problem as much as a product problem. Start with direct feedback, then expand into communities, launches, search, content, and partnerships.
👥 Start With People You Already Know
Your first users do not need to come from ads or a huge audience. Start with people who already know you, trust you, or are willing to give honest feedback.
🧑🤝🧑 Who to Ask First
- Friends
- Family
- Coworkers
- Classmates
- Online connections
- Social media followers
- Past clients or customers
- People in group chats or communities you already belong to
✅ Why This Works
- Easy way to get your first 10–25 testers
- Helps validate the idea before spending money
- Gives you early feedback before launching publicly
- Helps you find confusing features, missing benefits, or weak onboarding
💬 What to Ask
Instead of saying, “Download my app,” ask validation-style questions first:
“Would you use an app that helps with [problem]?”
“What do you currently use to solve [problem]?”
“What would make this app useful enough for you to keep using it?”
“Can I send you the beta version and get your honest feedback?”
🎯 KEY TAKEAWAY
Your first users are not just users — they are testers, validators, and feedback sources.
🌐 Reddit & Niche Communities
Reddit can be one of the best early traction channels because people gather around specific problems, hobbies, tools, and interests.
🧭 How to Use Reddit Correctly
- Find subreddits related to your app niche
- Read the community rules before posting
- Comment helpfully before sharing your app
- Ask for feedback instead of hard-selling
- Share the problem you are solving
- Be transparent that you built the app
- Respond to every comment professionally
⚠️ What to Avoid
- ❌ Spamming links
- ❌ Posting without context
- ❌ Pretending you are not the creator
- ❌ Ignoring community rules
- ❌ Asking for downloads before proving value
💡 Good Post Angle
“I built a simple app to help [audience] solve [problem]. I’m looking for honest feedback from people who deal with this. What would you improve?”
👥 Other Niche Communities
- Discord servers
- Facebook Groups
- Slack communities
- Indie hacker communities
- Niche forums
- LinkedIn Groups
- Maker communities
- University or local tech groups
💡 PRO TIP
Lead with usefulness, not promotion. Communities respond better when you ask for feedback and participate honestly.
🚀 Product Hunt — Launch Day Boost
Product Hunt is useful for launching apps, SaaS tools, productivity tools, AI tools, browser extensions, and creator-focused products.
💡 Why Product Hunt Works
- Can bring early exposure quickly
- Good for tech-savvy early adopters
- Helps validate positioning
- Can drive signups, feedback, and backlinks
- Useful for building credibility
👍 Best For
- SaaS apps
- Productivity apps
- AI tools
- Chrome extensions
- Developer tools
- Creator tools
- Notion-style tools
- Apps with a clear “wow” factor
☑️ Launch Checklist
- Create a strong tagline
- Add clear screenshots or demo video
- Explain the problem quickly
- Prepare your first comment
- Ask your network to support the launch
- Respond to comments throughout the day
- Have your landing page ready before launch
🚀 Other Launch Places
- Indie Hackers
- Hacker News
- BetaList
- Startup directories
- AppSumo, if relevant later
- LinkedIn posts
- Twitter/X build-in-public posts
- Niche newsletters
🎯 KEY TAKEAWAY
Product Hunt can bring a spike in traffic, but long-term growth depends on retention. A launch gets attention; the product still has to keep users.
📱 App Store Optimization — SEO for Apps
App Store Optimization, or ASO, helps people discover your app inside the Apple App Store or Google Play Store.
📈 What to Optimize
App Store Element | What to Improve |
App Title | Include the main keyword if natural |
Subtitle / Short Description | Explain the core benefit quickly |
Description | Focus on problem, benefits, features, and use cases |
Screenshots | Show benefits immediately, not just interface screens |
Preview Video | Demonstrate the app in action |
Keywords | Use phrases your audience actually searches |
Reviews | Build trust and improve conversion |
Icon | Make it simple, recognizable, and polished |
🖼️ Screenshot Strategy
Instead of showing random app screens, use screenshots that explain the value:
- “Track your habits in seconds”
- “Plan your week visually”
- “Save all client notes in one place”
- “Get reminders before deadlines”
- “See your progress at a glance”
🔎 Why ASO Matters
- Brings long-term organic downloads
- Helps your app appear in search
- Improves conversion from store visitors
- Makes your app look more professional
- Reduces dependence on ads
🎯 KEY TAKEAWAY
App store visitors decide quickly. Your icon, title, screenshots, and first few lines need to explain the app fast.
🎥 Content Marketing — Underrated Growth Hack
Content marketing works because it shows your app solving real problems. It also creates long-term traffic, trust, and search visibility.
🎵 TikTok
Use short videos to show:
- The app solving a real problem
- Before-and-after workflows
- Quick demos
- “I built an app that…” videos
- User reactions
- Behind-the-scenes development
- Feature launches
▶️ YouTube
Use YouTube for:
- Tutorials
- App walkthroughs
- Build-in-public videos
- “How to solve [problem]” videos
- Comparison videos
- Case studies
- Feature demos
✍️ Blog / Medium
Use written content for:
- “How I built this app”
- “Best apps for [problem]”
- “How to [solve problem]”
- Product updates
- Founder stories
- SEO-friendly tutorials
💡 Simple Content Ideas
- “I built an app to help [audience] do [result]”
- “The problem with most [category] apps”
- “How to use [app] to save time”
- “3 mistakes people make when [task]”
- “Behind the scenes of building my first app”
- “I asked users what they hated about [problem]”
💡 PRO TIP
Do not just post features. Show the problem, the result, and the transformation.
🤝 Micro-Influencers
Micro-influencers can help you reach a targeted audience without needing a huge ad budget.
📇 Who to Contact
- Niche TikTok creators
- YouTubers in your app category
- Newsletter writers
- Bloggers
- Community owners
- Podcast hosts
- Instagram creators
- LinkedIn creators
🎁 What to Offer
- Free access
- Early beta access
- Affiliate commission
- Exclusive discount code
- Lifetime deal
- Custom feature request
- Sponsored demo
- Giveaway for their audience
💬 Outreach Message
“Hi [Name], I built an app that helps [audience] with [problem]. I noticed your content focuses on [topic], so I thought it could be useful for your audience. I’d be happy to give you free access and set up an affiliate code if you’d like to test it.”
📧 Build an Email List Early
Email gives you owned traffic, which means you are not fully dependent on TikTok, YouTube, Reddit, or app store algorithms.
🛠️ How to Build It
- Offer beta access
- Create a waitlist
- Offer a free checklist, template, or guide
- Add email capture to your landing page
- Collect emails before launch
- Send product updates
- Invite users to test new features
📧 Why Email Matters
- You can announce launches directly
- You can re-engage inactive users
- You can ask for feedback
- You can promote paid upgrades
- You can build a community around the app
💡 PRO TIP
Start collecting emails before your app is finished. A waitlist helps validate demand before launch.
🎯 Simple Growth Strategy
The goal is to move from validation to early users, then from early users to repeatable growth.
👥 First 10 Users
Focus on direct feedback.
- Ask friends, coworkers, and online connections
- Share beta access
- Watch how people use the app
- Fix confusing onboarding
- Ask what would make them use it again
👥 First 100 Users
Focus on small communities and early visibility.
- Share in relevant Reddit communities
- Post in niche Facebook Groups or Discords
- Launch on Product Hunt or BetaList
- Create short demo videos
- Collect testimonials and reviews
👥 First 1,000 Users
Focus on repeatable channels.
- Improve ASO
- Publish content consistently
- Work with micro-influencers
- Build email list
- Test small paid ads only after conversion is proven
- Double down on the best-performing channel
💸 Paid Ads — Only After Validation
Do not start with ads unless you know the app converts.
Use paid ads only when:
- Users understand the app quickly
- Your landing page converts
- You know your target audience
- You have retention data
- You can track cost per signup or install
- You can afford to test creatives and audiences
🔁 Growth Loop
Validate Idea → Launch Small → Collect Feedback → Improve Product → Scale Traffic → Improve Retention
🎯 KEY TAKEAWAY
Getting downloads is not the same as getting users. Real growth comes from people who understand the app, use it again, and recommend it to others. Getting users is where most developers fail — not because their app is bad, but because they don’t market it.
7. How to Start: Your Beginner Roadmap
You do not need to build a massive app to become an app developer. Start with one specific user, one useful outcome, and the smallest app that delivers it reliably. This workflow takes you from validated problem → prototype → working MVP → tested release → real feedback → improvement. An MVP (Minimum Viable Product) is a small, usable first version—not an excuse to skip basic reliability, privacy, or security.
How to use this roadmap: Work through the seven tabs in order and finish each phase’s deliverable before moving on. Set a realistic weekly time budget and spending limit; measure progress by what you finish and learn, not a promised launch date or user count. The main path is your own app; use the conditional client checkpoints when building for someone else.
🔍 PHASE 1 — Validate the Problem
📋 Steps 1–4. Identify a reachable user, investigate the problem, and turn real evidence into a focused build brief. Encouraging comments alone are not evidence of demand.
✅ Ready to move on: You can name the target user, describe a recurring problem with concrete examples, identify people willing to test, and state the first useful outcome within your limits.
🎯 Step 1: Define One User and One Problem
Write a clear problem statement: “[Specific user] struggles with [specific task] because [current friction]. My app will help them [useful result].”
- Choose an audience you can reach for conversations and testing.
- Identify when the problem occurs and what it costs in time, money, or effort.
- Start with one workflow worth improving—not everyone who owns a phone.
Example: A freelance tutor needs to record completed lessons and see which invoices remain unpaid. That is a clearer starting point than “an app for small businesses.”
🔎 Step 2: Research Existing Solutions and Friction
Study direct competitors and substitutes, including spreadsheets, notes, and manual work. Read relevant reviews for recurring frustrations—not just missing features.
- Record how people complete the task today and what they already pay for.
- Note where alternatives are confusing, slow, expensive, or poorly suited to your audience.
- Decide what your first version could do more clearly or usefully.
Do not assume an existing competitor proves demand for your version. Look for a specific reason someone would switch.
💬 Step 3: Ask Target Users About Real Behavior
Talk to a small group of people who fit your target audience. Expand your research if the answers conflict or the problem remains unclear. Ask:
- “Tell me about the last time this happened.”
- “How did you handle it?”
- “What was the hardest or slowest part?”
- “What have you already tried or paid for?”
- “Could I show you a prototype when it is ready?”
Record concrete examples, workarounds, and willingness to test. If you plan to charge, investigate who pays and what outcome would justify the price.
💡 PRO TIP Ask about the person’s experience before describing your solution. “Would you use my app?” can produce polite answers that do not predict actual use.
📝 Step 4: Write a Build Brief and Decide Whether to Proceed
Keep one short working brief: User → Problem → Evidence → Useful outcome → Time/money limits → Next test. Include the people who agreed to test and the assumptions you still need to verify.
If the evidence is weak, narrow or change the idea before building. Choose an achievable outcome, not a feature count or an income target.
🤝 Client Work: Confirm Before You Build
Confirm who uses the app and who approves it. Agree the deliverable, acceptance criteria (the checks that prove the work is complete), exclusions, revision limits, payment milestones, account ownership, and post-launch support in writing before committing to the build. Use Chapter 4 for pricing and contract boundaries; this brief controls execution.
🚀 Your First 5 Actions
🚀 ACTION STEP
Focus on one app—not five separate projects.
🧪 Your First App: Deliverable by Phase
Finish one deliverable per tab before moving on:
- Validate: evidence and a one-page build brief
- Design: tested prototype and frozen MVP scope
- Build: working main task with a recoverable baseline
- Test & Prepare: tested, release-ready app
- Launch & Learn: small release and real feedback
- Maintain & Improve: one tested update and a decision
- Review: lessons, templates, and next-cycle plan
Record how long each phase takes so your next plan uses real numbers.
✏️ PHASE 2 — Design the Smallest Useful Experience
📋 Steps 5–7. Map how someone will get a useful result. Test the flow while changes are still cheap—before investing in polished screens or complex features.
✅ Ready to move on: You have a screen list, a clear user flow, a prototype target users can navigate with minimal help, and a small scope with a testable completion rule.
🧭 Step 5: Sketch the Core User Journey
Start with Open App → Complete Main Task → See or Save the Result. For a simple expense tracker: Add Expense → Choose Category → Save → View Total.
- Sketch only the screens needed for that journey.
- Define what each button does and where it leads.
- Include empty, loading, error, and success states where relevant.
- Avoid account creation unless the workflow genuinely needs it.
- Put extra features on a “later” list rather than in the first release.
Improve readability, contrast, control labels, and navigation before decorative polish.
🧪 Step 6: Test a Rough Prototype With Likely Users
A prototype is a model of the experience, not a finished product. Use paper sketches or a clickable prototype in Figma, with dummy data rather than real personal information.
Give a likely user a task: “Add an expense and find this week’s total.” Watch without explaining every click:
- Can they identify the next action?
- Do labels and navigation make sense?
- Can they tell whether the task succeeded?
- Where do they hesitate or get stuck?
Revise the flow and try again where necessary. 💡 PRO TIP Fix confusing steps before making the interface look impressive.
📋 Step 7: Define and Freeze Your First MVP Scope
Separate your plan into:
- Must have: What is necessary to deliver the main result.
- Later: Useful additions that are not required yet.
- Out of scope: Features you will deliberately not build in this version.
Define a testable completion rule. For example: “A user can add, edit, delete, and reopen saved expenses, with the correct total displayed.”
Do not add messaging, AI, social profiles, payments, or dashboards unless they are essential to the problem you validated. A working result is more valuable than a collection of unfinished features.
For client work: Have the designated approver confirm the flow and scope. Treat new requirements as changes to evaluate and approve—not automatically as free additions.
🛠️ PHASE 3 — Build One Reliable Workflow
📋 Steps 8–12. Choose a practical development path, create a recoverable project, and complete the main task end to end. Add storage and accounts only when the workflow needs them.
✅ Ready to move on: The main task works end to end, required data persists correctly, errors are understandable, and you have a saved working version you can recover.
🛤️ Step 8: Choose One Build Path and Release Target
- No-code / low-code: Useful for testing a focused workflow; check publishing, data limits, and export options first.
- Web app: Consider this when a browser link can deliver the outcome without device-specific features.
- Mobile app: Choose iOS, Android, or a suitable cross-platform framework when native capabilities or store distribution matter.
Use Chapter 5 to select the tools for that path; do not turn setup into a search for every possible tool.
⚠ COMMON MISTAKE Shared code does not remove platform-specific testing, signing, or publishing work. Choose one initial release target if supporting several platforms would prevent you from finishing.
⚙️ Step 9: Run a Starter Project and Save a Working Baseline
Create the project in your builder or install the editor, runtime, and required platform tools for your coding stack. Follow the official setup instructions and run the starter project before changing it.
- Save working versions with Git or your builder’s backup tools.
- Keep a short setup note so you can reproduce the environment.
- Confirm that the chosen plan supports the intended release, not just previewing a prototype.
A baseline gives you a known working version to return to when an experiment breaks the app.
🛠️ Step 10: Build the Main Task From Start to Finish
Build one part at a time: interface → working actions → necessary storage → error handling → testing.
Implement the scoped journey before adding unrelated features. In the expense-tracker example, make adding, editing, deleting, reopening, and totaling expenses work together—not just as separate attractive screens.
Use temporary sample data while constructing the interface, then replace it with the intended storage behavior. After each meaningful change, run the main task again and save a working version.
🔐 Step 11: Implement Necessary Storage and Private-Data Access
Decide what information the app needs and where it belongs. A local utility may not need accounts or a cloud database; a shared workflow may need both.
- Store only information required for the task.
- Check that required data persists after closing and reopening the app.
- Define who can read, change, and delete each kind of record.
- If accounts are needed, use an established authentication service; authentication means verifying who the user is.
- Enforce private-data permissions in the backend—the server-side system—not only by hiding buttons in the interface.
- Keep privileged keys out of client code, public repositories, and shared planning pages.
You will test with separate users in the next phase. A working login screen is not proof that private records are protected.
🛟 Step 12: Handle Failures and Prepare Recovery
Add clear feedback for invalid inputs, failed saves, loading, and connection problems relevant to the app. Make it obvious whether the task succeeded; do not silently discard a user’s work.
Review hosting or builder limits and expected usage costs. Set billing alerts where supported, and keep a saved version you can recover.
Recovery check: Know how to restore the project and, where applicable, recover stored data or roll back to a working release. A project backup and a database backup serve different purposes; use what your app actually needs.
🧪 PHASE 4 — Check Quality and Prepare the Release
📋 Steps 13–18. Test real use and failure cases, prepare trust and support basics, and make access clear. A store listing cannot compensate for a broken workflow; a reliable app still needs a clear explanation of its value.
✅ Ready to move on: Critical workflows pass testing, release materials are ready, and users have a clear route to access the app and get help. For client work, complete the agreed review and obtain approval.
📱 Step 13: Test the Core Task on Intended Devices
Check the app on its intended devices or browsers:
- Complete the main task from a fresh start.
- Try empty, invalid, duplicate, and unusually long inputs.
- Test saving, reopening, editing, and deleting data.
- Check slow or unavailable connections where relevant.
- Review readable text, contrast, keyboard access, and accessible control labels.
Record bugs with steps to reproduce → expected behavior → actual behavior → device/browser details. Fix launch-blocking issues first, then repeat the failed checks. Include another person in testing; familiarity can hide confusing interactions.
🧾 Step 14: Verify Account Boundaries and Payments
If accounts exist: Test login, logout, recovery, and whether one user can access another user’s private records. Use separate test accounts and check attempts to view or change records the user should not control.
If payments exist: Test purchases and cancellations through the supported test environment. Verify that a successful purchase provides the promised access and that failed or canceled transactions are handled clearly. Check restoration of purchases when relevant to your platform.
Use test credentials and dummy records—not real customers’ sensitive data. Resolve security, privacy, payment, and data-loss problems before inviting users.
🛡️ Step 15: Prepare Privacy, Support, and Platform Checks
Collect only necessary data. Make required privacy information and a support contact available, and check your platform’s current submission, data-disclosure, and payment rules.
- Explain what the app does and any important limits accurately.
- Check that support and privacy links open and contact instructions work.
- Review hosting limits, usage costs, backups, and the recovery or rollback plan before inviting real users.
- Address applicable disclosure and consent requirements before adding analytics or collecting real-user data.
Requirements vary with the platform, market, audience, and information collected. Check the applicable official rules rather than treating this checklist as universal legal advice.
🏪 Step 16: Prepare the Mobile Store Listing
Use this step when releasing a mobile app. Prepare the store listing and submission materials; skip to Step 17 for a web-first or private client app.
- Name and title: Make the purpose clear; check name availability and current field limits.
- Keywords: Use relevant phrases your audience actually searches. Avoid unrelated keyword stuffing.
- Description: Explain who the app serves, the problem it solves, and the useful result before listing features.
- Screenshots: Show real workflows and benefits; keep captions accurate.
- Icon: Use a recognizable design that works at small sizes.
- Submission: Prepare required disclosures, review access where needed, and any purchase information.
App Store Optimization (ASO) helps improve discovery and listing clarity. AppTweak and Sensor Tower are optional research tools—not prerequisites for a first launch.
🌐 Step 17: Prepare the Web Landing Page or Private Delivery
For a web app: Prepare a clear landing page. Explain the audience, problem, and outcome. Include a screenshot or short demo, a clear way to try the app, any pricing or limits, and support/privacy links where required. Test the live URL and the complete signup-to-result journey before sharing it.
For a private client app: Prepare access instructions and a demo against the agreed acceptance criteria instead of a public listing, unless public distribution is part of the scope.
💡 PRO TIP Choose a release route that matches your app. A web-first product does not need an app-store listing; a mobile beta still needs the appropriate distribution setup.
✅ Step 18: Run the Final Release Checklist
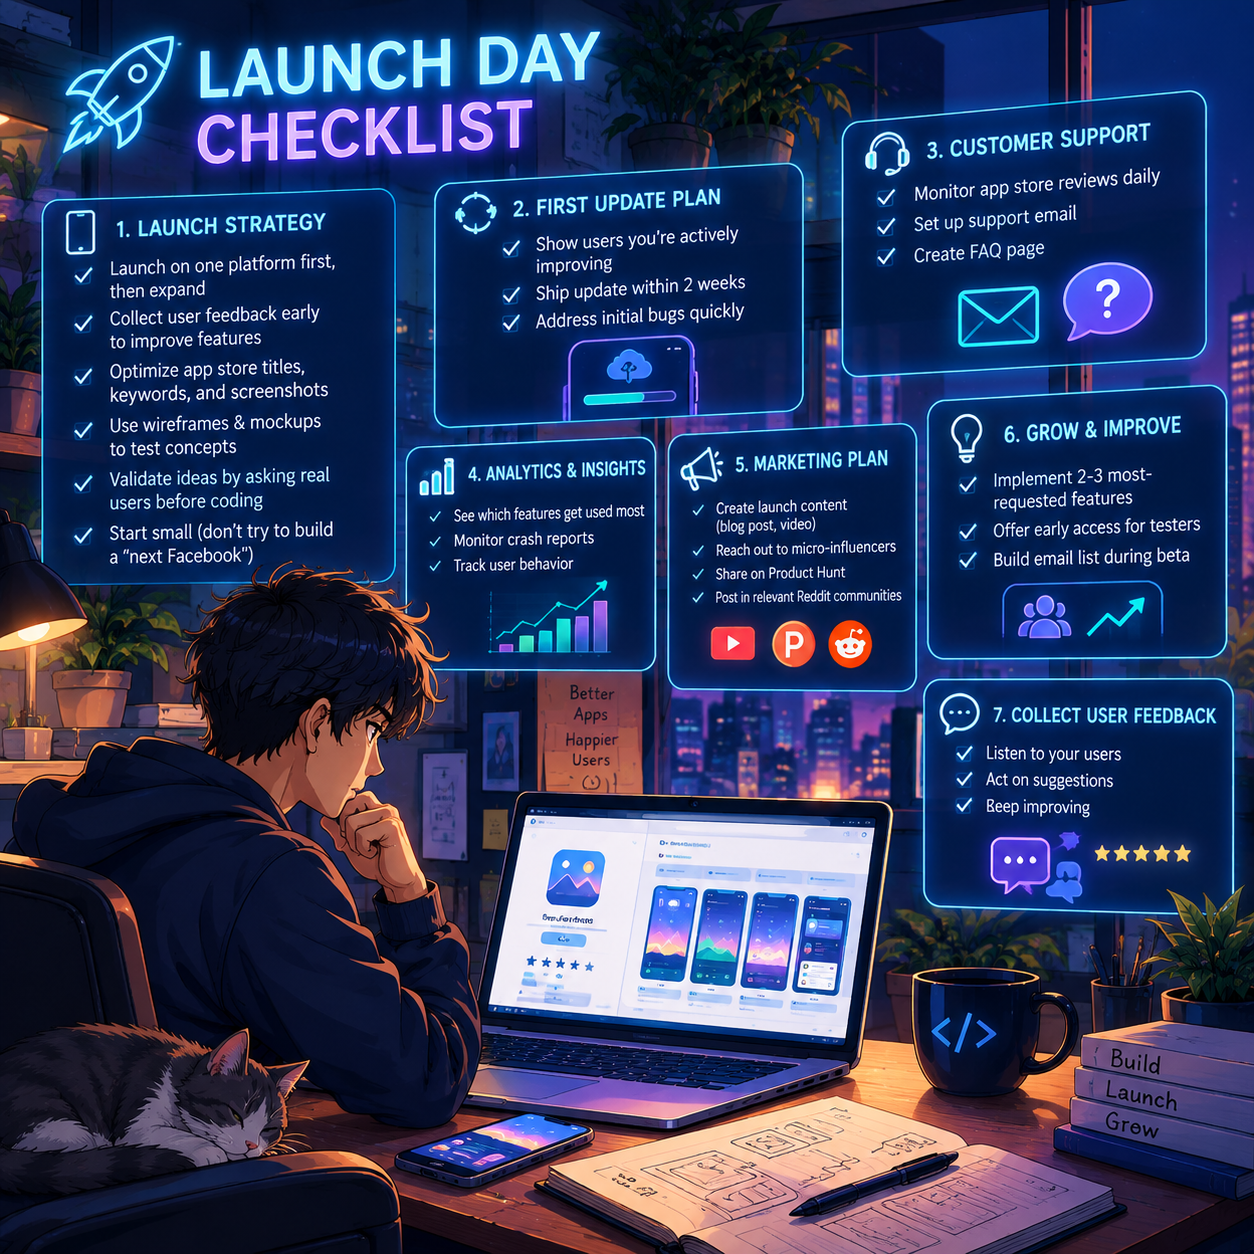
Use the items relevant to your app. Store-specific steps do not apply to every web app, and analytics should support learning rather than collect unnecessary data.
🧪 Check Product and Testing
📱 Check Release Materials and Trust
🔐 Check Data and Reliability
📣 Check Launch and Follow-Up
🚀 ACTION STEP
If a security, privacy, payment, data-loss, or core-workflow issue remains unresolved, fix it before widening access. Launch small enough that you can support the people you invite.
🚀 PHASE 5 — Release Small and Learn From Real Use
📋 Steps 19–22. Recruit people who actually experience the problem, observe their results, and establish a useful baseline. Your first release is a learning cycle—not a demand for thousands of downloads.
✅ Ready to move on: Relevant users have tried the main workflow, you have recorded what happened, and you can name the biggest drop-off or repeated complaint to investigate next. Small samples are a starting point—not proof of demand.
👥 Step 19: Recruit and Brief a Small Relevant Audience
Start with previous interview participants, relevant contacts, existing followers, or niche communities that allow beta requests. Do not rely only on friends’ encouragement.
- Explain the task and the limits of the test version.
- Share clear access instructions and a support contact.
- Use the appropriate mobile beta channel or a working web link.
- Respect community rules and be transparent that you built it.
- Keep the test group small enough that you can respond to issues.
🚀 Step 20: Publish or Deliver and Verify Actual Access
Use the release route you prepared: an approved mobile test channel, a permitted store release, a live web deployment, or an agreed private client environment. Store submissions may require review; do not promise access before it is available.
Open the actual release as a new user, not just inside the development preview. Check access, signup where needed, the core task, support links, and payments if included. Record the version, release date, access URL or distribution channel, and known limitations.
⚠ COMMON MISTAKE Do not scale promotion or buy traffic while users are blocked by basic bugs, confusing onboarding, or an unclear benefit.
A simple invitation:
“I’m testing an app for [audience] that helps with [problem]. Could you try [specific task] and tell me where you get stuck? It is an early version, so I’m looking for honest feedback.”
A beta is an early test release. Tell testers what may change and avoid presenting unfinished functionality as production-ready.
Demonstrate the acceptance criteria, record sign-off, and hand over the agreed accounts, project files or supported exports, setup notes, and support instructions. Transfer credentials securely; do not paste secrets into a shared document. Confirm who handles billing, updates, and issues after handover.
💬 Step 21: Observe the Core Task and Collect Specific Feedback
Watch someone attempt the core task without coaching every step. Ask:
- “Where did you get stuck?”
- “What did you expect to happen?”
- “What result was useful—or missing?”
- “When would you use this again?”
- “What would stop you from switching from your current method?”
Log recurring issues and follow up after users have had a chance to return. For a paid product, distinguish free-trial interest from a real purchase or paid pilot.
📊 Step 22: Record Useful Outcomes, Not Just Downloads
Keep measurement simple enough to inform your next decision. Define a few meaningful signals:
- Activation: A new user completes the main useful task—not merely signup.
- Repeat use: Users return at a frequency that fits the problem. A weekly planning tool should not be judged only by daily activity.
- Reliability: Track crashes, failed saves, login problems, and other errors that prevent completion.
- Paid validation: Where relevant, track purchases, renewals, refunds, and delivery costs separately from free usage.
- Feedback: Record repeated complaints, support requests, and reasons users stop.
Define exactly what counts as task completion and choose a sensible follow-up window before interpreting results. Capture the release version, observation dates, user group, and outcomes so later comparisons are meaningful.
📝 QUICK NOTE Use privacy-conscious analytics or a simple manual test log. Avoid sending sensitive inputs or personal records into analytics, and address applicable disclosure and consent requirements. More tracking is not automatically better.
🔄 PHASE 6 — Maintain, Improve, and Choose the Next Move
📋 Steps 23–26. Launch starts the feedback loop. Improve the core experience before adding features or expanding to more platforms; maintenance is part of delivering the product.
✅ Ready to move on: You have shipped a useful update, checked its effect, and made a clear next decision about the product or a tightly scoped client offer.
🔎 Step 23: Find Where the User Journey Breaks
Review Arrive → Start → Complete Core Task → Return → Pay, if applicable. If users do not:
- Start: Check whether the promise and next action are clear.
- Finish: Investigate bugs, unnecessary steps, or confusing controls.
- Return: Ask whether the problem recurs and whether the app delivered enough value.
- Pay: Check the paid outcome, packaging, price, and trust—not just the checkout button.
Compare similar groups over the same observation period. With a small early sample, combine behavior with interviews instead of treating a few users as conclusive proof.
🎯 Step 24: Prioritize the Next Useful Update
Work in this order:
- Protect users: Address security, privacy, data-loss, and payment problems first.
- Remove blockers: Fix crashes and errors that prevent the main task.
- Reduce friction: Improve confusing setup, navigation, and task completion.
- Add proven value: Consider features tied to recurring user needs and your earning model.
For each idea, record who it helps, the evidence, expected benefit, and effort. Do not treat every request as a requirement. Choose one main improvement for the next release.
🔧 Step 25: Ship a Tested Update and Check Its Effect
Build a repeatable feedback loop:
- Give users an easy way to contact you.
- Review support messages, reviews, usage signals, and costs regularly.
- Test the change and check for broken existing behavior.
- Save a recoverable version and document what changed.
- Tell affected testers what you fixed and invite them to retry.
- Check whether task completion, repeat use, or the reported issue improved.
Keep a short decision log: What we changed → Why → What happened → Next decision. Revisit relevant device/browser checks, permissions, costs, and release materials when changes affect them.
🔄 Step 26: Schedule Maintenance and Decide How to Continue
Reserve regular time for support, error review, dependency or platform changes, backups, and recurring costs. Update screenshots, privacy information, and access instructions when the product changes; review sooner when a serious issue appears.
For client work: Work within the agreed support period or maintenance agreement. Record new requests, confirm responsibility, and approve additional scope before starting repeat work. Do not silently turn a completed project into unlimited free maintenance.
📋 PHASE 7 — Review the First Release and Plan the Next Cycle
📋 Steps 27–29. Hold a short review after your first real release or client delivery, turn lessons into reusable records, and make one clear next decision.
✅ Ready to move on: You know what worked, what slowed you down, what to turn into a template, what to improve, and what the next cycle will do differently.
🔍 Step 27: Run a First Release Review
Review within a few days of release, using your brief, issue queue, release record, and test log—not memory alone. Answer in writing:
- What worked, and what evidence shows it?
- What slowed you down or cost too much time or money?
- What was unclear to users, testers, or you?
- Where did users get stuck or leave?
- Which repeated complaint or bug matters most?
- What should you repeat next time?
📊 Check the Numbers
- Time: hours per phase versus your weekly budget
- Money: tools, hosting, developer accounts, and APIs versus your spending limit
- Outcomes: activation, repeat use, reliability errors, and any paid validation
- Support: requests received and time spent responding
- Client work: scope changes, revision rounds, sign-off, and effective return on all project hours
🧱 Step 28: Turn Lessons Into Templates
Keep the records you will reuse:
- Build brief: user, problem, evidence, outcome, scope, limits, and next test
- Test checklist: core journey, failure cases, accessibility, accounts, payments, and devices
- Release record: version, date, route, completed checks, known limits, and recovery steps
- Issue queue: report, reproduction steps, severity, evidence, and status
- Client templates: scope, acceptance, handover, and support terms, if applicable
🚫 Do Not Automate Yet
Automate repeatable build or test checks only after the manual process works, and keep a recovery path. Do not automate:
- Deciding what to build or which feedback to follow
- Private-data permission, security, and payment checks
- Replies to users with serious problems
- Any step you cannot yet do reliably by hand
🧭 Step 29: Choose the Next Move
Decide whether to continue, narrow, pivot, or pause based on evidence and your time and cost limits. Persistence means learning and adapting—not repeating the same plan indefinitely. Then write one improvement for the next release, the evidence behind it, and how you will check whether it worked.
⭐ ADVANCED STRATEGY Scale distribution, paid acquisition, or platform coverage only when you can support users reliably and the costs make sense.
🎯 Your Beginner Goal
🎯 KEY TAKEAWAY
Build one useful app and help a real target user complete its main task. Then learn whether they return, what needs improving, and whether a paid offer makes sense. User counts and income are not guaranteed milestones. Validate → Design → Build → Test → Launch → Learn → Improve.
This is optional once you have a working release and a repeatable feedback loop. Reuse the records already created in this chapter; do not build a complicated management system before the app works.
📋 Reuse a Small Set of Working Records
- Build brief: Target user, problem, evidence, outcome, scope, time/cost limit, approver where applicable, and next test.
- Issue and improvement queue: Report, reproduction steps, affected version/device, severity, evidence, effort, and status.
- Test checklist: Core journey, input/failure cases, accessibility, accounts, payments, and relevant target devices.
- Release record: Version, date, distribution route, completed checks, known limits, and recovery instructions.
Keep templates short enough that you will actually use them. One organized project folder or planning page can hold all four.
🔄 Turn Maintenance Into a Repeatable Routine
Use a short recurring review: Support and errors → User outcomes → Costs → One priority → Tested update → Decision log.
Define review triggers: a platform or dependency change, repeated failed saves, a billing spike, a private-data concern, or a recurring user complaint. Serious safety, security, or data-loss issues take priority over the normal schedule.
For repeat client work, reuse approved scope, acceptance, handover, and support templates. Consider automating repeatable build or test checks only after the manual process works; check the results and retain a recovery path. Increase users, spending, or delivery capacity gradually—not all at once.
🎯 GOAL Make reliable delivery and improvement easier, not turn app development into paperwork.
8. Build Trust & Improve Results
Use this section to build proof, earn user and client trust, communicate professionally, raise technical quality, specialize strategically, and avoid the mistakes that keep new developers from getting traction or getting paid.
⭐ ADVANCED STRATEGY
1️⃣ Build Proof Before You Pitch or Launch 📁
Non-negotiable
Clients and early users rarely trust an app builder who has nothing to show. Working examples do more than any promise.
🛡️ Why Proof Builds Trust
People want evidence that you can ship an app that works, looks credible, and fits their problem.
Why this matters:
- They need proof you can finish what you start
- Your work affects their time, money, and data
- Hiring or installing from an unknown builder feels risky
- Seeing your process helps them judge fit
- A live project makes you look professional immediately
☑️ Minimum Proof Checklist
- At least 2–3 working projects
- 1 project that solves a real problem for a real person
- 2 different app types, such as a utility and a business tool
- A short demo video or screenshots for each project
- Recent work from the last 6–12 months
- Only your best work
- A clear one-sentence description of each app
- A readable, organized code repository or build log
- A working link or test build whenever possible
🛡️ How to Create Proof Before Paid Work
🏠 Option 1: Solve Your Own Problem
Start with a frustration you already have.
What to do:
- Build a small tool you would actually use
- Treat it like a real client project
- Write a short build brief first
- Design the core screens before coding
- Test it on real devices
- Document what it does and why
Good starter ideas:
- Habit or expense tracker
- Calculator or converter
- Study or workout planner
- Simple booking or quote tool
- Checklist or reminder app
- Small team dashboard
🛠️ Option 2: Build a Spec Project
A spec project is a sample app you build for a business that did not hire you.
What to do:
- Choose 2–3 local businesses or niches you could serve
- Identify one real workflow problem for each
- Build a focused prototype that addresses it
- Label it clearly as a “Concept” or “Personal Project”
- Use it to show your style and skill
⚠ COMMON MISTAKE
Do not imply a company hired you or endorses the app if it did not. Do not use their logos or data without permission.
📦 Option 3: Offer a Free or Discounted First Build
This can earn testimonials and a real case study.
What to do:
- Find 1–2 small businesses or creators with a clear manual process
- Offer a tightly scoped first version at no cost or a discount
- Ask for a testimonial in exchange
- Ask permission to show the project in your portfolio
- Deliver your best work
Best fit:
Local businesses, tutors, coaches, small shops, community groups, and early-stage founders.
👨👩👧 Option 4: Build for Friends or Family
You can create a realistic case study by helping people you know.
What to do:
- Ask what repetitive task wastes their time
- Build a simple solution around that task
- Watch them use it and note where they get stuck
- Keep the scope small
- Get permission to feature the project and any feedback
🛡️ Proof Must-Haves
Aim for at least two finished, working projects before pitching clients or promoting a launch.
💡 PRO TIP
A working demo link beats a long description. Make it easy for someone to try your app in under a minute.
Do not skip this step.
2️⃣ Showcase Your Work 🗂️
💡 Project Types to Include
Project | What It Shows |
Utility app | You can scope and finish a focused tool |
Business workflow tool | You can solve a real operational problem |
Data-driven app | You can store, display, and protect user data |
Mobile app | You can build for device features and store rules |
Web app | You can deliver an accessible product through a link |
Redesign or improvement | You can improve an existing experience with clear results |
🛡️ Where to Host Your Portfolio
Platform | Best For |
Showing code quality, commits, and documentation | |
Simple website | Most professional option for client work |
Simple one-page portfolio | |
Easy organized case-study pages | |
Public launch page with feedback | |
App Store / Google Play listing | Proof that an app passed review and is live |
Quick walkthroughs without a live build | |
Test build link | Letting reviewers try the app before public release |
💡 PRO TIP
For each project, write a mini case study: the problem, who it is for, what you built, how you tested it, and what happened.
Put your best project first.
3️⃣ Trust Over Flash 🧠
Users and clients trust apps that feel clear, honest, and dependable. A simple product that works reliably usually beats an impressive one that confuses people.
🎯 What Users and Clients Actually Want
😮 One Clear Promise, Not Feature Overload
Feature creep delays launch and weakens the message.
What works:
- One target user
- One painful problem
- One core workflow done well
- 1–3 core features at launch
- Extra features added after real feedback
- A first version that is finished, not perfect
🎨 Clear Design, Not Decoration
People judge an app quickly. Clean, familiar design signals care.
What works:
- Consistent layouts and spacing
- Readable text and clear buttons
- Familiar navigation patterns
- Helpful empty and error states
- Accessible colors and tap targets
- Platform guidelines such as Apple HIG and Material Design
🗣️ Plain Language, Not Jargon
Trust grows when people understand what the app does.
Use:
- Simple descriptions
- Honest feature names
- Short onboarding text
- Clear pricing and renewal terms
- Direct error messages
- Plain-language privacy information
🔐 Transparent Data Use, Not Hidden Permissions
Ask only for what the app needs.
Good practice:
- Request permissions when the feature needs them
- Explain why each permission is needed
- Collect only required data
- Offer a visible way to contact support
- Publish a readable privacy policy
- Never expose private data in logs or screenshots
⚠️ The “Me Too” Problem
Copying another app without improvement gives people no reason to switch.
Weak positioning looks like:
- “It’s like X, but cheaper”
- Same features with no clear advantage
- No underserved audience
- No unique workflow or insight
- Unclear reason to choose it
- Heavy reliance on novelty
💬 Honest Limits, Not Overpromising
Being upfront about what the app does not do builds credibility.
Examples:
- “This version supports iPhone only for now.”
- “Sync across devices is on the roadmap.”
- “This is a beta; please report bugs here.”
- “Here is what I need from testers.”
🧪 The Trust-Building Formula
Use this structure for a more credible launch:
- State the problem Name the specific frustration your user already feels.
- Show the real app Use real screens, not mockups of features that do not exist.
- Demonstrate the core task Walk through one complete workflow from start to finish.
- Share honest results Include real tester feedback, including useful criticism.
- Make the next step easy Offer one clear action: try it, join the beta, or book a call.
💡 Trust-Building vs. Trust-Eroding Examples
Trust-Eroding | Trust-Building |
“The ultimate all-in-one app” | “A simple tracker for one specific task” |
Fake reviews or inflated download counts | Real tester quotes and honest numbers |
Screens full of untested features | A working core workflow |
Unexplained permission prompts | Permission requests with clear reasons |
“Fix it after launch” | Tested on real devices before release |
📝 QUICK NOTE
Trust is built through small, consistent signals: clear copy, stable behavior, honest limits, and fast support.
Reliability is part of the brand.
4️⃣ Professional Communication 💼
This separates you from the competition.
Clients work with many developers. They remember the ones who are reliable, clear, and easy to work with.
💡 Why This Matters
Professional communication leads to:
- Repeat clients
- Referrals
- Better testimonials
- Fewer misunderstandings
- Faster approvals
- Higher trust
- More sustainable rates
☑️ The Professional Developer Checklist
⏱️ Response Time
Do:
- Reply within 24 hours
- Reply sooner to new leads when possible
- Set up email notifications
- Check messages at least once or twice daily
- Use an auto-responder if away for several days
Avoid:
- Ghosting clients or testers
- Leaving messages unanswered for days
- Responding vaguely
- Letting warm leads go cold
💬 Communication Clarity
Do:
- Be specific about timelines
- Confirm features and deliverables in writing
- Define revision rounds
- Ask important questions upfront
- Confirm who owns accounts, hosting, and code
- Put key decisions in writing
Avoid:
- Assuming what the client wants
- Being vague about timing
- Starting without a confirmed scope
- Asking major questions halfway through the project
🔔 Project Updates
Do:
- Confirm when you receive access, assets, and content
- Share milestone demos regularly
- Notify the client immediately about delays
- Confirm when builds are ready to test
- Ask for feedback after delivery
Avoid:
- Going silent during development
- Missing deadlines without warning
- Waiting until the due date to mention problems
🔁 Handling Feedback
Do:
- Thank them for the feedback
- Confirm you understand the requested changes
- Separate bugs from new feature requests
- Ask questions if anything is unclear
- Deliver fixes promptly
- Stay professional
Avoid:
- Getting defensive
- Arguing about every design choice
- Taking criticism personally
- Quietly accepting unlimited scope changes
5️⃣ Kickoff & Handover Templates 📝
📝 Project Kickoff Template
Use this after a client confirms the project:
📝 Handover Template
Use this when delivering the finished app:
6️⃣ First-Impression Mastery 🎣
The first few seconds win or lose the user.
A strong first impression gives people a reason to keep exploring your app.
💡 Why First Impressions Matter
- Attention is short, and alternatives are one tap away
- Store visitors often decide from the title, icon, and first screenshots
- A weak onboarding screen means people may never see the best feature
- A clear first message can improve installs, sign-ups, and activation
- Strong first impressions make your app more valuable to clients
🪝 Winning First-Impression Formulas
😣 Problem-First Headline
Best for apps that solve a clear pain point.
Examples:
- “Stop losing track of [task].”
- “Tired of [frustration]? Fix it in one tap.”
- “For anyone who [relatable problem].”
- “[Painful task], finally simple.”
🤝 Audience-Specific Headline
Best for building immediate connection.
Examples:
- “Built for [specific audience].”
- “The [tool] for [niche] who [situation].”
- “Made by a [role] who needed this too.”
- “Finally, a [category] made for [audience].”
🎯 Direct Benefit Headline
Best for clear, outcome-driven messages.
Examples:
- “Plan your week in 2 minutes.”
- “Send quotes in one tap.”
- “Everything for [task] in one place.”
- “Make [task] easier.”
🎬 Show-the-Product Opening
Best for visual proof.
Examples:
- First screenshot shows the main result
- Preview video starts with the core task
- Landing page opens with a real screen
- Onboarding gets to the first win quickly
🔄 Before/After Message
Best for transformation stories.
Examples:
- “Before: scattered notes. After: one clear plan.”
- “From spreadsheet chaos to one dashboard.”
- “Used to take 30 minutes. Now takes 3.”
- “POV: you finally found a simple solution.”
❓ Question Opening
Best for curiosity and engagement.
Examples:
- “What if [task] took one tap?”
- “Why is [task] still so hard?”
- “How do you keep track of [thing]?”
- “Ready to simplify [workflow]?”
🚫 First Impressions to Avoid
Avoid openings that waste attention.
Weak starts:
- “Welcome to our amazing app!”
- Starting with the company name before the benefit
- A long sign-up form before any value
- Generic stock imagery
- Feature lists with no outcome
- Explaining everything before showing the app
🧠 First-Impression Testing Strategy
Create multiple versions of the same message.
What to do:
- Write 3–5 alternate headlines
- Test different first screenshots
- Keep the rest of the listing mostly the same
- Compare installs, sign-ups, or demo requests
- Change one major element at a time
- Track which message styles work best
🔍 Optimization Add-On
For client projects, you can offer:
A store-listing or landing-page optimization pass as a separate paid scope item
This gives clients more testing options and increases the value of your project.
7️⃣ Technical Quality Checklist ✅
What gets apps rejected, uninstalled, and poorly reviewed
Before releasing or delivering any app, review it the way a skeptical user or client would.
⚙️ Functionality Standards
Check that the app:
- Completes the core task from start to finish
- Handles empty, invalid, and unexpected inputs
- Saves and restores data correctly
- Works after closing and reopening
- Recovers from lost connections
- Has no dead buttons or broken links
- Has no crashes in normal use
- Matches the build brief
🚀 Performance Standards
Performance shapes first impressions.
Check that the app:
- Launches quickly
- Responds quickly to taps and input
- Shows loading states during slow actions
- Handles slow connections gracefully
- Does not drain battery or storage unnecessarily
- Keeps images and files appropriately sized
- Performs well on older supported devices
🎨 Design & Accessibility Standards
Check that the design is:
- Consistent across screens
- Readable at different text sizes
- Usable on the intended screen sizes
- Clear in light and dark modes, if supported
- Navigable with large enough tap targets
- Labeled for screen readers where applicable
- Free of overlapping or cut-off text
- Understandable without instructions
🔐 Security & Privacy Standards
Check that:
- Users can access only their own private data
- Permissions are enforced on the backend, not just hidden in the interface
- Secrets and API keys are not exposed in the app or repository
- Authentication uses established services
- Only necessary data is collected
- Analytics avoids sensitive personal information
- A privacy policy and support contact are available
📋 Platform & Release Standards
Check that the release:
- Follows App Store and Google Play guidelines
- Includes accurate screenshots and descriptions
- Uses correct app names, icons, and sizes
- Declares data use accurately
- Follows payment and subscription rules
- Uses properly licensed assets and libraries
- Has a working support link
❌ Common Rejection & Uninstall Reasons
Avoid these issues:
- Crashes or major bugs
- Broken or incomplete core features
- Misleading descriptions or screenshots
- Missing or inaccurate privacy information
- Confusing onboarding
- Unexplained permission requests
- Payment or subscription rule violations
- Placeholder content or test data
- Poor performance or slow loading
- Ignoring the platform’s design and submission guidelines
🔍 Pre-Release Self-Review
Before shipping, review the app four ways:
- Use it on a real phone: does it feel good in your hand?
- Use it with a poor connection: does it fail gracefully?
- Use it as a brand-new user: is the first step obvious?
- Ask a friend to try it without help: where do they get stuck?
8️⃣ Specialization Strategy 🎯
Stand out and price with more confidence
After a few finished projects, choose one niche or problem area to specialize in.
🧭 Promising App Niches
Niche | Why It Can Work | Typical Revenue Model | Competition |
Productivity & Habits | Repeat daily use and clear personal value | Freemium or subscription | High |
Health & Wellness | Routine-based and motivated users, with added privacy duties | Subscription | Medium–High |
Education & Learning | Clear outcomes and willingness to pay for progress | Subscription, packs, or licenses | Medium |
Small Business Tools | Clear ROI and painful manual workflows | Monthly plans or custom projects | Low–Medium |
Industry-Specific Software | Niche language and workflows that generic tools miss | Subscription or licensing | Low–Medium |
Creator & Freelancer Tools | Users who understand the value of saving time | Subscription or one-time upgrade | Medium |
Local Service Businesses | Scheduling, quotes, and customer communication needs | Project fees plus maintenance | Low–Medium |
Internal Team Tools | Defined requirements and recurring support needs | Project fees or retainers | Low–Medium |
Micro-SaaS | Small focused products can work with fewer customers | Recurring subscriptions | Medium |
💡 Why Specialization Matters
Specialists can often communicate more value because they understand the audience better.
Benefits:
- Clients value niche expertise
- You understand industry-specific language and rules
- Your portfolio looks more focused
- You get referrals within that industry
- Building gets faster as you reuse patterns
- You learn which features and messages work
- You build authority and reputation
🧭 How to Specialize
🛠️ Step 1: Analyze Your First Projects
Ask:
- Which projects did you enjoy most?
- Which apps got the best user feedback?
- Which clients or testers gave the best responses?
- Which problems felt easiest to understand?
- Which projects were the most sustainable financially?
- Which work fits your skills and lifestyle?
🛠️ Step 2: Choose Based on Fit
Choose a niche based on:
- Genuine interest
- Market demand
- Your existing knowledge
- Competition level
- Access to target users
- Long-term product potential
Examples:
- Former teacher → education tools
- Fitness enthusiast → workout or habit apps
- Small-business worker → scheduling or quoting tools
- Parent → family organization apps
- Freelancer → client and invoice tools
🛡️ Step 3: Go All-In on Your Portfolio
Create 2–3 strong projects in your chosen niche.
Include:
- A working core product
- A clear case study
- A short demo
- User or tester feedback
- A before/after workflow story
- A simple pricing or packaging example
🛠️ Step 4: Update Your Marketing
Update your:
- Bio
- Portfolio
- Pitch messages
- Service descriptions
- Website
- Social profiles
- App store listing copy
📦 Positioning Example
Instead of:
“App Developer”
Use:
“App developer building scheduling and client-management tools for independent fitness coaches.”
🧭 Step 5: Network Within the Niche
Build relationships where your ideal users spend time.
What to do:
- Join niche communities and forums
- Follow industry leaders and tools
- Comment thoughtfully on relevant posts
- Connect with other builders
- Study competing apps and their reviews
- Save common user complaints
- Share niche-specific insights
💰 Positioning Premium Example
Developer Type | How Clients See You |
General developer | One of many options |
Niche specialist | Lower-risk expert who understands the problem |
Same technical skill, stronger positioning, higher perceived value. Price based on the value delivered and the scope involved—not a fixed percentage.
9️⃣ Common Mistakes: Product, Design & Monetization ⚠️
Learn from others before you lose time or money.
⚠ COMMON MISTAKE
🏗️ Overbuilding
Adding too many features at once delays launch and hides what matters.
Avoid this by:
- Shipping with 1–3 core features
- Writing a clear build brief
- Keeping a “later” list
- Adding features based on user feedback
- Asking whether each feature supports the core task
🎨 Ignoring Design
Clunky apps lose trust fast, and “I’ll make it pretty later” often never happens.
Avoid this by:
- Studying well-designed apps in your category
- Following Apple HIG and Material Design
- Using consistent spacing and components
- Testing readability and tap targets
- Getting design feedback before launch
🔁 Copying Apps Without Improvement
“Me too” apps rarely give people a reason to switch.
Avoid this by:
- Adding unique value
- Serving an underserved segment
- Solving the problem differently
- Reading competitor reviews for gaps
- Explaining your difference in one sentence
💰 Wrong Monetization Model
The wrong model can cap growth or push people away. Some apps need freemium; some need subscriptions; some work better as a project fee.
Avoid this by:
- Researching what works in your category
- Matching price to recurring value
- Testing one model at a time
- Checking platform fee and payment rules
- Tracking conversions, renewals, and refunds
🐛 Skipping Testing
Bugs hurt ratings, reviews, and credibility—and first impressions are hard to undo.
Avoid this by:
- Testing on multiple devices and screen sizes
- Recruiting 5–10 beta testers
- Letting testers use it for about a week
- Fixing blockers before wider release
- Keeping a simple bug list
🔟 Common Mistakes: Marketing, Contracts & Tracking ⚠️
⚠ COMMON MISTAKE
🙈 Not Marketing
“If I build it, they will come” rarely works. Even great apps need visibility, and app stores are crowded.
Avoid this by:
- Treating marketing and distribution as part of the build
- Reserving substantial time for promotion, not only coding
- Talking to target users before and after launch
- Starting your email list early
- Tracking where users actually come from
📣 Marketing channels that work:
- Reddit (find your niche communities)
- Product Hunt (launch day)
- App Store Optimization
- Content marketing (blog, YouTube)
- Paid ads (once validated)
⏰ Abandoning Too Soon
Low downloads in the first month or two do not prove the idea is dead.
Reality check:
- Many apps take months to gain traction
- Early results are usually small
- Improvement comes from feedback loops
- Consistent marketing compounds over time
- Quitting before testing real demand teaches little
Better approach:
Set a defined 12-month commitment, review monthly, and keep improving and marketing consistently.
📝 No Contract or Written Scope
For client work, vague agreements create scope creep and payment problems.
Specify:
- Deliverables and acceptance criteria
- Timeline and milestones
- Payment terms and deposit
- Revision rounds
- Code and account ownership
- Hosting, API, and store-account costs
- Support or maintenance terms
- Cancellation and late-payment terms
⚖️ Ignoring Platform Rules & Privacy
Store policies, payment rules, and privacy laws can block a release.
Check before launch:
- App Store and Google Play guidelines
- Payment and subscription requirements
- Privacy policy and data disclosures
- Third-party licenses
- Age or regional restrictions
- Permission explanations
📨 Giving Up After a Few Pitches
Finding clients is a numbers game at first.
Reality check:
- Many people will not reply
- Follow-ups matter
- Your pitch improves with practice
- A strong portfolio improves response rates
- Referrals build over time
💰 Not Tracking Results, Projects & Income
Poor tracking creates pricing, tax, and product-direction problems.
🔍 Track:
- Active users and retention
- Downloads versus active use
- Revenue, fees, and refunds
- Client name and contact person
- Project scope and rate
- Due dates and payment status
- Bugs and feature requests
- Time spent
- Profit per project
9. Learning Resources & Templates
🛠 TOOLS & RESOURCES
App Development brings together coding, product design, testing, and release planning. You do not need to master everything at once. Choose resources that help you complete the next practical step.
🎓 Learning Resources
Start with one source that fits your current level. Practice what it teaches before collecting more courses or tools.
🎓 Official Beginner Learning
Use official examples to learn setup, supported features, and the recommended way to build for your chosen platform.
Use Android Developers for official starter guidance, documentation, and setup steps for app development.
🟢 Beginner
Use Apple Developer — Develop in Swift for official starter guidance, documentation, and setup steps for app development.
🟢 Beginner
Use Apple Developer — SwiftUI Tutorials for official starter guidance, documentation, and setup steps for app development.
🟢 Beginner
Use Expo Documentation for official starter guidance, documentation, and setup steps for app development.
🟢 Beginner
Use Flutter Documentation for official starter guidance, documentation, and setup steps for app development.
🟢 Beginner
Use React Native Documentation for official starter guidance, documentation, and setup steps for app development.
🟢 Beginner
💻 Coding Foundations
Build confidence with programming concepts, debugging, and small exercises before attempting a full app.
Use Dart Documentation to code, test, deploy, or support the technical backend for app development projects.
🟢 Beginner
Use freeCodeCamp to code, test, deploy, or support the technical backend for app development projects.
🟢 Beginner
Use JavaScript.info to code, test, deploy, or support the technical backend for app development projects.
🟢 Beginner
Use Kotlin Documentation to code, test, deploy, or support the technical backend for app development projects.
🟢 Beginner
Use MDN JavaScript Guide to code, test, deploy, or support the technical backend for app development projects.
🟢 Beginner
Use Swift Documentation to code, test, deploy, or support the technical backend for app development projects.
🟢 Beginner
💬 Communities & Forums
Get help with specific errors and design decisions; include a minimal example and remove secrets before posting.
Use r/androiddev to ask questions, study real examples, and network with people doing app development.
🟡 Intermediate
Use r/FlutterDev to ask questions, study real examples, and network with people doing app development.
🟡 Intermediate

Use r/iOSProgramming to ask questions, study real examples, and network with people doing app development.
🟡 Intermediate
Use r/reactnative to ask questions, study real examples, and network with people doing app development.
🟡 Intermediate

Use Stack Overflow to ask questions, study real examples, and network with people doing app development.
🟡 Intermediate
💰 Paid Learning
Consider a structured programming or app-building course when you need a guided sequence rather than disconnected tutorials.

Use Coursera — Mobile App Development for structured training, courses, or credentials that build confidence in app development.
🟢 Beginner
Use LinkedIn Learning — App Development for structured training, courses, or credentials that build confidence in app development.
🟢 Beginner
Use Udemy — App Development Courses for structured training, courses, or credentials that build confidence in app development.
🟢 Beginner
Use Codecademy for structured training, courses, or credentials that build confidence in app development.
🟢 Beginner
Use Pluralsight for structured training, courses, or credentials that build confidence in app development.
🔴 Advanced
📝 QUICK NOTE
Use communities for ideas and troubleshooting, but verify legal, tax, licensing, and platform information through authoritative sources. Check current terms and costs before relying on a tool or course.
📝 What Should You Learn First?
Follow this order:
1️⃣ One user problem
Describe one task your app will help someone complete before choosing features.
2️⃣ Coding foundations
Practice variables, functions, data structures, and debugging in one language.
3️⃣ One platform & framework
Build a small working screen and learn navigation, state, and device constraints.
4️⃣ Data & security
Understand permissions, authentication, storage, and safe handling of user data.
5️⃣ Testing & accessibility
Check the main flow, error states, keyboard or assistive access, and different screen sizes.
6️⃣ Release & feedback
Learn store or deployment requirements and improve a small pilot from real user feedback.
🎯 KEY TAKEAWAY
Learn through a small, realistic practice task. Build confidence in the core workflow before adding more tools, paid courses, or commitments.
📄 Four Practical Starting Templates
Create these in a document, spreadsheet, or Notion page. They are working outlines—not ready-made legal agreements or professional advice. Use fictional data for practice and keep real records secure.
App Brief
Record: User | Problem | Core flow | Must-have features | Out of scope
Use before building to keep the first version small.
Feature Backlog
Record: Feature | User need | Priority | Acceptance criteria | Status
Separate essential behavior from later ideas.
Test & Bug Log
Record: Device | Steps | Expected result | Actual result | Severity | Fix status
Reproduce problems before release instead of relying on memory.
Release Checklist
Record: Version | Privacy review | Accessibility checks | Store assets | Release steps | Feedback
Use before each launch and keep a record of what changed.
🚀 ACTION STEP
Choose one learning resource and draft your App Brief. Use a small practice example to identify the next skill you need before taking on live work or spending more money.
🛠️ Tools, Platforms, Frameworks, and Services
Use these resources to put your app development learning into practice. Start with a small, dependable setup and add a tool only when its purpose, cost, and limitations are clear.
🛠️ Development Tools
Write, debug, and version your code. Choose a setup you can use reliably before adding extensions or services.
Use Visual Studio Code to code, test, deploy, or support the technical backend for app development projects.
🟢 Beginner
Use CodePen to code, test, deploy, or support the technical backend for app development projects.
🟢 Beginner
Use GitHub to code, test, deploy, or support the technical backend for app development projects.
🟢 Beginner

Use Replit to code, test, deploy, or support the technical backend for app development projects.
🟢 Beginner
Use Android Studio to code, test, deploy, or support the technical backend for app development projects.
🟡 Intermediate
Use Git to code, test, deploy, or support the technical backend for app development projects.
🟡 Intermediate
Use Xcode to code, test, deploy, or support the technical backend for app development projects.
🟡 Intermediate
📱 App Frameworks
Compare approaches to building your app’s interface and behavior. Pick one framework suited to your platform and current skills.
Use Expo to build cross-platform apps and speed up development for app projects.
🟢 Beginner
Build mobile and desktop apps for Android, iOS, macOS, and Windows using C# and one shared .NET codebase.
🟡 Intermediate
Use React Native to build cross-platform apps and speed up development for app projects.
🟡 Intermediate
Use Flutter to build cross-platform apps and speed up development for app projects.
🟡 Intermediate
Use Ionic to build cross-platform apps and speed up development for app projects.
🟡 Intermediate
🗄️ Backend, Database & APIs
Plan storage, authentication, and server-side functionality. Add services only when the app needs them and review their security and costs.
Use Appwrite to code, test, deploy, or support the technical backend for app development projects.
🟡 Intermediate
Use Firebase to code, test, deploy, or support the technical backend for app development projects.
🟡 Intermediate
Use MongoDB Atlas to code, test, deploy, or support the technical backend for app development projects.
🟡 Intermediate
Use Postman to code, test, deploy, or support the technical backend for app development projects.
🟡 Intermediate
Use Supabase to code, test, deploy, or support the technical backend for app development projects.
🟡 Intermediate
📊 Analytics & Monetization
Understand how people use the app and how revenue may work. Define useful events before adding tracking or monetization SDKs.

Use Google Analytics for Firebase to track results, spot what is working, and improve performance for app development.
🟡 Intermediate
Use Appfigures to track results, spot what is working, and improve performance for app development.
🟡 Intermediate
Use Amplitude to track results, spot what is working, and improve performance for app development.
🔴 Advanced

Use Mixpanel to track results, spot what is working, and improve performance for app development.
🔴 Advanced
💼 Freelance & Client Work
Explore places to find client projects and present your development skills. Start with work you can scope, test, and support confidently.
Use Fiverr to find paid opportunities, pitch services, or connect with clients for app development.
🟢 Beginner
Use Freelancer to find paid opportunities, pitch services, or connect with clients for app development.
🟡 Intermediate
Use Upwork to find paid opportunities, pitch services, or connect with clients for app development.
🟡 Intermediate

Use Contra to find paid opportunities, pitch services, or connect with clients for app development.
🟡 Intermediate

Use Toptal to find paid opportunities, pitch services, or connect with clients for app development.
🔴 Advanced
💳 Payments & Subscriptions
Evaluate ways to collect one-time or recurring payments. Check platform rules, fees, refund handling, and subscription obligations before integrating.
Use AdMob to handle payments, invoices, income tracking, or taxes for your app development work.
🟡 Intermediate
Use RevenueCat to handle payments, invoices, income tracking, or taxes for your app development work.
🔴 Advanced
Use Stripe Developers documentation to plan and implement supported payment, checkout, and billing integrations for app projects.
🔴 Advanced
🧪 Testing & Quality Assurance
Check expected behavior across devices and common failure cases. Use testing to catch defects before users encounter them.
Use TestFlight to code, test, deploy, or support the technical backend for app development projects.
🟡 Intermediate
Use Apple App Store Connect to code, test, deploy, or support the technical backend for app development projects.
🟡 Intermediate
Use Google Play Console to code, test, deploy, or support the technical backend for app development projects.
🟡 Intermediate
Use Sentry to code, test, deploy, or support the technical backend for app development projects.
🔴 Advanced
Use BrowserStack App Testing to code, test, deploy, or support the technical backend for app development projects.
🔴 Advanced
🎨 UI/UX Design
Plan accessible screens and usable flows. Use a simple prototype to test the main task before polishing every visual detail.

Use UX Design Institute Blog to learn UX research, user journeys, wireframing, and usability principles that help you design more intuitive, user-friendly apps.
🟢 Beginner

Use Canva to create simple app mockups, pitch presentations, and product-presentation visuals for app projects.
🟢 Beginner
Use Dribbble to explore interface-design examples and presentation ideas for app projects; study patterns without copying protected work.
🟢 Beginner
Use Figma to design app interfaces, create clickable prototypes, and organize design handoff for app-development projects.
🟡 Intermediate
Use Mobbin to explore real app screens, user flows, and interface patterns that can inspire clearer onboarding, navigation, and feature designs for your own app projects.
🟡 Intermediate
10. Your First 6 Months in App Development
Your first 6 months in app development should be focused on building a real product foundation, not trying to launch a huge, polished app too early.
The goal is to move from:
Skill Building → Small Projects → Real Features → Portfolio → Users or Clients → Clear Direction
By the end of 6 months, you should know what type of apps you want to build, have finished projects to show, understand how to publish or demo your work, and have a clear path toward earning through products, freelance work, or client builds.
🎯 6-Month Goal
By the end of your first 6 months, aim to have:
✅ One clear development path chosen
✅ 2–4 finished small apps or projects
✅ One stronger portfolio-ready project
✅ A simple portfolio, landing page, or demo hub
✅ A GitHub profile or organized project folder system
✅ Basic understanding of UI, databases, and app logic
✅ A repeatable build → test → improve workflow
✅ A list of future app ideas worth validating
✅ A plan to earn through apps, freelance work, or client systems
🎯 KEY TAKEAWAY
App development improves fastest when you finish real projects. Tutorials help, but completed builds prove your skill.
📅 Month 1: Choose Your Path & Set Up Your Foundation
🎯 Main Goal
Pick one app development path, set up your tools, and learn the core concepts before spreading yourself across too many languages or platforms.
✅ What to Do
- Choose one primary path
- Install your core tools
- Learn basic programming or no-code logic
- Follow one beginner tutorial from start to finish
- Build simple practice screens
- Learn basic layout and navigation concepts
- Organize your folders, notes, or GitHub workflow
- Write down 10–20 app ideas you could eventually build
🏁 Month 1 Success Looks Like
- You chose one main direction
- Your tools are installed and working
- You understand basic app structure
- You can complete a beginner tutorial
- You have built a few practice screens
- You know what kind of first app you want to make
⚠ COMMON MISTAKE
Jumping between too many frameworks or languages before finishing one simple project.
🧭 Beginner App Paths
Path | Why It Works |
Mobile apps | Strong demand and direct app-store distribution |
Web apps | Fast to launch and easy to share |
No-code apps | Great for validating ideas quickly |
React Native | Lets you build mobile apps with JavaScript |
Flutter | Strong cross-platform option with one codebase |
Swift | Best for focused iOS development |
Kotlin | Best for focused Android development |

📅 Month 2: Build Your First Simple App
🎯 Main Goal
Finish one small app from start to finish so you understand the full build process instead of just watching lessons.
✅ What to Do
- Pick one simple app idea
- Sketch the main screens
- Build the interface
- Add basic user actions
- Save simple data if needed
- Test the app on a device or browser
- Fix the most obvious bugs
- Save screenshots for your portfolio
🏁 Month 2 Success Looks Like
- You finished one small working app
- The app runs without major issues
- You understand the basic build process
- You can explain what the app does clearly
- You have screenshots or a demo to save
🎯 KEY TAKEAWAY
A finished simple app teaches more than an unfinished ambitious app.
💡 Good First App Ideas
App Idea | Example Skill Built |
To-do list | Inputs, lists, and saving data |
Habit tracker | Dates, streaks, and repeat use |
Calculator | Logic, buttons, and layout |
Notes app | Text input and storage |
Budget tracker | Categories, totals, and simple math |
Quiz app | Questions, answers, and scoring |
Weather-style mockup | UI layout plus basic API practice |

📅 Month 3: Build a Portfolio Project That Solves a Real Problem
🎯 Main Goal
Create a stronger project that shows practical skill, not just tutorial repetition.
✅ What to Do
- Choose a more useful app idea
- Define 3–5 core features
- Build the app in stages
- Improve the layout and user flow
- Add basic storage or persistent data
- Test it with a few real people
- Fix the most common bugs or confusion points
- Add the project to your portfolio
🏁 Month 3 Success Looks Like
- You have one portfolio-level project
- Your app solves a clear problem
- You understand more than just tutorial steps
- You can show your work to other people
- You are building confidence by finishing
💡 PRO TIP
The best portfolio projects solve practical problems people immediately understand.
🗂️ Portfolio App Examples
App Type | Example |
Productivity app | Planner, checklist, or habit tracker |
Service business tool | Cleaning schedule or quote tracker |
Business app | Invoice tracker or client manager |
Learning app | Flashcards, quizzes, or study tracker |
Fitness app | Workout log or meal tracker |
Side hustle tool | Gig income tracker or flipping tracker |

📅 Month 4: Add Real Features & Build Like a Real Product
🎯 Main Goal
Move beyond simple screens and start learning the features most real apps actually need.
✅ What to Do
- Learn how to save and retrieve data
- Practice basic database concepts
- Connect to an API
- Add forms, filters, or categories
- Improve error handling
- Learn simple security and authentication basics
- Keep your code or project files organized

🏁 Month 4 Success Looks Like
- Your apps feel more useful and real
- You understand how app data works
- You can add practical features
- You are solving bugs faster
- Your workflow is becoming repeatable
⭐ ADVANCED STRATEGY
Build the simplest working version first, then improve it.
🏋️ Features to Practice
Feature | Why It Matters |
Forms | Lets users enter useful information |
Database/storage | Keeps data between sessions |
API connection | Pulls outside information into the app |
Search | Helps users find information quickly |
Filters | Makes app data easier to use |
Authentication | Supports private or user-specific access |
Error handling | Makes the app feel more reliable |
🗓️ Simple Weekly Workflow
Day | Task |
Monday | Plan the next feature or improvement |
Tuesday | Build the main functionality |
Wednesday | Test and fix bugs |
Thursday | Improve design and usability |
Friday | Document what changed |
Weekend | Review progress and plan next steps |
📅 Month 5: Publish, Share & Test Market Interest
🎯 Main Goal
Start putting your work in front of people so you can collect feedback, build proof, and test possible income paths.
✅ What to Do
- Polish your strongest project
- Create a simple portfolio or landing page
- Share the app with friends, communities, or small test users
- Ask for honest feedback
- Fix the biggest usability issues
- Record a short demo video
- Start exploring freelance or client opportunities if ready
- Look for real problems businesses need solved
📦 Beginner Services You Can Offer
- App landing pages
- No-code app setup
- Small workflow tools
- Basic UI cleanup
- Bug fixes for simple projects
- Form-based internal apps
- Lightweight database setups
- App idea planning
🏁 Month 5 Success Looks Like
- Your best app is polished enough to show
- You have a simple portfolio or demo page
- You have shared your work publicly or privately
- You have collected real feedback
- You know which earning path interests you most
🎯 KEY TAKEAWAY
You do not need to be an expert to start showing your work. You need proof that you can build useful things.
🛠️ Ways to Use Your Skills
Path | How It Can Earn |
Freelance app work | Build small apps or features for clients |
No-code or low-code builds | Create business tools faster |
App templates | Sell starter builds or UI kits |
App Store apps | Earn from subscriptions, ads, or purchases |
Business tools | Build systems for local or niche businesses |
Portfolio work | Use projects to get jobs, clients, or internships |
📅 Month 6: Review Results, Improve Your Best Work & Pick a Direction
🎯 Main Goal
Review your progress and decide whether your next phase should focus on freelance work, your own app products, templates, or deeper technical skill-building.
✅ What to Do
- Review every project you built
- Pick your strongest app
- Improve your best project
- Remove weak or unfinished work from your portfolio
- Identify your biggest skill gaps
- Choose what to learn next
- Create a 90-day plan for months 7–9
- Decide how you want to earn from app development
❓ 6-Month Review Questions
- Which project are you most proud of?
- Which app solves the clearest problem?
- Which features were hardest to build?
- Which tool or language do you want to keep using?
- Do you prefer coding, design, databases, or strategy?
- Could one project become a paid product?
- Are you ready to take freelance work?
- What skill should you learn next?
🏁 Month 6 Success Looks Like
- You have finished multiple projects
- You know which path fits you best
- You have a portfolio, demo page, or project hub
- You understand your next major skill gap
- You have a 90-day growth plan for the next phase
🎯 KEY TAKEAWAY
The first 6 months are about direction and proof, not perfection.
📊 Decision Table
If This Happens | Do This |
You enjoy building mobile apps | Go deeper on mobile development |
You like fast business tools | Explore no-code or low-code services |
Your portfolio looks strong | Start applying for freelance projects |
Your app idea has promise | Build a better version and test users |
You still struggle with basics | Spend more time on fundamentals |
You like design more than logic | Focus on UI/UX for apps |
You like systems and data | Learn backend and database skills |
✅ 6-Month Success Checklist
By the end of 6 months, check whether you have:
✅ Chosen one clear development path
✅ Learned basic app structure and logic
✅ Built at least 2 small apps
✅ Created one stronger portfolio project
✅ Practiced design and usability
✅ Used forms, storage, APIs, or databases
✅ Tested your apps with real people
✅ Collected feedback and improved something
✅ Created screenshots or demos
✅ Built a simple portfolio or landing page
✅ Picked a likely earning path
✅ Created a plan for the next 90 days
⚠️ What Not to Do During the First 6 Months
Avoid these mistakes:
❌ Jumping between too many languages or frameworks
❌ Watching tutorials without building projects
❌ Trying to build a huge app too early
❌ Ignoring bugs instead of learning from them
❌ Copying projects without understanding them
❌ Spending too much time on branding instead of building
❌ Hiding your work until it feels “perfect”
❌ Adding features before the core app works
❌ Giving up because the learning curve feels hard
❌ Assuming one course makes you market-ready
📝 QUICK NOTE
App development gets easier through repetition. Build small, finish often, and improve every cycle.
🧭 Simple 6-Month Milestone Tracker
Month | Main Focus | Target Output |
Month 1 | Foundation | Tools set up and one path chosen |
Month 2 | First build | One simple working app |
Month 3 | Portfolio project | One stronger app with screenshots or demo |
Month 4 | Real features | Storage, APIs, forms, or authentication added |
Month 5 | Publishing & feedback | Portfolio, demo, launch, or shared test app |
Month 6 | Review & direction | 90-day growth plan created |
🚀 Final 6-Month Strategy
Your first 6 months should follow this simple path:
Month 1: Choose your path and set up your foundation
Month 2: Build your first simple app
Month 3: Create a real portfolio project
Month 4: Add practical product features
Month 5: Publish, share, and test market interest
Month 6: Review progress and choose your next direction
The app developers who grow fastest are not the ones who know every tool. They are the ones who keep building, finishing, testing, and improving useful products.
11. Get the App Development Starter Kit
🎁 Plan, Build & Launch Your App
The App Developer Starter Kit brings together 12 interactive learning, planning, testing, launch and maintenance tools. Work through the components in order or open the resource you need from the kit dashboard.
The 12 components:
✅ 1. Beginner-Friendly Coding Resources — Explore learning paths and keep track of coding skills.
✅ 2. No-Code vs. Code Decision Studio — Choose a build approach based on budget, experience and ongoing maintenance.
✅ 3. App Idea Validation Checklist — Evaluate target users, real demand signals and potential risks.
✅ 4. App Store Launch Strategy — Plan release milestones, store requirements and launch checks.
✅ 5. Monetization Model Calculator — Model revenue, costs and assumptions for different app business models.
✅ 6. 30 App Idea Prompts — Explore and assess ideas; profitability is not pre-validated.
✅ 7. UI/UX Design Principles — Apply accessibility, usability and interface design guidelines.
✅ 8. Testing Checklist — Organize test cases, bug evidence and release sign-off.
✅ 9. ASO Optimization Template — Research app-store keywords, listings and discoverability.
✅ 10. Marketing Launch Calendar — Plan promotion tasks and launch activities.
✅ 11. Backend & API Integration Guide — Review the fundamentals of connecting services and data.
✅ 12. App Maintenance & Update Planner — Organize updates, fixes and ongoing app improvements.
Also included: The App Developer dashboard and Start Here instructions.
This is an educational, browser-based development toolkit—not an app-building service or a finished mobile app. Revenue examples and app ideas are not guarantees; app-store rules and technical integrations require independent verification.
12. Frequently Asked Questions
💻 Do I need to know how to code?
No. Start with no-code tools like Glide or Bubble to validate ideas. Learning to code can add flexibility and remains valuable long-term.
📱 Which is better: iOS or Android?
iOS users spend 2x more on apps, but Android has 70% global market share. For beginners, start with one. React Native or Flutter lets you build for both with one codebase.
⏳ How long does it take to build an app?
Simple utility: 1–4 weeks. Moderate app: 1–3 months. Complex app: 3–12 months. Most beginners underestimate by 2–3x.
💰 How much does it cost to build an app?
DIY: $0–$300/year for developer accounts and tools. Hire a developer: $5,000–$50,000+. No-code tools: $0–$100/month.
🚀 Can I really make money from apps?
Yes, but it's not guaranteed. About 60% of app developers earn less than $500/month. The top 10% make $10,000+/month. Success requires good product, marketing, and persistence.
🧑💼 Should I build my own app or freelance first?
Freelancing can produce income while you learn, but only if you find paying clients. Building your own app has higher upside but takes longer to earn. Many people do both.
💡 What if my app idea already exists?
Good! That means there's demand. Study existing apps and find what you can do better, cheaper, or for an underserved audience.
👥 How do I get my first users?
Friends/family → Reddit communities → Product Hunt → App Store Optimization → Content marketing. Don't expect organic growth—you must actively market.
🧾 Do I need an LLC or business entity?
Not always required to start. You can often publish as an individual. Consider a business entity once income, liability, or client work makes it worthwhile — requirements vary by location.
🛠️ How do I handle app store rejections?
Read the rejection reason carefully, fix the issue, and resubmit. Apple is stricter than Google. Follow their guidelines from day one to avoid delays.
13. Important Considerations
Before you jump in, understand the realities — this is what separates successful app developers from everyone else:
⏳ It Takes Time & Consistent Effort
- First app: weeks to months
- Real traction: 3–12 months
- Phase 1 = building + testing → Phase 2 = growth → Phase 3 = more recurring income
- Most people quit too early
📉 Most Apps Don't Succeed Immediately
- Many developers earn under $500/month
- Top performers scale to $10K+/month
👉 The difference = product + marketing + persistence
🧠 Marketing Matters as Much as Coding
"Even great apps need visibility"
- Plan to spend ~50% of your time on marketing, not just building
🐛 Bugs & User Experience Matter
- First impressions = ratings
- Bad reviews can kill growth early
⚙️ Platform Rules & Fees
- Apple and Google fees vary by platform and program, and are often around 15–30% of qualifying store revenue
- Strict approval guidelines apply
🔁 You'll Need to Iterate
- Your first version won't be perfect
- Feedback is part of the process
🚫 Avoid Common Beginner Mistakes
❌ Overbuilding
❌ Ignoring design
❌ Skipping testing
❌ Not marketing
❌ Giving up too soon
💡 Final Reality Check
This is NOT a "quick win" side hustle.
This can become a high-income, scalable skill if you stick with it
14. Your Next Steps
🚀 ACTION STEP
📅 Today
- 📦 View the starter kit above
- 🛤️ Decide: no-code OR coding path
- 🛠️ Install necessary tools, such as Figma, a code editor, or a no-code platform
🗓️ This Week
- 🎓 Complete one beginner tutorial, such as Codecademy JavaScript OR a Glide no-code course
- 💡 Sketch 3 app ideas that solve problems YOU have
- 🔍 Research existing apps in those categories
📆 This Month
- 📱 Build your first simple app, such as a calculator, converter, or to-do list
- 💬 Get feedback from 10 people
- 🚀 Publish to an app store OR share your web app link
- 👥 Join 2 developer communities, such as Reddit or Indie Hackers
🚀 Months 2–3
- 🧩 Build a more complex app with real utility
- 💰 Implement basic monetization
- 📣 Learn app marketing fundamentals
- 🎯 Get your first 100 users OR first freelance client
- 🔁 Iterate based on feedback
15. The Bottom Line
🎯 KEY TAKEAWAY
App development is one of the most powerful side hustles you can build — but it rewards skill and consistency, not shortcuts.
🙋 If you:
✔ Solve a real problem people actually have
✔ Keep improving your app based on feedback
✔ Treat marketing as part of the job
✔ Stay consistent past your first release
🏗️ You can build:
💰 An asset that can keep earning long after launch
📈 A portfolio that compounds into freelance and product income
🌍 A product that scales globally
🚀 The real opportunity isn't just building apps — it's building assets that can pay you long-term.
16. Recommended Websites & Tools
🛠 TOOLS & RESOURCES
You do not need every resource listed below. This directory brings together the major platforms, tools, and resources from this guide, along with additional research and learning options, so you can find them in one place when you need them.
Start with the essentials. Add tools only when your app or workflow develops a specific need for them.
🧱 No-Code & Low-Code App Builders
- Bubble — No-code platform for building web apps and SaaS-style products.
- Glide — No-code app builder for turning spreadsheets and data into mobile-friendly apps.
- Adalo — No-code app builder for mobile and web apps.
- FlutterFlow — Visual app builder for creating Flutter-based apps.
- Softr — No-code platform for building portals, directories, internal tools, and web apps.
- Notion — Workspace tool that can support app planning, product documentation, and project management.
💡 PRO TIP
No-code builders are the fastest way to validate an idea. Prove people want your app before investing months in custom code.
🔥 Backend, Databases & Hosting
- Firebase — Backend platform for authentication, hosting, databases, and analytics.
- Supabase — Open-source backend platform with database, auth, and storage tools.
- AWS Amplify — AWS platform for building and hosting full-stack apps.
- MongoDB Atlas — Cloud database platform for app backends.
- Vercel — Hosting platform for frontend apps and web projects.
- Netlify — Hosting and deployment platform for websites and web apps.
📝 QUICK NOTE
Many backend platforms offer generous free tiers. Start free, and only pay when your app has real usage.
💻 Coding Languages, Frameworks & Developer Docs
- GitHub — Code hosting, version control, and collaboration platform.
- MDN Web Docs — Web development documentation for HTML, CSS, JavaScript, APIs, and web standards.
- Client-Side APIs — MDN — Beginner-friendly guide to web APIs.
- Flutter — Google's framework for building cross-platform apps.
- Flutter Docs — Official Flutter documentation.
- Kotlin — Programming language commonly used for Android development.
- React Native — Framework for building mobile apps with React.
- Swift — Apple's programming language for iOS, macOS, and Apple platform apps.
- Android Developers — Official Android development documentation.
- Apple Developer — Apple's official developer portal.
- Apple Human Interface Guidelines — Apple's official design guidance for apps.
- Material Design — Google's design system for Android and web interfaces.
📝 QUICK NOTE
Official documentation is the most reliable source for setup instructions, platform rules, and API changes. Check the docs before relying on older tutorials.
🎨 Design & Prototyping Tools
- Figma — UI/UX design and prototyping tool.
- Canva — Design tool for simple graphics, app promo assets, and mockups.
- Sketch — UI design tool for app and web interfaces.
- Adobe XD — UI/UX design and prototyping tool.
💡 PRO TIP
Design your screens before you build. A simple Figma or Sketch prototype can save you weeks of rework.
🎓 Learning Resources & Courses
- Fireship — YouTube channel for fast-paced coding and app development tutorials.
- Traversy Media — Web development tutorials and coding crash courses.
- CodeWithChris — iOS and app development tutorials.
- CodeWithChris Website — App development learning resources and courses.
- Flutter YouTube Channel — Official Flutter tutorials and updates.
- The Net Ninja — Web and app development tutorials.
- Codecademy — Interactive coding courses.
- Codefinity — Coding education platform.
- freeCodeCamp — Free coding tutorials, certifications, and projects.
- Scrimba — Interactive coding course platform.
- Udemy App Development Courses — App development courses for beginners and advanced learners.
- Coursera App Development Courses — App development courses and certificates.
🌐 Communities & Social Platforms
- Reddit — Community platform with app development discussions.
- Reddit r/AppDev — App development community.
- Reddit r/iOSProgramming — iOS programming community.
- Reddit r/AndroidDev — Android development community.
- Stack Overflow — Developer Q&A community.
- Indie Hackers — Community for founders, builders, and solo entrepreneurs.
- TikTok — Short-form content platform for app promotion and build-in-public content.
- YouTube — Video platform for tutorials, product demos, and app marketing.
📝 QUICK NOTE
Community advice is not automatically correct. Use communities for feedback, ideas, and troubleshooting, but verify technical and business decisions through official documentation.
📊 Analytics, Monetization & Payments
- Google Analytics — Website and app traffic analytics tool.
- Firebase Analytics — App analytics tool built into Firebase.
- AdMob — Google's mobile app advertising platform.
- Stripe — Payment processing platform for subscriptions, digital products, and app payments.
- RevenueCat — Subscription and in-app purchase management platform.
🚀 App Stores, Launch & Market Research
- App Store Connect — Apple's app submission and management dashboard.
- Apple App Store — Apple's app marketplace and developer resources.
- Google Play Console — Google's app publishing platform for Android apps.
- Product Hunt — Launch platform for apps, startups, and digital products.
- Medium — Publishing platform for app updates, build-in-public posts, and tutorials.
- AppTweak — App store optimization and app marketing platform.
- Sensor Tower — App intelligence and mobile market research platform.
🎯 KEY TAKEAWAY
You do not need every tool on this page. One way to build, one backend, one design tool, and one launch platform are enough to ship your first app.
🧭 How to Use This Directory
🧰 Start With a Simple Setup
Do not start by creating accounts with every service listed above. For most beginners, a simple setup is enough:
- One way to build (a no-code builder or one framework)
- One backend or hosting platform
- One design tool
- One learning resource
- Basic analytics
That is enough to start building. Add tools only when you can name the specific problem they will solve.
🎯 KEY TAKEAWAY
Tools support the product. They are not the product.
Your biggest advantages will come from:
Solving a real problem → Building something useful → Getting it in front of users → Improving from feedback
17. Explore Similar Side Hustles
 Consulting: Get Paid for What You Know — Turn your development expertise into paid advisory work for businesses that need technical guidance.
 Online Course Creation: Turn Your Knowledge Into Income — Package your coding skills into a course that teaches others how to build their first app.
 Selling Digital Products — Sell code templates, UI kits, and app boilerplates to other builders alongside your own products.
- Blogging: Build an Online Brand and Earn from Your Words — Publish tutorials and dev content that attract search traffic and support your apps.
 Faceless Video Content Creation: Go Viral Without Showing Your Face — Create screen-recorded coding tutorials and app demos without appearing on camera.
 Newsletter Monetization: Get Paid to Write About What You Love — Build a direct audience you can reach with app launches, updates, and recommendations.