Affiliate disclosure: Some links in this guide may be paid referral links. If you purchase or sign up through one, One Stop Side Hustles may earn a commission. How our affiliate links work.
ONLINE COURSE CREATION STARTER GUIDE
Learn how online course creation works—including choosing a topic, outlining lessons, recording a first version, and testing demand before a bigger launch. Sales are not automatic; results vary with audience fit, teaching quality, and whether people actually buy.
1. What Is Online Course Creation?
2. Why Online Course Creation Is a Great Side Hustle
4. How Much Can You Earn & Pricing Strategies
5. What You Actually Need to Create a Course
6. Course Creation Formula (Step-by-Step)
7. How to Sell Your First Course
8. Build Trust & Improve Results
9. Learn Course Creation for Free or Cheap
10. Your First 6 Months Online Course Creation Plan
11. Get the Course Creation Starter Kit
12. Frequently Asked Questions
Quick Snapshot
Earn: Highly variable — many first courses sell little; later income depends on demand, pricing, marketing, and whether students actually enroll
Work: Front-loaded creation, then ongoing marketing, student support, and updates — not fully hands-off
Start: Low cost — a phone/laptop and a hosting platform
Best for: People a few steps ahead who can teach clearly
Grow: One course → funnels, automation, multiple courses
1. What Is Online Course Creation?
Online course creation is the process of packaging your knowledge, skills, or expertise into structured digital content (videos, PDFs, quizzes, worksheets) that people pay to access. You create it once and can sell it repeatedly—if people keep finding and buying it.
Unlike coaching or consulting where you trade time for money, a course can reach many students from the same recorded material.
🔄 How It Works (Simple 4-Step Process)
- Identify what you can teach (skill, system, transformation)
- Create structured lessons (videos, workbooks, templates)
- Host on a platform (Teachable, Thinkific, or your own site)
- Market and sell (in a launch, on a schedule, or through a simple evergreen offer)
🎯 KEY TAKEAWAY
You don't need to be the world's #1 expert. You just need to know more than your target student and be able to explain it clearly.

2. Why Online Course Creation Is a Great Side Hustle
Online course creation is a strong side hustle because it turns your knowledge, experience, or repeatable system into a product that can keep selling long after the original work is finished.
💰 One course can be sold many times
The biggest advantage is leverage.
Instead of teaching one person at a time, a good course can help many buyers through the same structured material.
Common growth stages include:
- First test sales
- Small launch momentum
- Better conversion through positioning
- Stronger recurring monthly revenue
That one-to-many structure is what makes course creation so attractive.
🧠 You can monetize what you already know
You do not need to be the top expert in the world to help beginners get a result.
Strong course ideas often come from:
- Skills you use regularly
- Problems you solved yourself
- Processes you can explain clearly
- Transformations others want
Being a few meaningful steps ahead is often enough if you can teach well.
💻 The startup cost can stay relatively low
Many first courses begin with simple tools instead of expensive production.
A starter setup can include:
- Phone or laptop camera
- Screen recorder
- Slides or worksheets
- Course host
- Basic checkout setup
That makes it easier to validate the course idea before investing in premium equipment or software.
🕒 You can create it on a flexible schedule
Course creation fits well around other work because most of the build process can be broken into stages.
Common creation steps include:
- Outlining lessons
- Recording in batches
- Editing gradually
- Launching a first version
- Improving from feedback
That flexibility makes it possible to build a real product without needing full-time availability from day one.

📈 It can scale without adding the same amount of work per sale
Once the course exists, additional students usually do not require the same delivery effort as services or coaching.
Common scaling levers include:
- Evergreen funnels
- Email marketing
- Affiliates
- Paid ads after validation
- Additional related courses
That makes the course itself a real business asset instead of only a time-for-money offer.
🎯 A course can build authority around your niche
Teaching a clear transformation positions you as someone who can guide others to a result.
That authority can support:
- Consulting
- Coaching
- Speaking
- Partnerships
- Premium offers
A strong course often becomes a trust-building centerpiece for the rest of your brand.
🌍 There is strong demand for practical online learning
People pay when a course helps them save time, avoid mistakes, or make progress faster.
High-demand areas often include:
- Career skills
- Business systems
- Software tutorials
- Creative skills
- Personal improvement
Clear outcomes usually sell much better than broad information dumps.
🧪 It can expand into a larger digital business
One course can open the door to other products and higher-value offers.
Common next steps include:
- Templates
- Memberships
- Coaching programs
- Communities
- Affiliate partnerships
- Additional courses
That gives course creators room to turn one educational product into a broader ecosystem.
3. What Topics Can You Teach?
Online course topics range from practical business skills to creative hobbies, wellness, parenting, and niche expertise. The strongest beginner courses are not broad subjects—they are a specific outcome, for a defined learner, taught through a repeatable process.
Most beginners do better by choosing one topic and one learner type, testing a small first version, and expanding only after real learners show interest.
📝 QUICK NOTE
The prices below are illustrative starting points, not verified market prices or expected earnings. Check comparable courses on your chosen platform, and account for platform and payment fees, software, marketing, and taxes. Sales are never guaranteed.
💼 Professional & Business Skills
📊 Excel & Data Analysis
Practical spreadsheet training for people who use data at work and want faster, cleaner results.
- 📌 What you might teach: Formulas, pivot tables, dashboards, reporting templates, and repeatable spreadsheet workflows
- 👥 Common learners: Office professionals, freelancers, virtual assistants, and small-business owners
- 💰 Illustrative price: $29–$149 for a self-paced course; bundles with templates may price higher
- ✅ Best for: Creators with real workplace spreadsheet experience who can demonstrate on screen
💡 PRO TIP
Promise one practical result—such as a monthly sales dashboard—rather than “master Excel.” A narrow outcome is easier to teach, test, and sell.
📒 Bookkeeping & QuickBooks
A process-focused course that helps small businesses keep their records organized.
- 📁 What you might teach: Expense tracking, invoicing, bank reconciliation basics, categories, and simple monthly reports
- 👥 Common learners: Freelancers, Etsy sellers, service businesses, and new business owners
- 💰 Illustrative price: $49–$199 depending on depth and included templates
- ✅ Best for: People with hands-on bookkeeping experience who can explain systems clearly
💡 PRO TIP
Teach the workflow, not tax or legal advice. Rules vary by location, so tell learners to confirm tax and compliance questions with a qualified professional.

🎨 Creative Skills
📷 Photography
Visual, example-driven lessons that help learners take better photos with the gear they already have.
- 📸 What you might teach: Portrait, product, and phone photography; lighting; composition; and simple editing
- 👥 Common learners: Hobbyists, Etsy sellers, creators, and small-business owners who need better visuals
- 💰 Illustrative price: $29–$129 for a focused skill course
- ✅ Best for: Photographers who can show clear before-and-after results
💡 PRO TIP
Solve one use case, such as product photos for a small shop, and include shot lists learners can follow while they practice.
🎞️ Video Editing
A step-by-step course that turns raw footage into polished, publishable videos.
- 🎬 What you might teach: Short-form editing, YouTube workflows, captions, pacing, storytelling, and cleanup
- 👥 Common learners: Creators, freelancers, and small brands that publish video regularly
- 💰 Illustrative price: $39–$199 depending on software coverage and project files
- ✅ Best for: Editors with a strong portfolio who can teach one editing tool well
💡 PRO TIP
Teach in one editing program and provide sample footage so learners can follow along instead of searching for their own material.

💻 Technology & Software
💻 Coding & Web Development
A project-based path from basic concepts to a finished, working result.
- 🖥️ What you might teach: Beginner HTML, CSS, JavaScript, simple automation, or one complete practice project
- 👥 Common learners: Career changers, students, and freelancers building technical skills
- 💰 Illustrative price: $49–$249 depending on project depth and support
- ✅ Best for: Developers who can explain concepts without unnecessary jargon
💡 PRO TIP
Build the course around one project learners can complete. Finishing something real keeps beginners motivated and gives you proof the course works.
🧰 No-Code & AI Tools
A systems-focused course showing learners how to build useful workflows with modern tools.
- ⚙️ What you might teach: Dashboards, automations, templates, business systems, and practical AI-assisted workflows
- 👥 Common learners: Entrepreneurs, creators, operations-minded professionals, and virtual assistants
- 💰 Illustrative price: $39–$199, with higher prices only when templates or support add clear value
- ✅ Best for: Tool users who have already built these systems in real work
💡 PRO TIP
Tools change quickly. Date-stamp your lessons, teach one finished system instead of vague “mastery,” and plan periodic updates.

🏡 Lifestyle & Hobbies
🗄️ Home Organization
A course where progress is easy to see and easy to repeat.
- 🏠 What you might teach: Decluttering routines, pantry and closet systems, labeling, and maintenance habits
- 👥 Common learners: Busy families, renters, new homeowners, and anyone overwhelmed by clutter
- 💰 Illustrative price: $19–$79 for a self-paced course
- ✅ Best for: Organized, visual teachers who can show clear transformations
💡 PRO TIP
Include printable checklists and a simple one-room challenge. Learners are more likely to finish—and recommend—a course that gives them a quick win.
🍽️ Meal Planning & Batch Cooking
Practical routines that make weeknight meals easier and more affordable.
- 🛒 What you might teach: Grocery planning, prep routines, freezer meals, budgeting, and weekly systems
- 👥 Common learners: Busy parents, professionals, students, and budget-conscious households
- 💰 Illustrative price: $19–$89 including printable menus and lists
- ✅ Best for: Home cooks with a repeatable system and strong kitchen demonstrations
💡 PRO TIP
Offer printable menus, shopping lists, and prep schedules. Avoid medical or diet-outcome claims unless you hold appropriate credentials.

🧘 Health & Wellness
🧘 Yoga & Home Fitness
Beginner-friendly movement lessons learners can follow at home.
- 🏃 What you might teach: Beginner workouts, mobility, stretching, and simple home routines
- 👥 Common learners: Busy adults, older beginners, and people who prefer exercising at home
- 💰 Illustrative price: $29–$99 for a short program
- ✅ Best for: Qualified instructors who can cue movements safely on video
💡 PRO TIP
Focus on one audience or outcome instead of “general fitness,” and include clear safety guidance. Check certification, liability, and insurance expectations before selling instruction.
🧠 Mental Wellness & Mindfulness
Educational lessons that build calm daily habits without making clinical promises.
- 📓 What you might teach: Stress-management habits, journaling, guided routines, boundaries, and burnout prevention
- 👥 Common learners: People seeking calmer routines, better focus, and more balance
- 💰 Illustrative price: $19–$99 depending on length and guided audio
- ✅ Best for: Coaches, educators, and trained practitioners who stay within their scope
💡 PRO TIP
Keep the positioning educational. Avoid diagnosing, treating, or promising medical outcomes unless you are licensed and the law allows it.

👨👩👧 Parenting & Family
👪 Gentle Parenting
Real-life communication tools for hard parenting moments.
- 💬 What you might teach: Communication, boundaries, routines, and practical scripts for common challenges
- 👥 Common learners: Parents, caregivers, and family-focused creators
- 💰 Illustrative price: $29–$99 for a focused course
- ✅ Best for: Parents or educators with realistic examples and a calm teaching style
💡 PRO TIP
Use real scenarios learners can apply immediately. Present your approach as experience-based guidance unless you hold relevant professional credentials.
🧸 Toddler Activities & Homeschooling
Ready-to-use activities that make home learning easier to plan.
- 🎨 What you might teach: Low-cost learning activities, lesson ideas, routines, and weekly planning
- 👥 Common learners: Parents, homeschool families, and childcare providers
- 💰 Illustrative price: $15–$79 depending on how many printables are included
- ✅ Best for: Teachers and organized parents who can package plans families can use right away
💡 PRO TIP
Add weekly plans, supply lists, and printable activity guides. Homeschool requirements vary by location, so avoid implying that one plan satisfies every local rule.

🎯 Niche & Specialized Topics
🛍️ Etsy Shop Setup & Growth
A beginner path through launching and improving an online shop.
- 🏪 What you might teach: Listings, search keywords, product photos, pricing, policies, and first-shop strategy
- 👥 Common learners: Handmade sellers, digital creators, artists, and crafters
- 💰 Illustrative price: $29–$149 depending on shop type and included templates
- ✅ Best for: Sellers who can show their own process without promising sales
💡 PRO TIP
Choose one shop style, such as printables, jewelry, or first-shop setup. Marketplace rules and fees change, so link to current official policies.
🎙️ Podcast Launch & Growth
A practical launch roadmap for people who want to start and maintain a show.
- 🎧 What you might teach: Planning, recording, editing, publishing, promotion, and beginner monetization basics
- 👥 Common learners: Creators, educators, coaches, and personal brands
- 💰 Illustrative price: $29–$149 including launch checklists
- ✅ Best for: Podcasters who can share a repeatable production workflow
💡 PRO TIP
Include launch checklists, episode templates, and outreach scripts. Results depend on audience fit and consistency, so teach the system rather than promising listeners.

🎯 Choose Your First Course Outcome
🎯 KEY TAKEAWAY
Start with professional skills, software tutorials, business systems, or beginner-friendly creative skills. These topics are easier to break into step-by-step lessons, easier to prove with clear outcomes, and more likely to attract learners who want a practical result. Avoid topics where you would need credentials you do not have.
🚀 ACTION STEP
Write a focused first plan:
- Learner: Name the beginner audience and the skill they want to gain.
- Outcome: Specify a practical result your course can reasonably teach.
- Lesson plan: Outline a short sequence with demonstrations, practice, and a finished project.
- Validation: Test a sample lesson with likely learners before producing the full course.
4. How Much Can You Earn & Pricing Strategies
Use this chapter to connect the course outcome, audience trust, and offer structure to your pricing plan.
🧠 Reality Check (What Actually Separates Earners)
- Most new course creators make little or nothing on their first launch
- Not because courses do not sell
- 👉 Many create the course before validating demand
- 👉 Or they rely on “build it and people will come”
- The creators who earn more typically:
- Solve a specific problem
- Build an audience before launching
- Package a clear transformation
- Use strong pricing, positioning, and offers
💡 PRO TIP
Your income is not based on how many lessons you record. It is based on how valuable the outcome feels to the buyer.
🎯 KEY TAKEAWAY
A useful learner outcome, evidence of demand, and a support model you can deliver matter more than recording more lessons.
🔑 Smart Pricing Strategy
🎯 Demand & Outcome-Based Pricing
- Start by validating demand before building everything
- Price based on:
- The problem solved
- The result delivered
- The time / money saved
📦 Tiered Course Offers
- Use tiered offers:
- Self-paced course
- Course + templates
- Course + community or coaching
🎯 KEY TAKEAWAY
Price the complete learning experience and support obligations. Templates, coaching, and community add value only when they genuinely help students and can be delivered responsibly.
🧪 Real Example
📋 REAL-WORLD EXAMPLE
📌 Same Course Topic, Different Outcomes
These scenarios are hypothetical gross sales calculations with 20 sales at each listed price—not verified typical outcomes or forecasts. They exclude refunds, fees, promotion, support, overhead, and taxes. A higher price may change sales volume.
🌱 Scenario A: Information-only course
- Price: $49
- Weak audience trust
- 20 sales
- Income: $980
🎯 Scenario B: Well-positioned transformation course
- Price: $297
- Better messaging + bonuses
- 20 sales
- Income: $5,940
🚀 Scenario C: Premium course ecosystem
- Price: $997
- Includes templates + support
- 20 sales
- Income: $19,940
💡 Same number of sales. Huge difference in positioning, pricing, and perceived value.
🎯 KEY TAKEAWAY
Use these scenarios to understand the model, not to predict your own income. Compare actual results and risks with your written plan.
🎯 What Actually Drives Income
🧮 Learner Need × Trust × Offer Fit = Income Potential
This is a business framework, not a mathematical earnings forecast.
📊 Key Income Drivers
- Topic value
- Career, business, money, and skill-building courses usually command higher prices
- Audience trust
- Warm audiences convert far better than cold traffic
- Transformation
- “Get a result” sells better than “learn information”
- Offer structure
- Bonuses, templates, worksheets, and community can increase value
- Sales system
- Launches, evergreen funnels, email sequences, and affiliates improve revenue
💡 PRO TIP
The strongest course businesses are built on audience + outcome + offer design.
📈 Enrollment Revenue & Delivery Costs (Pricing Reality)
📖 Read the Numbers in Context
Course price multiplied by sales produces gross revenue—not profit. Refunds, platform and payment fees, affiliates, advertising, contractors, and student support affect what remains. A higher price does not guarantee the same number of sales. Avoid unsupported income, career, or learning-result promises.
🎯 KEY TAKEAWAY
Look beyond headline income: assess the complete economics, risks, and real cash available.
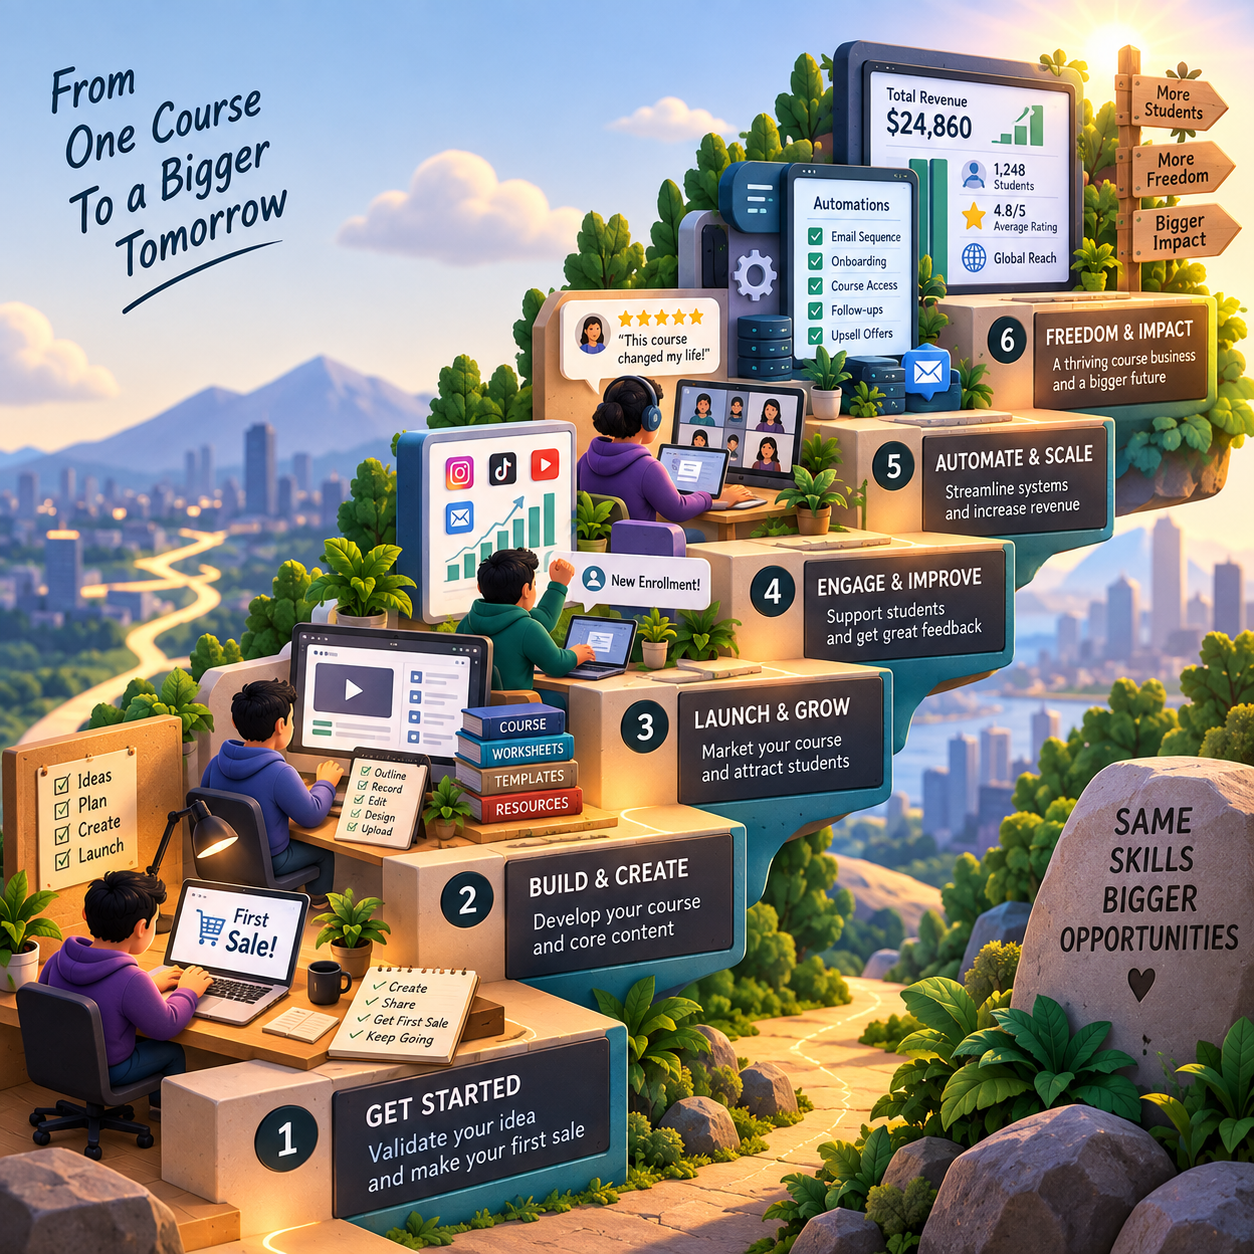
🚀 Build Your First Validated Course Offer
Start with one defined learner, one achievable outcome, a small pilot curriculum, and a clear offer. Validate the problem before recording a large course or spending heavily on promotion.
🧭 Run a Focused Course Offer Test
- Choose a narrow learner outcome. Identify who the course helps, their starting point, prerequisites, and a realistic result they can practice. Speak with potential learners or review genuine questions to check the problem. Do not treat social likes or a large audience as proof of willingness to pay.
- Design the smallest useful pilot. Map a short sequence of lessons, exercises, examples, and a final practical task. Build only enough to teach the promised scope. Use original or licensed materials, accessible formats where feasible, and a clear boundary around topics outside your expertise.
- Write a transparent offer. State the curriculum, access period, support level, schedule, price, and applicable refund or cancellation terms. Explain pilot status and delivery dates if selling before completion. Obtain consent for testimonials and avoid claiming results that your evidence cannot support.
- Run a manageable four-week pilot. Recruit a small group through one relevant channel, deliver the agreed material, and collect specific feedback on comprehension and task completion. Set support hours and boundaries. If demand remains uncertain, use interviews or a free prototype before taking payments.
- Review learning and economics together. Track inquiries, enrollments, collected payments, refunds, completion of the practical task, support time, and delivery costs. Improve weak lessons and unclear positioning before adding a bigger funnel, a premium tier, or paid advertising.
🎯 KEY TAKEAWAY
A useful learner outcome, evidence of demand, and a support model you can deliver matter more than recording more lessons.
💡 Example: A Four-Week Course Offer Test
- Learner: Independent freelancers new to a simple client-onboarding workflow
- Outcome: Build and practice using a client intake checklist and project brief
- Pilot: A short four-week learning sequence with templates and a final task
- Offer: Clear access, support, dates, pilot status, price, and refund terms
- Channel: One existing relevant audience or permission-based outreach channel
- Feedback: Ask whether students can complete the practical task and what remains confusing
- Signals: Enrollments, completion evidence, support load, refunds, and net contribution
This is a validation and delivery test, not a promise of sales or student outcomes. If interest is weak, revise the learner problem before building more content. A course’s listed price is not evidence that buyers will pay it.
✍️ Write Your One-Line Earnings Test Plan
Use this structure to make the plan easy to review:
“For [learner], I will pilot [specific learning outcome] through [small curriculum] over [period], with [access and support terms]. I will review [enrollments, task completion, feedback, collected revenue, and costs] before expanding.”
✅ Completed example
“For freelancers new to client onboarding, I will pilot a short four-week course that helps them build and practice an intake checklist and project brief. I will state access, support, price, and refund terms clearly, then review enrollments, task completion, feedback, refunds, and delivery costs before expanding.”
🚀 ACTION STEP
Before starting:
Keep the first plan focused. Build a workable process before adding more complexity.
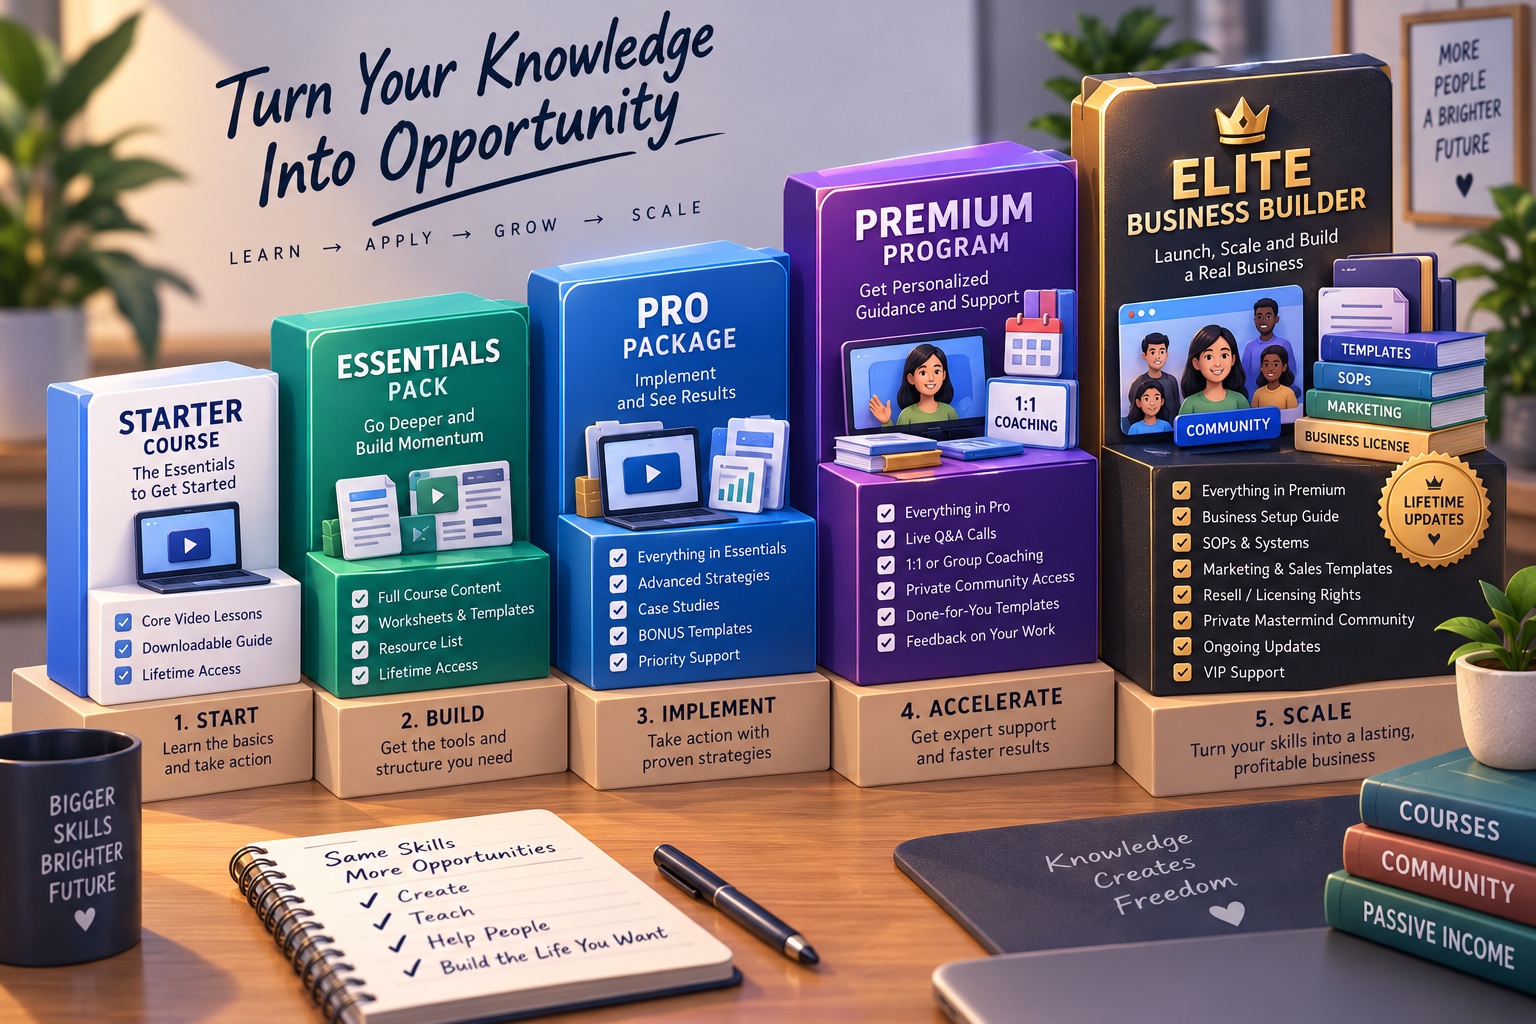
📋 Pricing & Revenue Planning Reference
Treat the existing income stages and price ranges as illustrative planning references, not verified typical results or a required timeline. Topic, audience fit, trust, conversion, refunds, and delivery costs all affect outcomes. Revenue from a launch is not automatically recurring monthly income.
💵 What Course Creators Can Earn
📊 Income Progression by Stage
🚀 Stage | 🎓 Course Status | 💰 Typical Monthly Income | ⏳ Timeline | 📌 What’s Happening |
Beginner | First course / first launch | $0–$500 | 0–3 months | Building content, validating offer |
Early Growth | Small audience + first sales | $500–$3,000 | 3–6 months | Testing pricing and messaging |
Established | Proven course offer | $3,000–$10,000 | 6–12 months | Better sales funnel + testimonials |
Scaling | Multiple launches / evergreen sales | $10,000–$50,000+ | 12–24 months | Audience growth + upsells |
Advanced | Course brand ecosystem | $50,000+/month | 2+ years | Multiple courses, team, funnels |
🎯 KEY TAKEAWAY
The stages describe possible progression, not guaranteed income or a required timeline. Use your own capital or business records to plan realistically.
📊 Key Metrics & Margin Snapshot
📈 Enrollment Revenue & Delivery Costs (Pricing Reality)
📊 What Your Course Offer Is Actually Worth
Metric | What to Record |
Offer demand | Track qualified inquiries and enrollments by channel |
Learning evidence | Review practical task completion and learner feedback |
Collected revenue | Separate paid enrollments, refunds, and pending payments |
Delivery workload | Record teaching, editing, support, and update time |
Margin and capacity | Track platform fees, affiliates, acquisition, and delivery costs |
🎯 KEY TAKEAWAY
Evaluate learning usefulness and business sustainability together. A large launch total alone does not show whether the offer works.
💸 Course Pricing Ranges
🧾 Course Pricing Ranges
💡 Course Type | 💰 Typical Price Range | 📈 Best Use Case |
📘 Mini course | $20–$99 | Intro offers, beginner topics |
🧠 Standard self-paced course | $99–$497 | Most common model |
🚀 Premium transformation course | $497–$2,000+ | High-value outcomes |
👥 Course + community / coaching | $500–$5,000+ | Deeper support |
🏢 B2B / licensing | $1,000–$10,000+ | Teams, organizations, training bundles |
🎯 KEY TAKEAWAY
Higher tiers must have useful, clearly stated differences. Model support capacity and costs before promising coaching or community access.
🧮 Check Your Project & Revenue Economics
Course contribution = collected sales − refunds, platform and payment fees, commissions, acquisition costs, and direct delivery costs.
Track production and support hours alongside contribution. Allow for ongoing updates and broader overhead when assessing profit. Do not assume a higher price preserves the same conversion rate or that a one-time launch repeats every month.
🚀 ACTION STEP
🗓️ Build a Monthly Course Revenue Snapshot
Use actual records and a sustainable plan—not projections alone—to decide what to continue.
5. What You Actually Need to Create a Course
🛠 TOOLS & RESOURCES
📷 Recording Equipment
Equipment | Best For | Cost | Priority |
Laptop Built-In Webcam | Testing your first lessons | Free | Starter only |
Standard 1080p course videos | $50-$80 | ⭐ High | |
Premium talking-head videos | $150-$200 | Medium | |
DSLR / Mirrorless Camera | High-ticket courses and polished content | $400+ | Optional |
Natural Window Light | Simple, free lighting setup | Free | 🔥 Essential |
Ring Light | Even lighting for face-to-camera lessons | $30-$60 | ⭐ High |
Softbox Kit | More professional lighting setup | $80-$150 | Optional |
Recommendation: Start with what you already have. Upgrade your camera only after sales can support it.
🎙️ Audio Equipment
Microphone | Cost | Quality | Best For |
Laptop Built-In Mic | Free | Poor | Testing only |
$50-$70 | Good | Budget courses | |
$100-$130 | Excellent | Most course creators | |
$80-$100 | Great | Professional sound | |
Rode PodMic | $100-$150 | Studio-level | Premium courses |
Critical: Audio matters more than video. Students will tolerate average video, but bad sound makes a course feel unprofessional fast.
💻 Screen Recording Software
Software | Cost | Platform | Best For |
Free | Windows / Mac / Linux | Advanced screen recording | |
Free-$12/mo | Browser / Desktop | Quick tutorials and walkthroughs | |
Free-$30/yr | Windows / Mac | Simple screen recording | |
$299 one-time | Windows / Mac | Recording + editing combined | |
$169 one-time | Mac only | Professional Mac users |
Recommendation: Start with Loom if you want easy. Start with OBS Studio if you want free and powerful.
🎬 Video Editing Software
Software | Cost | Difficulty | Best For |
Free | Easy | Quick edits and short lessons | |
Free for Mac | Easy | Simple Mac-based editing | |
Free | Medium | Serious editing without monthly cost | |
$10/mo | Easy | Quick mobile + desktop edits | |
$23/mo | Hard | Professional creators | |
$299 one-time | Medium | Mac power users | |
$299 one-time | Easy | Screen-recording courses | |
$12-$24/mo | Easy | Editing video like a text document |
Recommendation: Use DaVinci Resolve if you want a free professional editor. Use Descript if you want fast, beginner-friendly transcript editing.
🖼️ Slide Design Tools
Tool | Cost | Best For | Priority |
Free-$13/mo | Beautiful course slides and templates | 🔥 Essential | |
Free | Simple collaborative slides | ⭐ High | |
$70/yr | Traditional presentation decks | Medium | |
Free for Mac | Polished Apple-style slides | Medium | |
Free-$8/mo | Modern collaborative presentations | Optional |
Recommendation: Start with Canva or Google Slides. You do not need fancy slide software to make a useful course.
🏫 Course Hosting Platforms
Platform | Monthly Cost | Transaction Fee | Best For |
$0-$99/mo | 0% | Feature-rich free plan | |
$39-$119/mo | 0% on many plans | Beginner-friendly course setup | |
$33-$89/mo | 0% on many plans | Courses, memberships, downloads | |
$149-$399/mo | 0% | Premium all-in-one business | |
$99/mo | 0% | Community-first courses |
Best beginner pick: Thinkific if you want a free plan. Teachable if you want a polished beginner-friendly platform.
🌐 Marketplace & DIY Options
Platform | Model | Best For | Trade-Off |
Marketplace course sales | Built-in traffic | Lower pricing control | |
Paid by engagement/watch time | Creative and beginner topics | Less direct customer ownership | |
Partner-style course platform | Academic/professional courses | Harder to access | |
Sell downloads/courses directly | Simple digital products | You bring the audience | |
Self-hosted course site | Full control | More technical setup | |
Memberships and private content | Recurring revenue | Requires more setup |
Simple rule: Use a marketplace if you need built-in traffic. Use your own platform if you want more control, better branding, and higher long-term profit.
💳 Payment Processing
Tool | Purpose | Cost | Best For |
Card payments, checkout, subscriptions | 2.9% + $0.30 | Most course businesses | |
Familiar buyer checkout option | Similar transaction fees | Extra trust and convenience | |
Built-In Platform Payments | Payments handled inside your course platform | Varies | Simplest setup |
Recommendation: Let your course platform handle payments at first. Add Stripe or PayPal directly once you sell through your own website or funnel.
✅ Beginner Stack ($0-$50/month)
Need | Tool | Cost |
Course hosting | Free plan | |
Screen recording | Loom or OBS Studio | Free |
Slide design | Free | |
Video editing | Free | |
Email list | Free up to 1,000 subscribers | |
Payments | Built into platform / Stripe | Pay per transaction |
Total to launch: $0-$50/month
Best for: Testing your first course idea without taking on unnecessary software costs.
🚀 Intermediate Stack ($100-$200/month)
🏆 Professional Stack ($300+/month)
Need | Tool | Estimated Cost |
All-in-one course platform | $149-$399/mo | |
Creative software | $55/mo | |
Advanced email marketing | $29+/mo | |
Community platform | Varies | |
Webinars / live training | $15+/mo |
Best for: Full-time course creators, coaches, and experts selling premium programs.
💡 Essential Tip: Do not spend heavily on tools before you validate the course. Free tools are enough to outline, record, publish, and sell your first version. Upgrade only when the tool helps you save time, improve student experience, or generate more revenue.
6. Course Creation Formula (Step-by-Step)
Use this seven-step workflow to validate demand, design a clear transformation, produce efficiently, and launch a course students can understand and complete.
🎯 Step 1: Validate Your Idea
Before creating anything, confirm people will actually buy the course.
💳 Method 1: Pre-Sell
- Create a compelling sales page
- Offer an early-bird discount, such as 30% off
- Aim for 10 sales before moving forward
- If no one buys, pivot the topic
📋 Method 2: Survey Your Audience
- Ask your email list or social media audience
- Question: “What’s your #1 struggle with [topic]?”
- Question: “Would you pay $X for a course on [solution]?”
- Look for repeated problems or patterns
🔍 Method 3: Test with Free Content
- Create 3–5 YouTube videos or blog posts
- Monitor views, comments, saves, and questions
- If interest is strong, turn the topic into a course
- Use that audience for your launch
🛠️ Method 4: Competitor Research
- Search Udemy and Skillshare for your topic
- High enrollment usually means validated demand
- Read reviews to find gaps you can fill
- Create a better, more specific version
⚠️ Critical Mistake: Spending 3 months creating a course nobody wants. Validate first, create second.
📝 Step 2: Outline Your Curriculum
Use the Transformation Framework:
- Where is the student now? Point A
- Where will they be after the course? Point B
- What journey takes them from Point A to Point B?
💡 Ideal Lesson Length
- 5–12 minutes per lesson is ideal
- Short lessons are easier to watch, finish, and revisit
⏱️ Course Length Options
Course Type | Length | Lesson Count |
Mini Course | 30–90 minutes | 3–10 lessons |
Standard Course | 2–4 hours | 15–25 lessons |
Premium Course | 6–10 hours | 30–50 lessons |
Signature Course | 15+ hours | 50+ lessons |
📝 Course Structure Template
Module 1: Foundation & Mindset
- Lesson 1: Welcome & what to expect
- Lesson 2: Common misconceptions
- Lesson 3: Success mindset
- Lesson 4: Tools you’ll need
Module 2: Core Skill #1
- Lesson 5: Fundamental concept
- Lesson 6: Step-by-step process
- Lesson 7: Common mistakes
- Lesson 8: Practice exercise
Module 3: Core Skill #2
- Lessons 9–12: Repeat structure
Module 4: Core Skill #3
- Lessons 13–16: Repeat structure
Module 5: Advanced Strategies
- Lessons 17–19: Next-level tactics
Module 6: Implementation & Next Steps
- Lesson 20: Putting it all together
- Lesson 21: Troubleshooting
- Lesson 22: Scaling & growing
- Lesson 23: Resources & conclusion
🎥 Step 3: Create Your Content
Choose the simplest lesson format that teaches the outcome clearly, then batch production to protect momentum and consistency.
🧰 Filming Setup
- Use a clean, simple background
- Place the camera at eye level
- Face a window or use a ring light
- Remove clutter from the frame
🎙️ Recording Tips
- Record in a quiet space
- Turn off AC, fans, and background noise
- Use an external microphone
- Test audio before every session
- Record in short segments
- Keep water nearby
🎥 On-Camera Presence
- Smile and show energy
- Speak to one person, not “everyone”
- Use natural hand gestures
- Look into the camera
- Re-record mistakes instead of fixing everything later
🧠 Batch Recording Strategy
Week | Task |
Week 1 | Record Module 1 |
Week 2 | Record Module 2 |
Week 3 | Record Module 3 |
Week 4 | Edit everything |
Week 5 | Upload and finalize |
🖥️ Screen Recording Tips
- Close unnecessary tabs and programs
- Zoom in so text is readable
- Slow down your mouse movement
- Narrate what you are doing
- Use a script or bullet points
- Record system audio when showing software
📑 Slide-Based Lessons
Do:
- ✅ One idea per slide
- ✅ Large readable fonts, ideally 30pt+
- ✅ Minimal text
- ✅ High-quality images
- ✅ Consistent branding and colors
Don’t:
- ❌ Use walls of text
- ❌ Use tiny fonts
- ❌ Use cheesy clip art
- ❌ Read slides word-for-word
- ❌ Add too many animations
❌ Avoid this: Record one lesson, edit it, upload it, then repeat. That workflow is much slower.
✂️ Step 4: Edit for Engagement
Editing makes the course easier to watch, understand, and finish.
🛠️ Essential Edits
- Cut dead air, long pauses, mistakes, and filler words
- Add a branded 5–10 second intro/outro
- Insert B-roll, screenshots, examples, or graphics
- Add captions for accessibility and engagement
- Add chapter markers for easier navigation
- Normalize audio for consistent volume
✨ Optional But Valuable
- Low-volume background music
- Text overlays for key points
- Simple transitions between sections
- Animated graphics for concepts
🛠️ Editing Timeline
Lesson Length | Beginner Editing Time | Experienced Editing Time |
10-minute lesson | 30–60 minutes | 15–30 minutes |
💡 Perfection Paralysis: Good enough beats perfect. Your first course will not be flawless, but you can always update it later.
📄 Step 5: Create Supporting Materials
Supporting resources make the course feel more valuable and help students take action.
📓 Workbooks & Worksheets
- One per module
- Practice exercises
- Reflection prompts
- Actionable steps
- Canva templates when useful
☑️ Checklists
- Step-by-step implementation
- One-page quick reference
- Easy to save, print, or reuse
📝 Templates
- Swipe files
- Spreadsheets
- Documents
- Fill-in-the-blank resources
- Time-saving examples
🔗 Resource Lists
- Tools mentioned in the course
- Links to software
- Recommended reading
- Discount codes if available
👥 Community Access
- Private Facebook group
- Discord server
- Circle community
🖥️ Step 6: Set Up Your Course Platform
Use this tab as a launch checklist.
☑️ Platform Setup Checklist
- ✅ 🎯 Course title — clear and benefit-focused
- ✅ ✍️ Course description — focused on transformation, not just features
- ✅ 🧭 Module organization — logical flow
- ✅ 🎥 Lesson uploads — all videos uploaded and organized
- ✅ 📎 Downloadable resources — PDFs attached to lessons
- ✅ 💳 Pricing set — include payment plans if needed
- ✅ 🛍️ Sales page created — compelling copy and testimonials
- ✅ 📧 Email sequences — welcome, onboarding, engagement
- ✅ 🎓 Certificate of completion — optional but nice
- ✅ 👀 Preview lessons — 1–2 free lessons
- ✅ 📱 Mobile optimization — test on phone
⏱️ Estimated setup time: 8–15 hours for your first course.
💰 Step 7: Create Your Sales Page
Your sales page should clearly explain the transformation, build trust, and make the buying decision easy.
🛒 Sales Page Structure That Converts
Section | Purpose |
1. Headline | Clear promise, such as “Master [Skill] in [Timeframe]” |
2. Sub-headline | Explain who the course is for |
3. Video or Image | Build trust with a course intro or strong visual |
4. The Problem | Describe the student’s current struggle |
5. The Solution | Show how your course solves the problem |
6. What They’ll Learn | List modules, takeaways, and outcomes |
7. About You | Share credentials, results, or your story |
8. Social Proof | Add testimonials, results, or student numbers |
9. Curriculum Details | Include module breakdown, lessons, and time commitment |
10. Bonuses | Highlight extra resources included |
11. Pricing & CTA | Show price, payment options, guarantee, and button |
12. FAQ | Answer objections and common questions |
13. Final CTA | End with a strong “Join Now” button |
💡 Headline Examples
- 🎯 Master [Skill] in [Timeframe]
- 💼 Build a $5K/Month Freelance Business
- 🚀 Launch Your First Profitable Online Course
- 🧠 Learn [Skill] Without Starting From Scratch
7. How to Sell Your First Course
Creating the course is only half the job.
Now you need to help the right people understand: Who the course is for → What problem it solves → What they will learn → Why they should trust it → What to do next
For your first course, keep the sales system simple. You do not need paid ads, complicated funnels, dozens of social platforms, or an affiliate army.
You need: One clear offer + One audience + One sales page + One launch plan + Real feedback
Use the seven tabs in order for your first launch, then reopen the phase you need. Chapter 6 covers course production; this chapter takes your working course or clearly disclosed pilot from offer to enrollment, student delivery, and improvement.
🎯 PHASE 1 — Define the Offer and Smallest Useful Pilot
📋 Steps 1–4: Make the promise specific, state boundaries, and choose a version you can deliver responsibly.
✅ Ready to move on: You can explain who it helps, what students will practice, what is included, and when the pilot will be delivered.
🎯 Step 1: Define the Learner, Problem, and Practical Outcome
Before promoting the course, make sure you can explain it clearly.
You should be able to answer:
Who is it for? Be specific.
What problem does it solve? Describe the frustration or obstacle the learner is facing now.
What will the learner be able to do? Focus on a realistic learning outcome.
Write these three answers in your launch brief so the course, sales page, and messages use the same promise.
🧪 Example: Turn a Broad Topic Into a Clear Offer
📋 REAL-WORLD EXAMPLE
Instead of:
“Anyone who wants to learn photography.”
Try:
“Beginner Etsy sellers who want to take better product photos with their phone.”
Practical outcome:
“By the end of the course, students will be able to photograph, edit, and prepare a consistent set of product images for an online shop.”
📦 Step 2: State Exactly What Is Included
List:
- Lessons
- Worksheets
- Templates
- Exercises
- Community access, if offered
- Support, if offered
- Access period
- Any bonuses
State the access period and support arrangements rather than leaving buyers to assume them.
🚫 Set the Boundaries Before You Sell
Set expectations about:
- Coaching
- Done-for-you work
- Certifications
- Guaranteed results
- Topics outside the course scope
If the offer takes several paragraphs to explain, simplify it before you start promoting it.
🔎 Step 3: Choose What Your Pilot Will Test
Your first launch does not need to be your final polished course.
A pilot version can help you test:
- Whether people want the topic
- Whether the outcome is clear
- Whether the lessons make sense
- Where students get stuck
- How much support they need
- Whether the price and format fit the audience
A pilot is a small early version tested with real learners. Record which learning and buying questions you need answered; do not judge it only by production polish.
🧪 Step 4: Set a Small Pilot Scope and Delivery Schedule
- A smaller student group
- Fewer polished lessons
- Live or scheduled support
- Worksheets and exercises
- A defined start and end date
- Clear disclosure that it is an early version
The goal is to learn before spending months polishing something nobody has purchased.
Before accepting payment, disclose pilot status, what is already available, delivery dates, price, access, support, and refund or cancellation terms. If interest is still uncertain, test a sample lesson and talk to likely learners before committing to a paid pilot.
Validate usefulness before optimizing production value.
🚀 Your First 5 Actions
🚀 ACTION STEP
Keep the first week focused on a clear offer and a usable learner path—not buying more tools or setting up ads.
👥 PHASE 2 — Listen to Learners and Gather Interest
📋 Steps 5–7: Choose a relevant audience, collect genuine questions, and give interested people a working signup path.
✅ Ready to move on: You have learner feedback, one audience source, and a tested waitlist; signups are treated as interest, not guaranteed sales.
👥 Step 5: Choose One Warm Audience Source
You do not need thousands of followers to test a course.
Start with people already interested in the problem you solve.
That may include:
- Email subscribers
- Existing social followers
- YouTube viewers
- Blog readers
- Community members
- Previous clients
- People who downloaded a related resource
- Relevant professional contacts
A warm audience already has some relevant interest or connection with you. Choose one source from the list, not all of them. Use permission-based contact and follow community rules; a previous connection is not automatic permission for marketing emails.
💬 Step 6: Ask Potential Students About Their Real Obstacles
Before launch, collect real questions.
Ask potential students:
- What is hardest about this topic?
- What have you already tried?
- What usually stops you?
- What would make a course useful?
- What would you want explained more clearly?
- What would make you hesitate to buy?
Keep a short note of repeated questions and the learner’s actual wording. Listen for both the learning need and reasons they may not buy.
📝 Use the Answers to Improve the Offer
Use the answers to improve:
- Course positioning
- Lessons
- FAQs
- Examples
- Sales-page wording
- Support materials
Do not invent objections when your audience can tell you what they actually are.
📧 Step 7: Create and Test a Simple Waitlist
Give interested people a simple place to raise their hand.
Your waitlist page only needs:
- Course Name
- Who It's For
- What They'll Learn
- Expected Launch Timing
- Email Signup
CTA means call to action: the next step you ask someone to take.
“I'm building a course that helps [audience] achieve [outcome]. Join the waitlist and I'll let you know when enrollment opens.”
Do not treat the size of the waitlist as proof of future sales.
It is simply an early signal of interest.
Check that the form submits, the signup reaches your list, and any confirmation tells people what to expect. Explain what emails they are signing up for and make it easy to unsubscribe.
🛒 PHASE 3 — Build a Clear Buying Decision and Working Checkout
📋 Steps 8–11: Explain the course accurately, publish transparent terms, and test the complete payment-to-access path.
✅ Ready to move on: The page matches the product and a test student can enroll, receive confirmation, log in, and find the starting lesson.
✍️ Step 8: Write the Outcome and Curriculum Sections
Your sales page should help someone decide whether the course is right for them.
It does not need to be overly complicated.
Build the opening in this order:
Sales-page section | What to write |
1. Headline | State the main outcome. |
2. Who It Is For | Help the right student recognize themselves. |
3. The Problem | Describe the situation they are trying to improve. |
4. The Course Outcome | Explain what the course is designed to help them learn or complete. |
5. What Is Included:
Show:
- Modules
- Lessons
- Exercises
- Templates
- Bonuses
- Support
Use the actual pilot or course scope—not hoped-for future features. Keep the promised result achievable and avoid unsupported income or career guarantees.
🧭 Step 9: Explain the Format, Access, and Prerequisites
6. How the Course Works:
Explain:
- Format
- Access
- Approximate time commitment
- Prerequisites
- Support level
Tell students what they need before starting and how much time to allow for practice, not just watching lessons.
🧑🏫 Explain Why You Can Teach This Material
7. Instructor Section:
Explain why you are qualified to teach the material.
Use relevant:
- Experience
- Training
- Examples
- Work
- Personal experience
Do not exaggerate credentials.
🌟 Use Only Legitimate Social Proof
8. Social Proof:
If you have legitimate feedback or pilot results, include them with permission.
If you do not have testimonials yet, skip the section.
Do not manufacture them.
Confirm consent for the specific quote and where it will appear. Describe pilot context honestly and do not imply that one student’s result is guaranteed for everyone.
💰 Step 10: Publish the Price, Terms, FAQ, and Enrollment Button
9. Price + Terms:
Clearly state:
- Price
- Payment options
- Access period
- Refund or cancellation terms
- Any important conditions
10. FAQ: Answer genuine questions.
11. Call to Action:
Give one obvious next step:
Enroll
If offering installments, show the total commitment and schedule. Ensure sales-page dates, access, support, and refund terms match checkout and the delivery plan. Check your platform’s current selling rules and applicable requirements rather than assuming another creator’s terms fit your offer.
💳 Step 11: Test Checkout and Student Access Before Launch
Checkout should be simple and predictable.
Before launch, test:
Run a test purchase:
Go through the experience yourself.
After payment, ask:
“If I were a student, would I immediately know what to do next?”
If not, fix it before launch.
Use the platform’s test mode if available; otherwise follow its test-purchase process. Prepare the welcome message and first lesson now, using Phase 5 as the checklist. Verify each sales-page enrollment button reaches the correct offer.
📅 PHASE 4 — Prepare Messages and Open Enrollment
📋 Steps 12–16: Draft a useful six-message sequence, explain student fit, check readiness, and run a simple launch through your chosen channel.
✅ Ready to move on: Enrollment is open under the stated terms, the learner path works, and questions and results are being recorded.
✉️ Step 12: Draft Messages That Teach the Problem and Opportunity
Do not announce the course once and assume everyone saw it.
Use several messages with different purposes.
Launch message | Purpose |
Message 1 — The Problem | Teach something useful about the problem your course solves. Do not pitch heavily. |
Message 2 — The Opportunity | Show what becomes easier when the learner understands the skill or process. |
Schedule these before opening enrollment so the launch starts with useful context. Use the learner questions gathered in Phase 2.
📣 Step 13: Introduce the Course and Announce Enrollment
Message 3 — Introduce the Course:
Explain:
- Who it is for
- What it teaches
- What is included
- When enrollment opens
🚀 Message 4 — Open Enrollment Clearly
Clearly state that the course is available.
Include:
- Course outcome
- Curriculum
- Price
- Enrollment link
- Important dates or terms
Send this only once the offer is available and checkout has passed testing.
❓ Step 14: Answer the Questions Buyers Actually Ask
Message 5 — Answer Questions:
Address common concerns such as:
- Is this for beginners?
- What do I need before starting?
- How much time will it take?
- How long do I have access?
- What support is included?
- What is the refund policy?
Keep answers consistent with the sales page and add genuinely repeated questions to the FAQ.
⏰ Message 6 — Use Only a Real Final Reminder
💡 PRO TIP
If enrollment genuinely closes or a real launch term expires, remind people before the deadline.
Do not create fake scarcity.
Each message should help someone make an informed decision—not pressure the wrong person into buying.
🚦 Step 15: Help Learners Check Whether the Course Fits
Good selling includes telling some people not to buy.
Clearly Explain:
This course is for you if...
- You are at the intended skill level
- You want the stated outcome
- You can meet the prerequisites
- You are willing to complete the exercises
This course may not be for you if...
- You need advanced material the course does not cover
- You need personalized professional advice
- You expect guaranteed financial or career results
- You want done-for-you work
- You cannot meet required prerequisites
That creates better-fit students and clearer expectations.
Use these boundaries in the sales page, replies to questions, and launch messages. Do not stretch the promise to win an unsuitable enrollment.
✅ Complete the Launch Readiness Check
Fix failed checks before opening enrollment; clear teaching and working access matter more than perfect visuals.
📅 Step 16: Run a Manageable Launch Window
For your first course, a short launch window can keep the process manageable.
Day | Main Goal |
Day 1 | Open enrollment |
Day 2 | Teach something useful related to the course |
Day 3 | Explain the curriculum and student outcome |
Day 4 | Answer common questions |
Day 5 | Share legitimate feedback or examples |
Day 6 | Explain who should—and should not—enroll |
Day 7 | Final reminder if enrollment is actually closing |
You do not have to post everywhere every day.
Choose the channels where your audience already pays attention.
This seven-day schedule is an example, not a required deadline or sales forecast. Keep answering relevant questions, check enrollments and access issues, and close only when the stated enrollment window genuinely ends.
👋 PHASE 5 — Deliver, Support, and Learn From the First Students
📋 Steps 17–21: Make the starting point obvious, create early progress, observe use, and collect feedback you can act on.
✅ Ready to move on: Students have access and support, practical progress has been reviewed, and confusing lessons or expectations are documented.
👋 Step 17: Onboard Every New Student With a Clear Starting Point
The sale is not the finish line.
It is the beginning of the learner experience.
Immediately after purchase, provide:
Provide:
- Welcome message
- Login instructions
- Where to start
- Course navigation
- Required materials
- Support instructions
- Community access, if included
- Expected course pace
- Important dates
Onboarding means helping a new student access the course and begin. Check the first cohort’s access promptly, explain how to get help, and respond within the support arrangements you actually offered.
⚡ Step 18: Give Students an Achievable First Win
The first lesson should help students make progress quickly.
Avoid opening with 45 minutes of:
- Your life story
- Course housekeeping
- Theory
- Long disclaimers
Get them moving.
Early momentum makes the course feel usable.
Choose a small task that directly supports the course outcome. State the task, show an example, and explain how students can check their work. Keep necessary safety or scope guidance concise and relevant; do not omit it for speed.
📚 Step 19: Watch Where Students Progress or Get Stuck
Your first students are giving you valuable information.
Pay attention to:
- Questions they ask repeatedly
- Lessons they replay
- Lessons they skip
- Exercises they struggle with
- Where progress slows
- Where students stop
- Resources they request
- What they say is especially helpful
Use available course analytics and direct questions together. Completion data alone does not prove someone can perform the skill; review the course’s practical task or milestone where relevant.
🛠️ Fix Confusion Before Adding More Lessons
Do not immediately respond by adding more content.
Sometimes the solution is:
- Shorter explanation
- Better example
- Clearer instructions
- Different lesson order
- Better worksheet
- Removing unnecessary material
More content is not always better.
💬 Step 20: Collect Specific Learning and Buying Feedback
Do not ask only:
“Did you like the course?”
Ask questions that help you improve it.
- What did you want to accomplish?
- Which lesson was most helpful?
- Where did you feel confused?
- What felt unnecessary?
- What did you wish was included?
- What task or skill can you now complete more confidently?
- What almost stopped you from enrolling?
- Would you recommend the course to someone like you? Why or why not?
With permission, legitimate feedback can later support your sales page.
Never alter feedback in a way that changes its meaning.
Invite replies at a meaningful checkpoint or after the practical task, not only at the end. Separate feedback for improving the course from permission to use a quote in marketing.
🧪 Step 21: Run Your First 10-Student Learning Challenge
Instead of focusing immediately on revenue milestones, focus on serving your first small group well.
Your goal is to learn:
Students 1–3 — Test Clarity:
Ask:
- Did they understand the offer?
- Was onboarding clear?
- Could they follow the lessons?
This is a learning framework, not a promise of ten enrollments. Start with the students you actually have and keep commitments manageable.
🔧 Students 4–6 — Improve the Course
Look for:
- Repeated questions
- Weak lessons
- Missing examples
- Confusing exercises
Use these patterns to choose the next clarification, worksheet fix, or example.
🧭 Students 7–10 — Test the System
Evaluate:
- Sales process
- Checkout
- Support workload
- Student progress
- Feedback collection
- Delivery consistency
After 10 students, you should understand the course much better than you did before launch.
📊 PHASE 6 — Evaluate Learning, Economics, and the Next Decision
📋 Steps 22–25: Review the dashboard, distinguish revenue from contribution, and decide whether the course deserves another launch.
✅ Ready to move on: Your decision is supported by learner feedback, actual payments and costs, and a realistic view of delivery workload.
📊 Step 22: Review the Full Launch and Learning Dashboard
After the launch, review the complete picture.
Do not judge it only by gross revenue.
Track:
Metric | What It Tells You |
Qualified Interest | Whether the audience cared about the offer |
Waitlist Signups | Early interest |
Sales Page Visits | How many people considered the offer |
Enrollments | Buyers |
Collected Revenue | Money actually received |
Refunds | Whether expectations or fit may be weak |
Support Time | How demanding delivery is |
Lesson Completion | Whether students are progressing |
Student Questions | Where the material may be unclear |
Feedback | What should improve |
Launch Costs | What it took to acquire and serve students |
Record the figures in one sheet for a consistent review period.
🧮 Step 23: Separate Course Contribution From Revenue and Profit
Use:
Collected Revenue − Refunds − Platform Fees − Payment Fees − Promotion Costs − Affiliate Commissions − Direct Delivery Costs = Course Contribution
Also track your time.
A launch can produce revenue and still be inefficient.
Review audience fit, learning evidence, costs, and workload together. Course contribution is what remains after these direct costs; it is not automatically take-home profit. Account for broader overhead and taxes when assessing profit, and log production, marketing, support, and update time. Count each refund or fee once and distinguish collected payments from amounts still due.
📋 Step 24: Complete Your First-Launch Review
Ask:
- Did the right people enroll?
- Did the sales page accurately describe the course?
- What objections appeared repeatedly?
- Which launch messages created interest?
- Where did students get stuck?
- Which lessons were strongest?
- What support took the most time?
- Were refund requests tied to the same problem?
- Did students reach the intended learning milestone?
- What should I remove?
- What should I clarify?
- What should I improve before selling again?
Write the three most important findings, the biggest bottleneck, and one next action with an owner and review date. Look for repeated patterns rather than changing the course for every isolated comment.
🚦 Step 25: Choose Whether to Keep, Improve, Reposition, or Stop
After the first launch, choose one of four paths.
KEEP:
The offer is understandable, students are getting value, and the workload is manageable.
Run another launch with small improvements.
Use the options below when the evidence does not yet support a simple relaunch.
🛠️ Improve the Biggest Weak Point
People are interested, but something needs work.
Possible problems:
- Weak sales-page messaging
- Confusing lessons
- Poor onboarding
- Too much content
- Missing examples
- Weak audience fit
- Pricing mismatch
Fix the biggest problem first.
🔄 Reposition the Audience or Promise
The course may be useful, but the audience or promised outcome is wrong.
You may need to change:
- Target learner
- Course promise
- Format
- Curriculum
- Offer structure
🛑 Stop an Offer With Too Little Evidence
If there is little evidence of demand after reasonable validation and testing, do not keep adding lessons and advertising spend indefinitely.
Record what you learned and reconsider the problem you are solving.
The goal of the first launch is not to prove that your original idea was perfect. It is to discover what is worth improving.
🔄 PHASE 7 — Improve the Product and Repeat What Works
📋 Steps 26–28: Keep the course accurate, fix the biggest proven bottleneck, and repeat a sustainable launch-and-delivery cycle before expanding.
✅ Ready to move on: Updates are tested, existing obligations are covered, and the next launch or stop decision fits actual demand and capacity.
🔧 Step 26: Update the Course Around the Biggest Proven Problem
Turn the Phase 6 decision into a small improvement plan:
- Clarify confusing instructions and recurring FAQ questions.
- Fix the weak example, lesson order, worksheet, or onboarding step identified by students.
- Check software demonstrations, links, downloads, and prerequisites for changes.
- Review actual support demand before promising more coaching or community access.
- Add a lesson only when it fills a genuine gap in the learning outcome.
- Re-test changed content and the purchase-to-access path before selling again.
Record what changed and tell existing students about updates that affect their learning. Keep previously promised access and support obligations in view.
🔁 Step 27: Relaunch With a Repeatable Delivery and Review Cycle
Use this cycle:
Validate → Offer → Waitlist → Launch → Enroll → Onboard → Teach → Listen → Improve → Relaunch
Before the next enrollment window:
If the decision is to stop, record what you learned and finish or resolve existing delivery obligations instead of running another promotion.
🎯 Step 28: Keep Growth Focused on Student Value
Your first objective is not:
“Build an automated course empire.”
It is:
“Prove that I can help the right students achieve a useful learning outcome—and that some of them are willing to pay for that experience.”
- Make the offer clear.
- Launch to a real audience.
- Serve the first students well.
- Listen carefully.
- Track what happens.
- Fix the biggest problems.
- Then sell it again.
Build proof first. Build the funnel second.
⭐ ADVANCED STRATEGY
Once that works, you can decide whether you actually need:
- Evergreen funnels
- YouTube
- Affiliates
- Partnerships
- Webinars
- Paid advertising
- Additional courses
Do not add a marketing channel because other course creators use it.
Add one when you can name the specific problem it solves.
Keep these as optional growth choices, not beginner prerequisites. Maintain a reusable launch brief, message drafts, checkout checklist, student-feedback log, and review dashboard so expansion follows evidence rather than guesswork.
✅ Check Whether an Evergreen Funnel Is Actually Ready
Do not rush into automation after your first few sales.
An evergreen funnel makes more sense when:
- The course has already attracted paying students
- The positioning is clear
- The sales page converts some qualified visitors
- Student expectations match the product
- Refunds are manageable
- The course is delivering useful outcomes
- You know which questions buyers ask
- You know where qualified traffic can come from
Evergreen means ongoing enrollment rather than only a fixed launch window. Confirm these signals before replacing hands-on learning with automation.
⚙️ Automate a Sales Path That Already Works
Then you can begin automating parts of the process:
Helpful Content → Email Signup → Nurture → Course Offer → Enrollment → Onboarding
Automation should scale something that already works.
It should not hide the fact that the offer has not been validated.
Nurture means useful follow-up messages that help subscribers understand the problem and decide whether the course fits. Test signup, emails, enrollment, onboarding, and exclusion of existing buyers before switching automation on. Review results and student questions regularly; automation does not remove support or update work.
📣 Add a Channel Only for a Specific Reason
Start with one audience source.
Get comfortable with it.
Then add another channel only when you have a reason.
For example:
Channel | When it fits |
YouTube | Useful when people actively search for tutorials related to your course. |
Search or Blog Content | Useful when your audience searches for detailed answers. |
Short-Form Social Content | Useful for awareness, demonstrations, and reaching new audiences. |
Pinterest | Can fit visually searchable, evergreen topics. |
Affiliates | Can help after the course, checkout, attribution, terms, and economics are established. |
Paid Advertising | Consider only after you understand your conversion economics and can afford to test without depending on immediate returns. |
Partnerships, webinars, or additional courses are also options—not obligations. Name the bottleneck, set a small test budget or time limit, and review student fit and contribution before expanding.
💡 Pro Tip: More Traffic Is Not the First Fix
💡 PRO TIP
More traffic does not fix a weak offer. It sends more people to it.
Repair unclear positioning, unmet expectations, weak lessons, or an unworkable support load first. Add distribution only when it can bring appropriate learners to a course and delivery system that already work.
8. Build Trust & Improve Results
Use this section to build proof before you scale, showcase your course, stay recognizable and honest, support students like a professional, use ready-made templates, master teaching hooks, check every lesson before it goes live, choose a specialty and pricing path, and avoid the mistakes that cost new course creators sales, refunds, and momentum. Chapter 7 shows you how to sell your first course; this chapter helps you earn student trust and keep improving. Sales are not automatic, and results vary with audience fit, teaching quality, and whether people actually buy.
⭐ ADVANCED STRATEGY
1️⃣ Build Proof Before You Scale 📁
Non-negotiable
Buyers cannot see inside your course before they enroll. Build real evidence that your lessons work and that you can deliver before you invest in a full production or a bigger launch.
🛡️ Why Proof Builds Trust
Strangers pay for outcomes they believe you can deliver.
Why this matters:
- A completed pilot shows the course can teach the promised result
- Real student feedback finds confusing lessons before a public launch
- Sample lessons let buyers judge your teaching style
- Early testimonials (with permission) carry more weight than your own claims
- Demand evidence protects you from months spent on a course nobody wants
☑️ Minimum Proof Checklist
- One learner type and one practical outcome in a sentence
- A short outline with a final task students can complete
- At least one free sample lesson or preview
- A small pilot group with written feedback
- Evidence of demand (pre-sales, survey replies, or interviews)
- Permission to quote any testimonial
- Clear access, support, and refund terms
🛡️ How to Create Proof Before You Scale
📝 Option 1: Publish Free Content First
Test your teaching before you build the full course.
What to do:
- Publish three to five helpful videos, posts, or lessons
- Track views, comments, saves, and questions
- Note which topics people ask you to teach in more depth
- Share the best one as a free sample lesson
👥 Option 2: Run a Small Pilot Cohort
Teach a handful of real learners.
What to do:
- Recruit a small group from one relevant, permission-based channel
- Deliver a short sequence with a final practical task
- Collect specific feedback on comprehension and completion
- Set support hours and boundaries up front
🎁 Option 3: Pre-Sell or Offer Early Access
Check willingness to pay before recording everything.
What to do:
- Create a simple sales page describing the outcome and delivery dates
- Offer a clearly labeled early-access price
- Be transparent about what is finished and what is coming
- Refund promptly if you cannot deliver as promised
💡 PRO TIP
A pilot is a teaching test, not a launch. Judge it on whether students finished the practical task and what stayed confusing, not only on how many paid.
🤝 Option 4: Learn With Peers and Mentors
Other teachers can sharpen your outline.
What to do:
- Ask a beginner to review your outline and first lesson
- Join creator communities and compare course structures
- Have a subject-matter peer check accuracy
- Interview a few likely learners about their real problem
Avoid:
- Fake testimonials or inflated enrollment numbers
- Copying another creator's course content
- Treating social likes as proof of willingness to pay
2️⃣ Showcase Your Course Like a Pro 🗂️
🖼️ What to Include in Your Course Showcase
What to Show | Why It Matters |
Clear sales page with a specific outcome | Tells buyers who it is for and what they will be able to do |
Curriculum overview | Shows modules, lessons, lengths, and the final task |
Free preview lessons | Lets buyers judge your teaching and audio quality |
Student testimonials (with permission) | Social proof from real learners |
Before-and-after examples | Shows what students can produce |
Instructor background | Explains why you are qualified to teach this |
Refund, access, and support terms | Reduces purchase risk and builds trust |
Keep it tight:
- Lead with the outcome, not the number of lessons
- Show your strongest preview lesson first
- Date-stamp your content and note the last update
- Remove unverified results or exaggerated claims
🛡️ Where to Showcase Your Course
Place | Best For |
Course platform sales page | Checkout, curriculum, and previews in one place |
Simple landing page or website | Owning your audience and email signups |
YouTube or blog sample lessons | Free discovery and trust-building |
Email list | Warm audience that converts better than cold traffic |
Social profile and pinned post | Sending followers to your free sample or waitlist |
Protect your students:
- Never publish student names, work, or results without permission
- Use original or properly licensed materials
- Link to your privacy and refund policies
- Keep payment details inside your platform's checkout
💡 PRO TIP
Offer one or two free preview lessons that teach something real, ideally a quick win. A buyer who has already achieved something small is easier to convince than one reading a promise.
3️⃣ Be Recognizable and Honest ✨
Trust is built by being clear about the promise and honest about the limits.
🎨 Make Your Course Instantly Recognizable
- Write the promise in one sentence, such as “Build a client intake checklist in four weeks”
- Name the learner, the starting point, and the result
- Use the same title, visuals, and tone across the sales page, lessons, and emails
- Add personality: share real stories, honest mistakes, and your own frameworks
- Use consistent lesson structure so students know what to expect
Why it works:
- Buyers understand the offer in seconds
- Your teaching style becomes a differentiator, since information is everywhere
- Consistency makes the course easier to market and update
🧱 Core Principles
- Teach one outcome: Narrow focus beats a comprehensive encyclopedia
- Content over production: Clear teaching and usable steps matter more than studio polish
- Define the learner: Even for intermediate students, define jargon and do not assume knowledge
- Make action easy: Every lesson should end with something students can do
- Improve from feedback: Student questions are your roadmap
🤝 Be Honest With Students
Do:
- State who the course is for and who it is not for
- Describe results as possible outcomes, not guarantees
- Disclose affiliate links and sponsored tools
- Share your real experience and credentials
- Note pilot status and delivery dates if selling before completion
Avoid:
- Income, career, or learning-result promises you cannot support
- Fake scarcity, fake testimonials, or inflated enrollment numbers
- Implying you hold credentials you do not have
🔐 Respect Rights and Privacy
Do:
- Use original, licensed, or properly attributed materials
- Get consent before using testimonials or student work
- Stay within your expertise on health, tax, legal, and financial topics
- Check laws and platform rules that apply to your topic and location
Avoid:
- Copying another creator's slides, templates, or lessons
- Sharing student information without consent
- Making medical, legal, or financial claims without proper qualifications
4️⃣ Support Students Like a Professional 💼
Professional course creators feel reliable, responsive, and organized.
💬 Clear, Prompt Communication
Do:
- Send a welcome email with access instructions and expectations
- Publish support hours and a realistic response time
- Answer common questions once in an FAQ or community post
- Announce updates and changes to the course
- Keep refund and access terms easy to find
Avoid:
- Promising unlimited personal support you cannot deliver
- Ignoring stuck students until they ask for a refund
- Changing pricing or terms without notice
- Hiding the refund policy
🔁 Handling Questions, Complaints & Refunds
Do:
- Thank students for feedback and fix the lesson when it is valid
- Follow your stated refund policy consistently
- Review refund reasons for patterns, not blame
- Keep community rules and moderation clear
Prevent problems by:
- Setting accurate expectations on the sales page
- Including a quick win in the first 30 minutes
- Adding checkpoints that show students their progress
🟢 Follow a Student Support Rhythm
When | What to Do |
At enrollment | Send a welcome message with access, schedule, and how to get help |
First week | Check that students can log in and finish the first quick win |
Weekly | Answer questions within your stated support window |
Midway | Ask for short feedback and check who has stalled |
At completion | Send a thank-you and a testimonial request |
Quarterly | Review questions, refresh outdated lessons, and update the FAQ |
⏱ Keep Support Sustainable
- Batch support into set hours, such as 30–60 minutes per week for a community
- Use an FAQ and templates for repeat questions
- Track common confusion points to improve lessons
- Pause enrollment if you cannot support more students
- Stay realistic: support time is part of the course's real cost
📝 QUICK NOTE
State your support hours and response time in the course. Clear boundaries protect both your students' expectations and your own time.
5️⃣ Ready-to-Use Course Templates 📝
🌟 Testimonial Request Email
Send this when students are halfway through or finished:
Always ask permission before using someone's words.
📝 One-Page Course Outline
Create this before recording anything:
One-Page Course Outline

Learner: [who and starting point]
Prerequisites: [what they need to know or have]
Outcome: [practical result by the end]
Final task: [what they will produce]
Modules: [3-6 names, one outcome each]
Lessons: [5-12 minutes, one concept each]
Support: [community / email / live calls, hours]
Access and refunds: [period and terms]
Last updated: [date]
Update it as you learn from your pilot.
👋 Student Welcome Email
Send this automatically after enrollment:
Subject: Welcome to [Course Name]

Hi [First name],

You're in! Start here: [first lesson link].
Your first quick win: [task, about 10 minutes].

What to expect: [modules, schedule, access period]
Support: [where to ask questions, response time]
Refund policy: [short summary and link]

Reply and tell me your goal for this course.

[Your Name]
🎬 Lesson Plan Template
Use this for every lesson to keep it short and actionable:
Lesson Plan

Lesson title: [one concept]
Length: [5-12 minutes]
Learning goal: [what students can do after]
Hook: [why this matters, 1-2 sentences]
Teach: [steps, example, or demo]
Common mistake: [what to avoid]
Action step: [exactly what to do next]
Resource: [worksheet / template / checklist]
📊 Pilot Feedback Survey
Send this at the end of your pilot:
Pilot Feedback Survey

1. Were you able to complete the final task? [yes / partly / no]
2. Which lesson was clearest? Why?
3. Which lesson was most confusing?
4. What was missing?
5. What would you pay for this course, and why?
6. May I quote your feedback? [yes / no]
📌 Use Your Templates Every Time
- Save each template in Notion or your course platform
- Personalize the first line before sending
- Keep refund and support terms consistent across versions
- Update the outline after each feedback round
- Track which versions get replies and results
💡 PRO TIP
Fill in every bracket, then read the template as if you were the student. If it sounds generic, rewrite the first line with one specific detail.
6️⃣ Teaching Hook Mastery 🎣
Great courses hook students early, teach one thing at a time, and make action easy.
🪝 Teaching Hooks That Keep Students Moving
Teaching Hook | Example |
Quick win | “Create your first [result] in 10 minutes” |
Before and after | Show a weak example next to a finished one |
Common mistake | “The mistake most beginners make with [topic]” |
Story opener | “I once did this wrong. Here's the system I use now…” |
Mini challenge | “Finish this one task before the next lesson” |
Real example | Walk through a complete example from your own work |
⏱️ Keep Lessons Short and Focused
Ideal lesson length: 5–12 minutes
- One lesson = one concept
- Easier to finish, review, and revisit
- Break “Complete Email Marketing Strategy” (45 minutes) into short lessons such as “Choosing Your Email Platform” (8 minutes) and “Building Your First List” (10 minutes)
Course Type | Typical Length | Lesson Count |
Mini course | 30–90 minutes | 3–10 lessons |
Standard course | 2–4 hours | 15–25 lessons |
Premium course | 6–10 hours | 30–50 lessons |
Signature course | 15+ hours | 50+ lessons |
🎓 Teach for Results
🎥 Content Quality Over Production Quality
Students care more about:
- Clear explanations
- Actionable steps
- Achieving results
- Your expertise
Students care less about:
- Hollywood-level production
- A perfect studio setup
Reality: Audio should be decent and clear, but teaching matters most.
🧑🏫 Teach to Complete Beginners
- Define jargon
- Do not assume prior knowledge
- Use analogies and real-world examples
- Start each concept from scratch
The curse of knowledge: You forget what it is like not to know.
Combat it by:
- Having a beginner review your outline
- Explaining as if teaching a friend
- Testing each lesson with a real learner
✅ Make It Actionable
After every lesson, students should:
- Know exactly what to do next
- Have a template or example to follow
- Be able to act immediately
Implementation boosters:
- End each video with an action step
- Include worksheets and templates
- Show before-and-after examples
- Add accountability checkpoints
⚡ Create “Quick Win” Moments Early
Within the first 30 minutes:
- One achievable task completed
- Visible progress made
- A confidence boost
Example: In a social media course, Module 1 Lesson 3 could be “Create Your First Post in 10 Minutes,” giving students something they can share right away.
😎 Add Personality
Your information is not unique. Your voice and examples are.
- Share personal stories and honest mistakes
- Use humor if it fits your style
- Create your own frameworks or catchphrases
- Show behind-the-scenes where useful
Generic: “Here's how to create a content calendar.”
Personal: “I used to wing my content and posted the same thing three days in a row. Here's the dead-simple system I use now…”
👥 Build Community (Optional)
Benefits:
- Students help each other
- You answer once and everyone sees it
- Social proof and accountability
- Students may feel more supported
Platforms (see Chapter 5):
- Facebook Group or Discord (free)
- Circle (about $39–$99/month)
- Skool (about $99/month)
Time commitment: Often 30–60 minutes per week of moderation
💡 PRO TIP
Polished video cannot save a course that does not help students. Fix clarity and action steps first, then improve audio and visuals.
🚀 ACTION STEP
Rewrite your first lesson so a beginner can finish a small task within 10 minutes. Add an action step and a template, then ask one beginner to try it.
7️⃣ Course Quality Checklist ✅
Before any lesson goes live, check what students will actually experience.
✅ Pre-Launch Lesson Checklist
Check | What to Verify |
Learning goal | Each lesson teaches one concept and one outcome |
Accuracy | Facts, steps, and tool screens are current and verified |
Audio and video | Clear sound, readable screens, captions added |
Action step | Every lesson ends with a task students can do |
Resources | Worksheets, templates, and links open and are correct |
Rights | Images, music, and materials are original or licensed |
Access and checkout | Test purchase, login, mobile view, and refund link |
🔄 Update and Improve Regularly
Quarterly Checkup | What to Do |
Student questions | Update the FAQ and fix confusing lessons |
Outdated content | Check software, trends, and platform changes |
Lowest-rated lessons | Re-record or rewrite them first |
Examples | Refresh stale examples and screenshots |
Bonuses | Add lessons or templates based on feedback |
Last-updated date | Show it so students can see the course is maintained |
🎬 Content Quality
- One main idea per lesson
- Clear hook in the first sentences
- Plain language and defined terms
- Real examples from your own work
- No filler to hit a length target
- Reviewed by a beginner
🧭 Student Value Check
- Could a beginner finish the final task?
- Does it match the sales page promise?
- Is any result claim supported by evidence?
- Are affiliate links disclosed?
- Does it sound like you?
📈 After You Launch
- Track enrollments, completion, and refunds
- Review practical task completion
- Read student feedback and questions
- Record one lesson learned
- Plan one improvement for the next update
🚀 ACTION STEP
Copy this checklist into your course notes and run it before every launch and every update. Add the items you usually miss.
8️⃣ Specialization & Pricing Strategy 🎯
Specialize first. Price on value. Add tiers only when you can deliver them.
🎯 Specialization Beats General
Focus | Typical Pricing Fit | Notes |
Broad topic (“learn marketing”) | Harder to price and sell | Crowded; unclear outcome |
Specific outcome for a defined learner | Mini or standard course | Easier to validate and explain |
Professional or business skill | Standard to premium course | Value tied to career or business outcomes |
Creative or hobby skill | Mini to standard course | Strong demand, often lower price points |
Team or organization training | B2B or licensing | Longer sales cycles; clear deliverables needed |
💰 Offer Tiers & Price Ranges
Offer Tier | Typical Price Range (see Chapter 4) | Notes |
Mini course | $20–$99 | Intro offers and beginner topics |
Standard self-paced course | $99–$497 | Most common model |
Premium transformation course | $497–$2,000+ | Needs clear, deliverable value |
Course + community or coaching | $500–$5,000+ | Model support capacity first |
B2B or licensing | $1,000–$10,000+ | Teams, organizations, training bundles |
Ranges are illustrative, not guaranteed. A listed price is not evidence that buyers will pay it.
🧭 5-Step Specialization Plan
1. Pick your learner
- Choose a specific beginner audience you understand
2. Name the outcome
- Define a practical result they want
3. Validate demand
- Interview, survey, or pre-sell before building
4. Pilot a small version
- Teach a short sequence and collect feedback
5. Price, review, refine
- Compare real results and adjust the offer
🏷️ Positioning Choices
Positioning Choice | What to Do |
Learner | Name one learner type and their starting point |
Outcome | Promise a practical result you can support |
Format | Pick the simplest format that teaches the outcome |
Price | Base it on the problem solved, the support offered, and market comparisons |
Guarantee | Choose a refund policy you can honor and describe it clearly |
💸 Money-Back Guarantee Options
Standard guarantee: “30-day money-back guarantee if you're not satisfied.”
Why offer it:
- Reduces purchase risk for buyers
- Shows confidence in your course
- Refunds still happen; rates vary by offer and audience
Completion-based guarantee: “Complete the course and show your work, and if you still don't see the result, I'll refund you.” This can filter for students who do the work, but refunds can still happen.
Always: Describe terms clearly and honor them promptly.
🧱 Check Your Course Economics
Course contribution = collected sales − refunds, platform and payment fees, commissions, acquisition costs, and direct delivery costs.
- Track production, support, and update hours
- Separate launch revenue from recurring revenue
- Do not assume a higher price keeps the same conversion rate
- Gross revenue is not profit
⭐ ADVANCED STRATEGY
Once a pilot works, test one change at a time: price, offer structure, or a bonus. Compare enrollments, completion, refunds, and support time before adding a premium tier. Ranges are illustrative and results vary.
9️⃣ Common Mistakes: Validation, Pricing & Positioning ⚠️
Avoid the mistakes that make a course hard to sell, hard to finish, or hard to trust.
❌ Not Validating Before Creating
The trap: “I'll build it first and people will come.”
The reality: Months can go into a course nobody wants, and social likes are not proof of willingness to pay.
The fix: Pre-sell, survey, interview, or pilot before recording everything.
❌ Making It Too Long or Too Broad
The trap: “More content means more value.”
The reality: Long, broad courses overwhelm students, hurt completion, and are harder to market.
The fix: Teach one narrow outcome in short lessons and add depth later.
❌ Pricing Without Evidence
The trap: “I'll pick a price that feels right,” whether very low or very high.
The reality: A very low price can signal low value or attract buyers who do not finish, while a high price needs clear proof and support. Neither guarantees sales.
The fix: Compare similar courses, price on the outcome and support you can deliver, and test one change at a time.
❌ Vague Positioning
The trap: “This course is for anyone who wants to learn [broad topic].”
The reality: Buyers cannot tell if it is for them.
The fix: Name one learner, one starting point, and one practical result on the sales page.
❌ Waiting for Perfection
The trap: “I'll launch when everything is perfect.”
The reality: Waiting can mean never launching, and you can update later.
The fix: Launch a good-enough first version to a pilot group and improve it from feedback.
❌ No Marketing or Email List
The trap: “Build it and they'll come.”
The reality: Courses need an audience. Relying only on a platform means building on rented land.
The fix: Build a permission-based email list and a simple promotion plan before launch.
⚠ COMMON MISTAKE
Building the whole course before validating demand. Test the outcome with real learners first, then build only what the pilot proves.
🔟 Common Mistakes: Claims, Rights, Refunds & Burnout ⚠️
Protect your students, your reputation, and your energy.
❌ Overpromising Results
The trap: “Students will definitely earn or achieve [result].”
The reality: Results vary by student effort and circumstances, and unsupported income or outcome claims can mislead buyers and violate advertising rules.
The fix: Describe what students will learn and practice, show evidence you actually have, and avoid guarantees.
❌ Using Content You Do Not Own
The trap: “I'll borrow slides, music, or lessons from other creators.”
The reality: Copying can violate copyright and platform terms and damage your reputation.
The fix: Use original or licensed materials and attribute sources correctly.
❌ Ignoring Refund, Platform, and Tax Rules
The trap: “I'll figure out the fine print later.”
The reality: Platforms differ on fees, payouts, and refund handling, and course income may be taxable and need records.
The fix: Read your platform's current terms, write a clear refund policy, track revenue and costs, and consider qualified tax advice.
❌ Ignoring Feedback and Updates
The trap: “It's finished, so I'm done.”
The reality: Student complaints and outdated lessons lower trust, ratings, and referrals.
The fix: Review questions and refunds each quarter, update lessons, and show a last-updated date.
❌ Burning Out on Support
The trap: “I'll answer every message instantly and run a community daily.”
The reality: Unsustainable support leads to slow replies and resentment.
The fix: Set support hours, use an FAQ, and limit community or coaching promises to what you can deliver.
❌ Giving Up After the First Launch
The trap: “My first launch earned little, so it failed.”
The reality: Many first courses sell little. The first launch is data, not a verdict, and results are never guaranteed.
The fix: Review what the numbers and feedback show, improve the offer, and decide with real records whether to continue.
🚀 ACTION STEP
Before you launch, write down your refund policy, support hours, content rights, and any disclosures, and check your platform's current terms.
9. Learn Course Creation for Free or Cheap
🛠 TOOLS & RESOURCES
Online Course Creation brings together learner research, practical instruction, production, and feedback-led improvement. You do not need to master everything at once. Choose resources that help you complete the next practical step.
🎓 Learning (Free & Paid)
Start with one source that fits your current level. Practice what it teaches before collecting more courses or tools.
🎬 Course Creation Tutorials & YouTube
Watch lesson-planning and recording walkthroughs to see how a course moves from an outline to a teachable sample.
Watch Think Media (YouTube Channel) for tutorials, examples, and practical ideas you can apply to online course creation.
🟢 Beginner
Watch Latasha James (YouTube Channel) for tutorials, examples, and practical ideas you can apply to online course creation.
🟡 Intermediate
Watch Vanessa Lau (YouTube Channel) for tutorials, examples, and practical ideas you can apply to online course creation.
🟡 Intermediate
🆓 Free Course Creation Learning
Learn outcomes, practice activities, and learner feedback before recording a complete course.
Creator Science Podcast helps aspiring course creators connect audience research, educational-product ideas, launches, and sustainable creator operations. Use relevant interviews to define a learner outcome, validate demand, and plan a small course pilot without assuming another creator’s sales results will transfer.
🟢 Beginner

Use Google Digital Garage to learn beginner concepts, examples, and workflows before starting online course creation.
🟢 Beginner
Use HubSpot Academy to learn beginner concepts, examples, and workflows before starting online course creation.
🟢 Beginner
Use Teachable Blog to learn beginner concepts, examples, and workflows before starting online course creation.
🟢 Beginner
Use Thinkific Blog to learn beginner concepts, examples, and workflows before starting online course creation.
🟢 Beginner
Gillian Perkins’ online-business resources help first-time course creators develop an educational offer, research audience needs, and organize course marketing. Use the lessons to plan a focused learner outcome and a small launch, while distinguishing free guidance from paid programs and exceptional revenue examples.
🟢 Beginner
Use Kajabi Blog to learn beginner concepts, examples, and workflows before starting online course creation.
🟡 Intermediate
💬 Course Creator Communities
Discuss lesson design and production problems with other creators rather than treating launch stories as sales forecasts.
Use r/OnlineCourses to ask questions, study real examples, and network with people doing online course creation.
🟢 Beginner
Use Indie Hackers to ask questions, study real examples, and network with people doing online course creation.
🟡 Intermediate
Use r/Entrepreneur to ask questions, study real examples, and network with people doing online course creation.
🟡 Intermediate

Use Teachable Community to ask questions, study real examples, and network with people doing online course creation.
🟡 Intermediate
💰 Paid Course Creation Courses
Consider instruction that improves teaching design or production quality once a pilot reveals what learners need.

Use Skillshare — Course Creation Classes for structured training, courses, or credentials that build confidence in online course creation.
🟢 Beginner
Use Udemy — Course Creation Courses for structured training, courses, or credentials that build confidence in online course creation.
🟢 Beginner

Use Coursera — Instructional Design for structured training, courses, or credentials that build confidence in online course creation.
🟡 Intermediate
Use LinkedIn Learning — Instructional Design for structured training, courses, or credentials that build confidence in online course creation.
🟡 Intermediate
Use Creator Science Lab for structured training, courses, or credentials that build confidence in online course creation.
🔴 Advanced
🏫 Course Hosting Platforms
Compare course delivery, learner access, export options, and ongoing costs. Choose hosting after defining how the course will be taught.
Use Skillshare Teach to host lessons, manage students, and sell online courses from one platform.
🟢 Beginner
Use Udemy Instructor to host lessons, manage students, and sell online courses from one platform.
🟢 Beginner
Use Teachable to host lessons, manage students, and sell online courses from one platform.
🟢 Beginner
Use Thinkific to host lessons, manage students, and sell online courses from one platform.
🟢 Beginner
Use Kajabi to host lessons, manage students, and sell online courses from one platform.
🔴 Advanced
🤝 Course Creator Support & Communities
Find peer support for production and learner experience questions. Treat community opinions as ideas to test, not evidence of guaranteed sales.
Use Facebook Groups to ask questions, study real examples, and network with people doing online course creation.
🟢 Beginner
Use Discord to ask questions, study real examples, and network with people doing online course creation.
🟢 Beginner
Use Circle to ask questions, study real examples, and network with people doing online course creation.
🟡 Intermediate
Use Mighty Networks to ask questions, study real examples, and network with people doing online course creation.
🟡 Intermediate
📝 QUICK NOTE
Use communities for ideas and troubleshooting, but verify legal, tax, licensing, and platform information through authoritative sources. Check current terms and costs before relying on a tool or course.
📝 What Should You Learn First?
Follow this order:
1️⃣ Learner & outcome
Define one learner group and a specific skill they should demonstrate.
2️⃣ Demand research
Talk to prospective learners and test interest before recording a large course.
3️⃣ Curriculum design
Work backward from the outcome to lessons, practice, and assessment.
4️⃣ Sample lesson
Record a short lesson with clear audio, readable visuals, captions, and an activity.
5️⃣ Delivery & support
Learn hosting, checkout, access, refunds, and learner support expectations.
6️⃣ Pilot & revision
Use completion, learner work, and feedback to improve the course.
🎯 KEY TAKEAWAY
Learn through a small, realistic practice task. Build confidence in the core workflow before adding more tools, paid courses, or commitments.
📄 Four Practical Starting Templates
Create these in a document, spreadsheet, or Notion page. They are working outlines—not ready-made legal agreements or professional advice. Use fictional data for practice and keep real records secure.
Learner Research Notes
Record: Audience | Goal | Current difficulty | Evidence | Questions
Use before outlining the course.
Curriculum Map
Record: Outcome | Lesson | Activity | Assessment | Prerequisite
Check that each lesson supports an observable skill.
Lesson Production Checklist
Record: Script | Visuals | Rights | Audio | Captions | Upload QA
Review lessons before giving learners access.
Pilot Feedback Log
Record: Lesson | Completion issue | Learner feedback | Evidence | Revision
Prioritize changes based on actual learning difficulties.
🚀 ACTION STEP
Choose one learning resource and draft your Learner Research Notes. Use a small practice example to identify the next skill you need before taking on live work or spending more money.
🧰 Resources
Use these resources to put your online course creation learning into practice. Start with a small, dependable setup and add a tool only when its purpose, cost, and limitations are clear.
🧩 Course Design & Curriculum
Design outcomes, lesson sequences, and practice activities. Use these resources when turning expertise into teachable steps.
Use Google Slides to create visuals, templates, mockups, portfolios, or branded assets for online course creation.
🟢 Beginner

Use Canva / Canva Mockups to create visuals, templates, mockups, portfolios, or branded assets for online course creation.
🟢 Beginner
Use Figma to create visuals, templates, mockups, portfolios, or branded assets for online course creation.
🟡 Intermediate
Use Beautiful.ai to create visuals, templates, mockups, portfolios, or branded assets for online course creation.
🟡 Intermediate
Use Microsoft PowerPoint to create visuals, templates, mockups, portfolios, or branded assets for online course creation.
🟡 Intermediate
🎙️ Recording & Audio Equipment
Improve recording clarity and consistency. Start with a quiet space and a tested setup before buying a full studio.

Use Loom to record, edit, clean up, or package media assets for online course creation.
🟢 Beginner
Use Zoom to record, edit, clean up, or package media assets for online course creation.
🟢 Beginner
Use OBS Studio to record, edit, clean up, or package media assets for online course creation.
🟡 Intermediate
Use Camtasia to record, edit, clean up, or package media assets for online course creation.
🟡 Intermediate
Use ScreenFlow to record, edit, clean up, or package media assets for online course creation.
🟡 Intermediate
🎬 Video Editing Tools
Edit lessons for comprehension, readable visuals, and accessibility. Learn only the effects needed to explain the material clearly.
Use CapCut to record, edit, clean up, or package media assets for online course creation.
🟢 Beginner

Use Audacity to record, edit, clean up, or package media assets for online course creation.
🟡 Intermediate

Use DaVinci Resolve to record, edit, clean up, or package media assets for online course creation.
🟡 Intermediate
Use Descript to record, edit, clean up, or package media assets for online course creation.
🟡 Intermediate

Use Adobe Premiere Pro to record, edit, clean up, or package media assets for online course creation.
🔴 Advanced
📝 Course Planning & Launch
Coordinate scripts, lesson files, testing, and launch tasks. Use a manageable production plan instead of recording everything at once.
Use Google Docs to compare, buy, or organize the tools and supplies needed for online course creation.
🟢 Beginner
Use Notion to compare, buy, or organize the tools and supplies needed for online course creation.
🟢 Beginner
Use Trello to compare, buy, or organize the tools and supplies needed for online course creation.
🟢 Beginner
Use Airtable to compare, buy, or organize the tools and supplies needed for online course creation.
🟡 Intermediate
Use Miro to compare, buy, or organize the tools and supplies needed for online course creation.
🟡 Intermediate
📣 Course Marketing & Sales
Communicate the course’s purpose and intended learner honestly. Test demand without promising outcomes the course cannot guarantee.
Use Substack to promote your offer, capture leads, and build an audience around online course creation.
🟢 Beginner

Use Kit to promote your offer, capture leads, and build an audience around online course creation.
🟡 Intermediate
Use Mailchimp to promote your offer, capture leads, and build an audience around online course creation.
🟡 Intermediate

Use ActiveCampaign to promote your offer, capture leads, and build an audience around online course creation.
🔴 Advanced

Use ClickFunnels to promote your offer, capture leads, and build an audience around online course creation.
🔴 Advanced
💳 Payments & Checkout
Understand checkout, payment fees, access, and refunds. Test the purchase-to-enrollment flow before accepting real learners.
Use Gumroad to handle payments, invoices, income tracking, or taxes for your online course creation work.
🟢 Beginner
Use PayPal Business to handle payments, invoices, income tracking, or taxes for your online course creation work.
🟢 Beginner
Use Podia to handle payments, invoices, income tracking, or taxes for your online course creation work.
🟢 Beginner
Use Stripe to handle payments, invoices, income tracking, or taxes for your online course creation work.
🟡 Intermediate
Use ThriveCart to handle payments, invoices, income tracking, or taxes for your online course creation work.
🔴 Advanced
📊 Course Analytics & Student Feedback
Collect feedback and inspect learning or completion patterns. Use evidence to improve lessons instead of judging success by enrollment alone.
Use Google Forms to track results, spot what is working, and improve performance for online course creation.
🟢 Beginner
Use YouTube Studio to track results, spot what is working, and improve performance for online course creation.
🟢 Beginner

Use Google Analytics to track results, spot what is working, and improve performance for online course creation.
🟡 Intermediate
Use Typeform to track results, spot what is working, and improve performance for online course creation.
🟡 Intermediate
Use Hotjar to track results, spot what is working, and improve performance for online course creation.
🔴 Advanced
10. Your First 6 Months Online Course Creation Plan
Your first 6 months in online course creation should be focused on building a clear student outcome, simple course structure, useful lessons, and early buyer feedback.
The goal is to move from:
Topic → Audience → Course Outline → Lessons → Launch → Feedback → Improve
By the end of 6 months, you should know who your course helps, what result it promises, how to package the lessons, and whether people are willing to pay for the transformation you teach.
🎯 6-Month Goal
By the end of your first 6 months, aim to have:
✅ One clear course topic
✅ One specific student outcome
✅ A simple course outline
✅ 5–10 core lessons planned
✅ A basic course platform or delivery method
✅ A small audience or interest list started
✅ A beta version created
✅ First students, testers, or buyers
✅ Feedback collected and used to improve the course
🎯 KEY TAKEAWAY
A course sells better when it promises a clear result, not just a collection of random information.
📅 Month 1: Choose Your Course Topic & Student Outcome
🎯 Main Goal
Pick a course topic that solves a real problem for a specific type of student.
✅ What to Do
- List skills, experience, or processes you can teach
- Choose one target student
- Identify one clear problem they want solved
- Research existing courses in your topic
- Study reviews, comments, and complaints
- Define the result your course should help students reach
- Create a list of 20–30 lesson ideas
- Validate whether people already search for or pay for this topic
🏁 Month 1 Success Looks Like
- You picked one course topic
- You know who the course is for
- You know what result students want
- You researched competing courses
- You have a rough lesson idea list
⚠️ Beginner Mistake: Creating a course about everything you know. A strong beginner course should solve one specific problem for one specific audience.
🎓 Course Topics to Consider
Course Topic | Student Outcome |
Beginner freelancing | Land first freelance client |
Notion setup | Build an organized workspace |
Canva design | Create better graphics faster |
Budgeting | Create a personal budget system |
Resume writing | Build a stronger resume |
AI tools | Save time with practical workflows |
Photography basics | Take better photos |
Social media content | Plan and create posts consistently |

📅 Month 2: Outline the Course & Build the First Version
🎯 Main Goal
Turn your topic into a clear course structure that students can follow step by step.
✅ What to Do
- Create a course roadmap
- Group lessons into modules
- Decide what students should do after each lesson
- Create worksheets, templates, or checklists if helpful
- Choose a course platform or simple delivery method
- Record or write the first lessons
- Keep the first version simple
- Build a beta version before trying to make it perfect
🏁 Month 2 Success Looks Like
- Your course outline is organized
- Lessons are grouped logically
- Students have clear action steps
- Your first lessons are started
- You have a simple delivery plan
🎯 KEY TAKEAWAY
Your first course does not need fancy production. It needs clear lessons, useful examples, and a path students can follow.
🗂️ Simple Course Structure
Section | Purpose |
Introduction | Explain the goal and who the course is for |
Foundation | Teach the basics students need first |
Step-by-step lessons | Walk students through the process |
Practice activities | Help students apply the lesson |
Tools/resources | Give templates, examples, or downloads |
Final project | Help students complete the main outcome |
Next steps | Show students what to do after finishing |
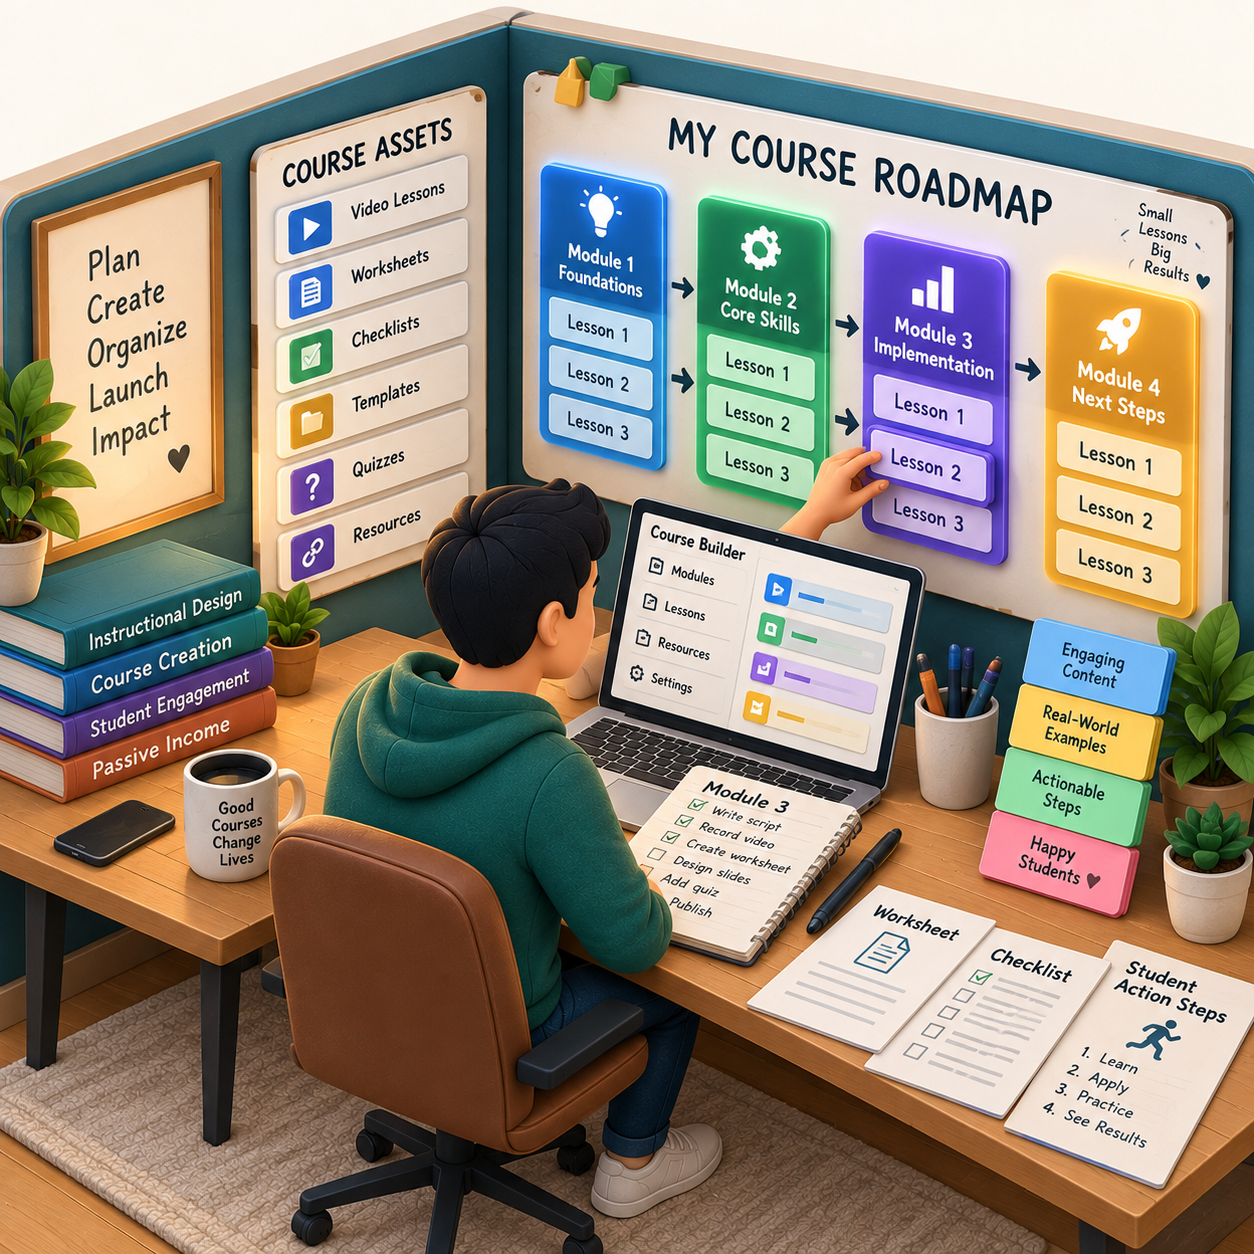
📅 Month 3: Create the Beta Course
🎯 Main Goal
Build a simple working version of the course that real people can test.
✅ What to Do
- Finish the core lessons
- Create slides, screen recordings, written lessons, or videos
- Add worksheets or action steps
- Create a simple course landing page
- Explain who the beta course is for
- Invite a small group of testers or early buyers
- Offer a discounted beta price if appropriate
- Collect questions as students go through the material
🏁 Month 3 Success Looks Like
- You have a working beta version
- Students can access the material
- The course has a clear start and finish
- You have early testers or interest
- You are collecting feedback instead of guessing
🎯 KEY TAKEAWAY
Beta students help you find confusing lessons, missing steps, weak examples, and better ways to explain the topic.
💡 Beta Course Formats
Format | Best For |
Video lessons | Visual demos and step-by-step teaching |
Screen recordings | Software, design, writing, or workflow courses |
Written lessons | Simple guides, tutorials, and email courses |
Live workshops | Teaching while collecting real-time feedback |
Cohort format | Group learning and accountability |
Notion course hub | Templates, lessons, and resources in one place |
Email course | Simple lesson delivery over several days |
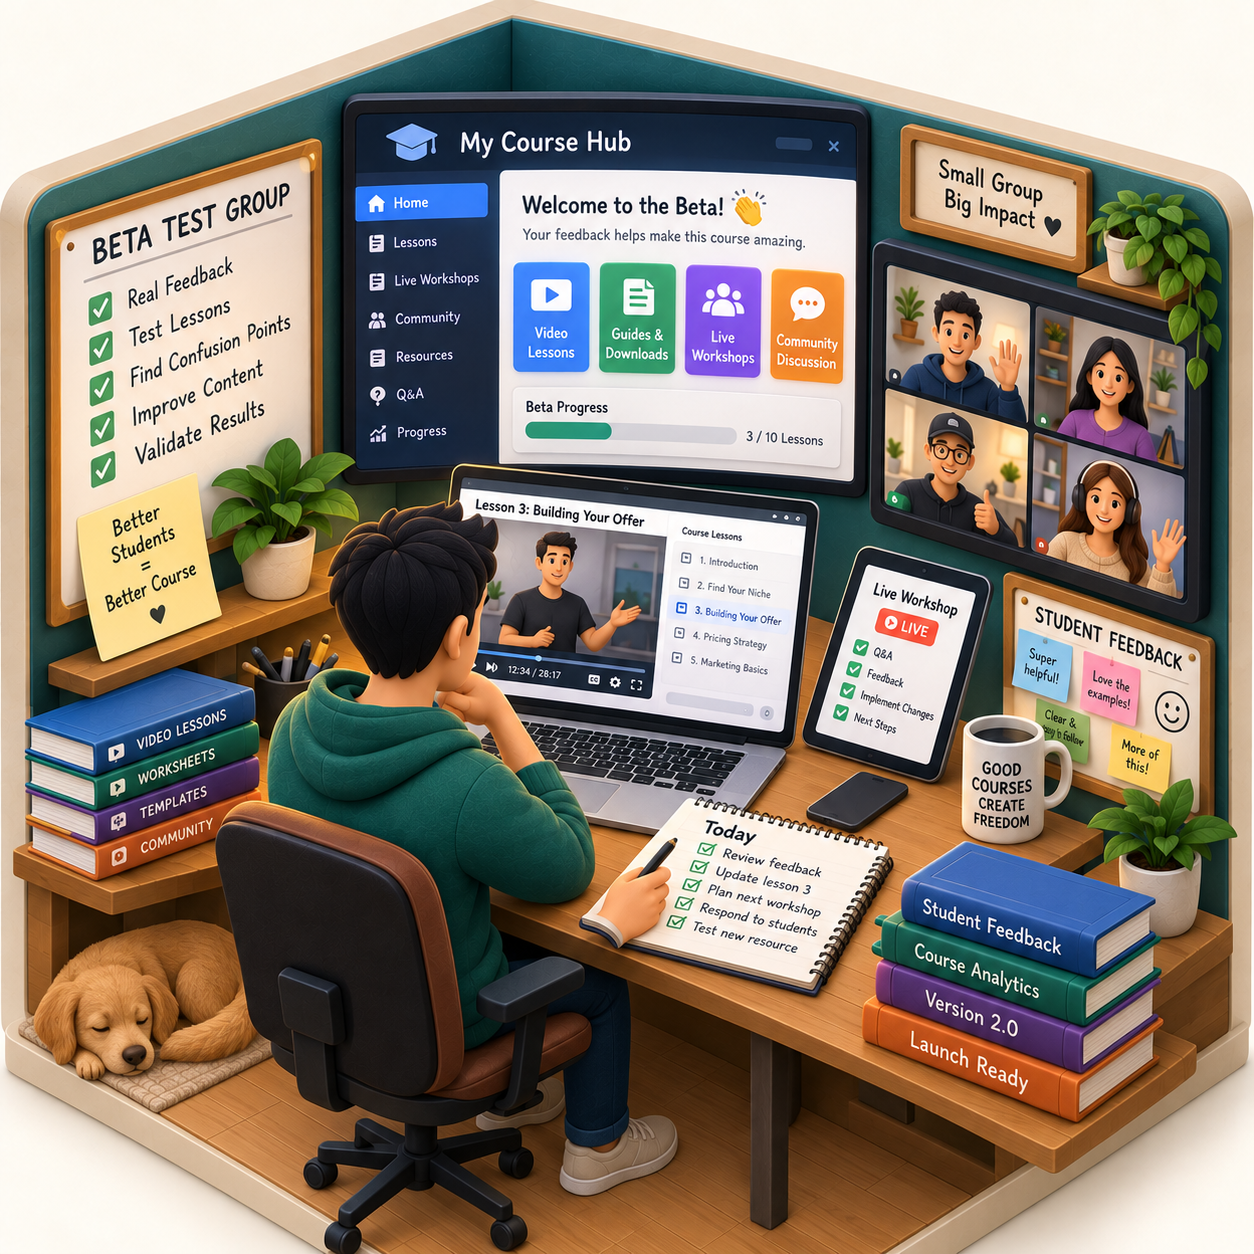
📅 Month 4: Launch to a Small Audience
🎯 Main Goal
Put the course in front of real people and test whether the offer is clear enough to sell.
✅ What to Do
- Create a simple sales page
- Write a clear course promise
- Explain what students will learn
- List who the course is for
- Add screenshots, lesson titles, or sample materials
- Promote to your email list, audience, network, or niche groups
- Answer questions from interested buyers
- Track signups, sales, clicks, and objections
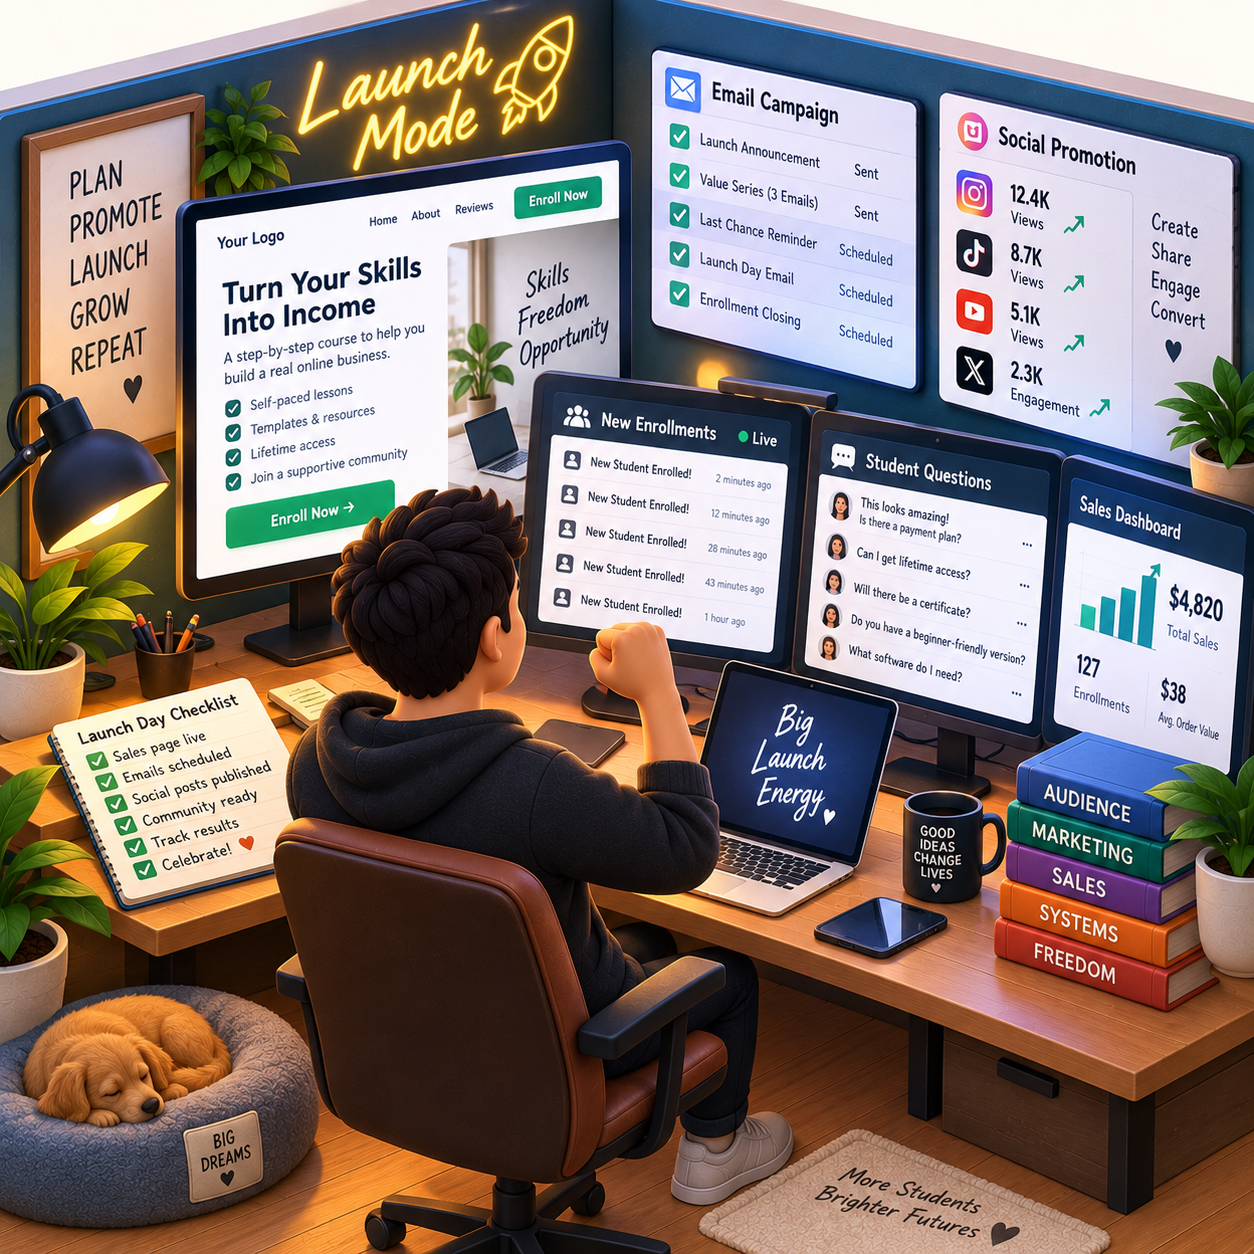
🏁 Month 4 Success Looks Like
- Your course has been offered publicly or semi-publicly
- You understand what people ask before buying
- You know whether the course promise is clear
- You have first students, testers, or buyers
- You have real feedback to improve the course
⚠️ Scale Smart: Do not build 50 lessons before proving people want the course. Test the offer early with a simple version.
🗓️ Simple Weekly Workflow
Day | Task |
Monday | Improve sales page and course promise |
Tuesday | Share helpful content related to course topic |
Wednesday | Promote course or beta offer |
Thursday | Answer questions and follow up |
Friday | Review signups, clicks, and feedback |
Weekend | Improve lessons or resources |
🔄 Simple Course Launch Workflow
Step | What Happens |
Course promise | Define the result students should get |
Sales page | Explain who it helps and what is included |
Promotion | Share with audience, network, or communities |
Questions | Collect objections and confusion |
Enrollment | Students join or purchase |
Delivery | Students access lessons and resources |
Feedback | Students share what worked or needs improvement |
Improvement | Course is updated based on real feedback |
📅 Month 5: Improve the Course & Add Student Support
🎯 Main Goal
Use feedback to make the course clearer, more useful, and easier to complete.
✅ What to Do
- Review student questions
- Fix confusing lessons
- Add missing examples
- Improve worksheets or templates
- Add a welcome message and completion checklist
- Create an FAQ section
- Add bonus resources only if they support the outcome
- Collect testimonials from students who got value
🏁 Month 5 Success Looks Like
- Your course is easier to follow
- Student questions are being answered
- The lessons feel more complete
- You have testimonials or useful feedback
- The course outcome is clearer
🎯 KEY TAKEAWAY
The best courses are not always the longest. They are the ones that help students reach the promised result with fewer confusing steps.
📈 Ways to Improve the Course
Improvement | Why It Helps |
Better lesson order | Makes the course easier to follow |
Clear action steps | Helps students apply what they learn |
Templates | Saves students time |
Examples | Makes abstract ideas easier to understand |
Checklists | Helps students track progress |
FAQ section | Reduces repeated questions |
Office hours or Q&A | Adds support and accountability |
Completion project | Gives students a clear finish line |
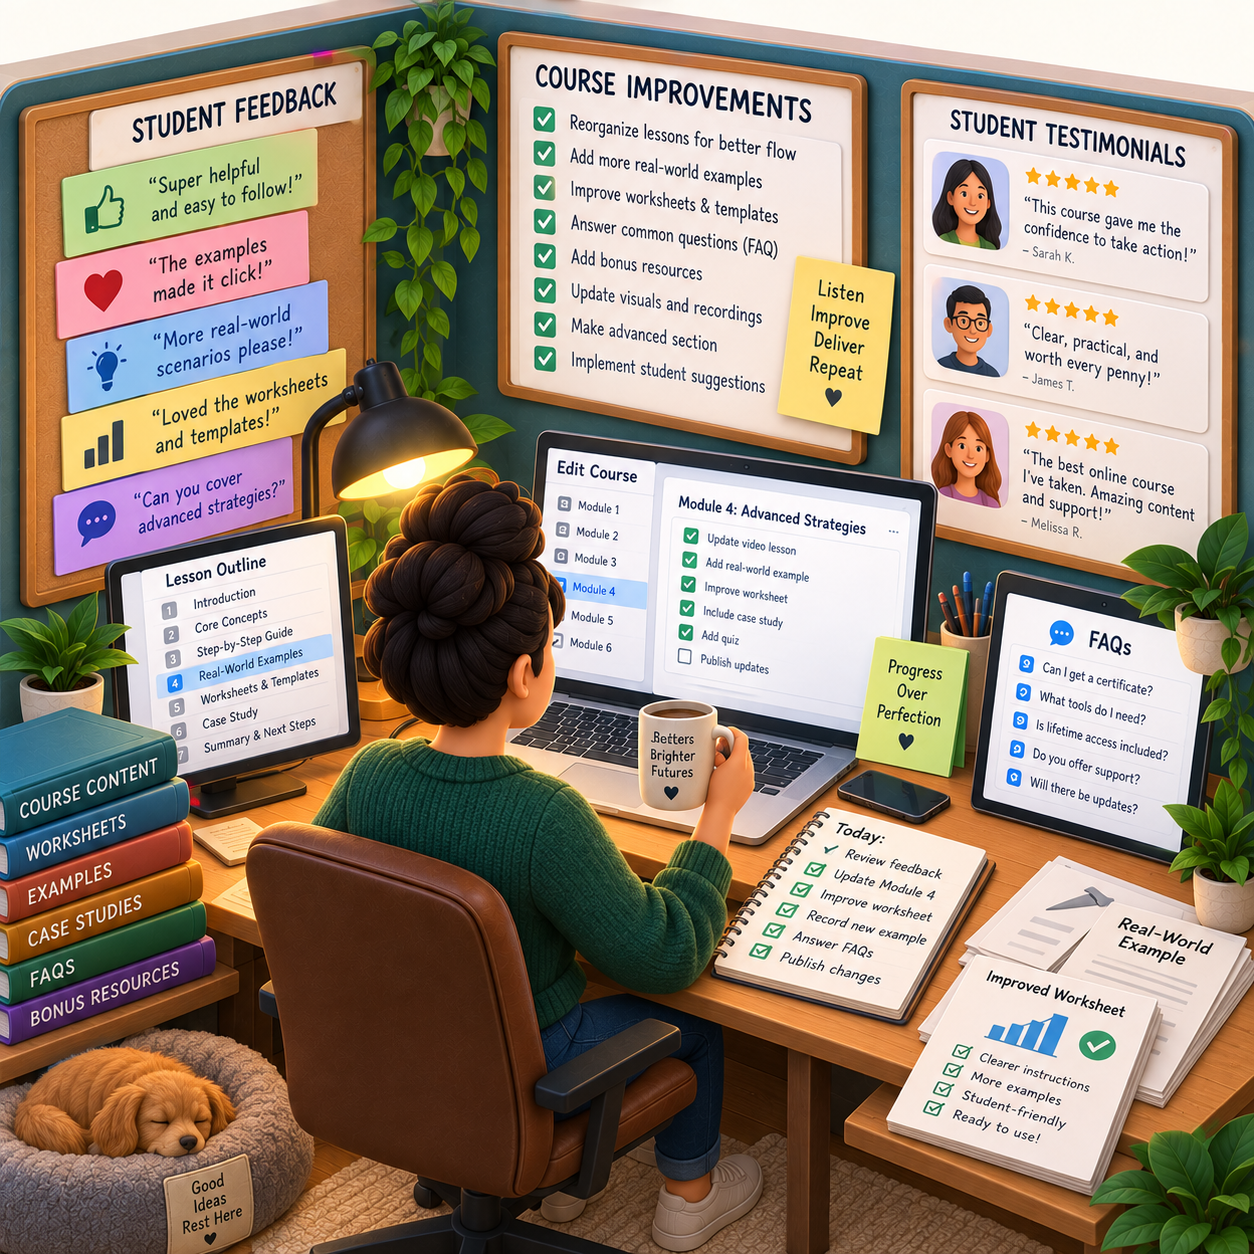
📅 Month 6: Review, Refine & Build a Growth Plan
🎯 Main Goal
Review your first 6 months and decide how to improve, relaunch, or scale the course.
✅ What to Do
- Review all feedback, sales, and engagement
- Identify the lessons students used most
- Identify where students got stuck
- Improve the sales page
- Update the course outline if needed
- Add testimonials or student results
- Decide whether to raise price, relaunch, or build a smaller offer
- Create a 90-day plan for months 7–9
❓ 6-Month Review Questions
- Who was most interested in the course?
- What problem did students care about most?
- Which lessons were most useful?
- Where did students get confused?
- What objections stopped people from buying?
- Did the course promise feel specific enough?
- What should be removed, improved, or added?
- Is the course ready for a bigger launch?
- Should you create a smaller starter product first?
🏁 Month 6 Success Looks Like
- You know whether the course topic has demand
- You have improved the course using feedback
- You understand your best student type
- You have a clearer sales message
- You have a 90-day plan for growth, relaunch, or improvement
🎯 KEY TAKEAWAY
Course creation is not one-and-done. The first version teaches you what students actually need, and every update can make the course easier to sell and complete.
📊 Decision Table
If This Happens | Do This |
People like the topic but do not buy | Improve the offer, price, or course promise |
Students get stuck early | Simplify the first module |
Students ask the same questions | Add FAQ, examples, or bonus lesson |
Testimonials are strong | Use them in the next launch |
Course feels too large | Break it into a smaller starter course |
Completion is low | Add checklists, milestones, or support |
Sales are growing | Relaunch with improved materials |
Audience is too small | Focus on content and email list growth |
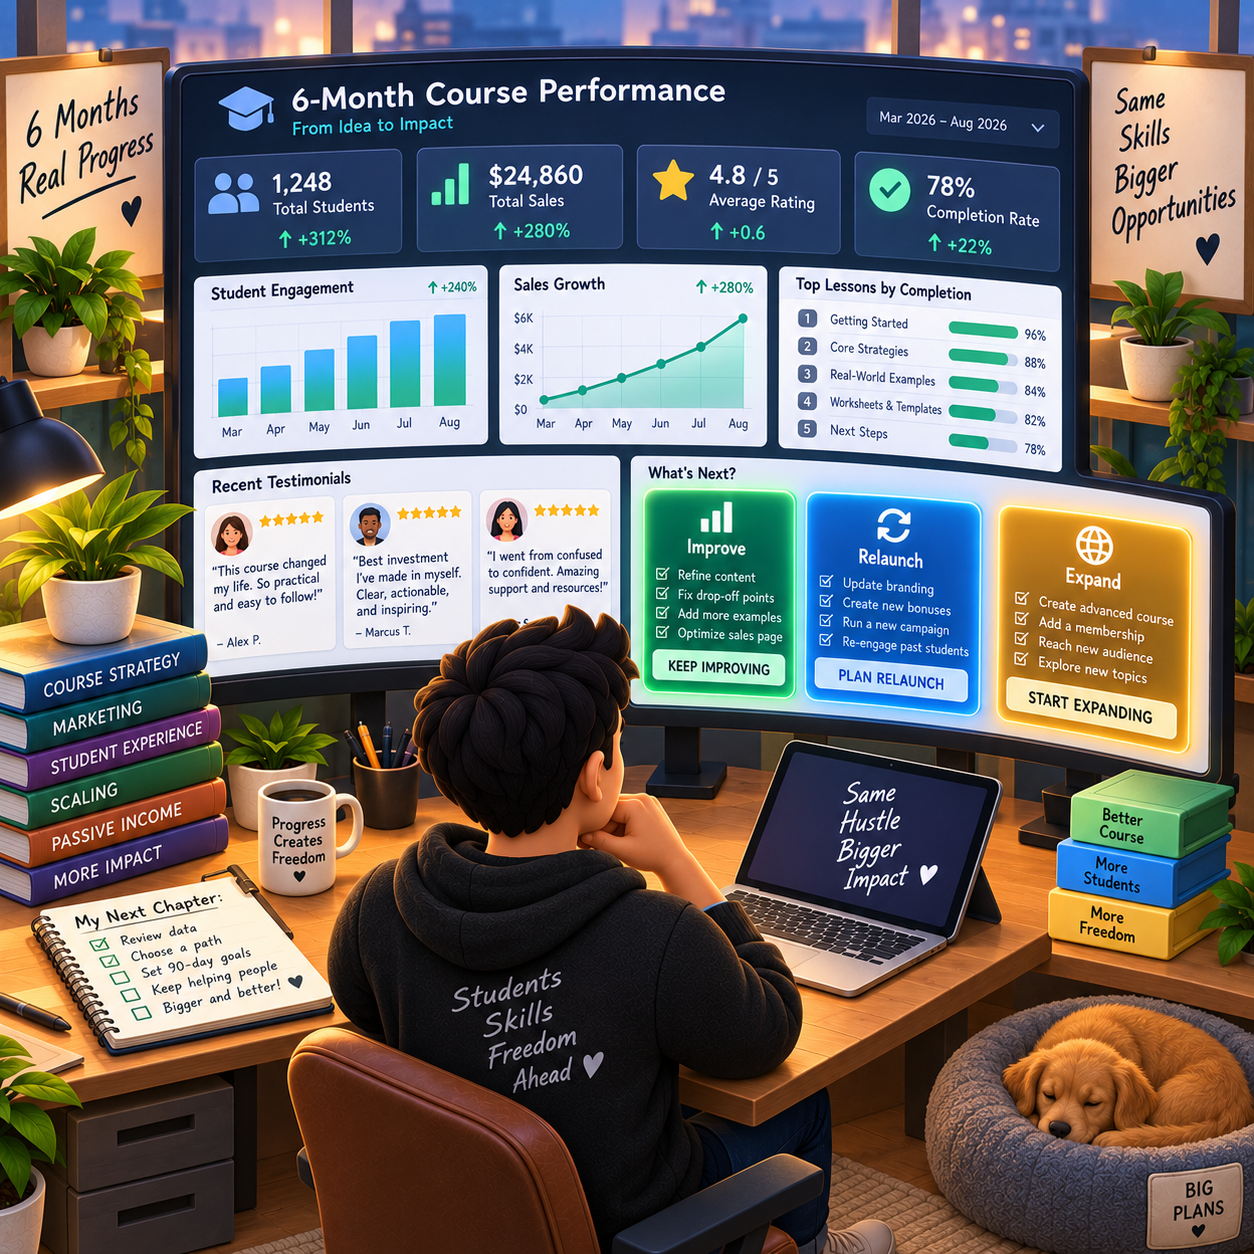
✅ 6-Month Success Checklist
By the end of 6 months, check whether you have:
✅ Picked one course topic
✅ Defined the target student
✅ Created a clear course outcome
✅ Built a course outline
✅ Created core lessons
✅ Built a beta version
✅ Created a simple sales page or signup page
✅ Invited testers or early buyers
✅ Collected feedback
✅ Improved confusing lessons
✅ Collected testimonials if possible
✅ Created a plan for the next 90 days
⚠️ What Not to Do During the First 6 Months
Avoid these mistakes:
❌ Creating a huge course before validating demand
❌ Teaching too many unrelated topics
❌ Making lessons long without clear action steps
❌ Focusing only on video quality and ignoring the student result
❌ Pricing without knowing the course value
❌ Ignoring student feedback
❌ Adding bonuses that distract from the main outcome
❌ Hiding what students actually receive
❌ Launching with no clear course promise
❌ Thinking the first version has to be perfect
⚠️ Reminder: A course is valuable when it helps students make progress. Keep the outcome clear, the lessons practical, and the first version simple.
🧭 Simple 6-Month Milestone Tracker
Month | Main Focus | Target Output |
Month 1 | Topic & outcome | Clear course promise and lesson ideas |
Month 2 | Course outline | Modules, lessons, and delivery plan |
Month 3 | Beta course | Working version and early testers |
Month 4 | Small launch | First students, buyers, or feedback |
Month 5 | Course improvement | Better lessons, support, and testimonials |
Month 6 | Review & growth | 90-day plan created |
🚀 Final 6-Month Strategy
Your first 6 months should follow this simple path:
Month 1: Choose your topic and student outcome
Month 2: Outline the course and build the first version
Month 3: Create the beta course
Month 4: Launch to a small audience
Month 5: Improve the course and add support
Month 6: Review results and build your growth plan
The course creators who grow fastest are not the ones with the most lessons. They are the ones who solve a clear problem, collect feedback, and improve the course around real student progress.
11. Get the Course Creation Starter Kit
🎁 Your Course Creation Toolkit
The Online Course Creation Starter Kit provides 12 browser-based workspaces to outline your course, develop lessons, evaluate delivery options, plan promotion and gather student feedback.
The 12 components:
✅ 1. Course Outline Builder — Define learning outcomes and arrange modules into a logical curriculum.
✅ 2. Lesson Plan Builder — Organize each lesson’s objectives, activities, scripts and supporting materials.
✅ 3. Course Platform Evaluator — Compare course-hosting options based on your research and delivery requirements.
✅ 4. Sales Page Copy Builder — Draft honest course descriptions, benefits and enrollment messaging.
✅ 5. Video Recording Checklist — Check your recording setup, script readiness and video quality before finalizing lessons.
✅ 6. Course Launch Timeline — Map out realistic course production and release milestones.
✅ 7. Course Email Sequence Builder — Draft and organize a sequence of course-related emails for review before sending.
✅ 8. Course Pricing Calculator — Model pricing options, costs and hypothetical sales scenarios using your own assumptions.
✅ 9. Student Feedback Analyzer — Create survey questions and review learner responses to identify potential course improvements.
✅ 10. Course Name Generator — Use naming formulas to brainstorm and compare clear course titles.
✅ 11. Bonus Content Planner — Plan additional resources that support your course’s learning outcomes.
✅ 12. Course Equipment Checklist — Review recording gear needs and prioritize spending before buying equipment.
Also included in the editable master: The editable master includes a dashboard, Start Here guide and supporting resource materials.
These tools plan and draft a course; they do not record, host, publish, sell or send lessons automatically. Equipment recommendations and platform terms must be checked independently. This edition is still marked for review rather than approved retail release.

12. Frequently Asked Questions
🎓 Do I need to be an expert to create a course?
No. You need to be a few steps ahead of your target student.
If you can help beginners, you're qualified.
💡 Expertise comes from experience, not necessarily credentials. The best teachers often learned recently because they remember the struggles.
⏳ How long should my course be?
Quality over quantity.
A 2-hour course that gets results beats a 20-hour course that overwhelms.
Good starting range:
- ⚡ 90 minutes = fine for a focused topic
- 🎯 3–6 hours = sweet spot for most courses
- 📚 Longer courses only work if the depth is truly needed
👉 Focus on the transformation, not the length.
🛡️ What if someone copies my course content?
They can’t copy:
- 🎤 Your personality
- 🧠 Your teaching style
- 👥 Your community
- 📖 Your examples and perspective
- 🤝 The trust you build with students
💡 Piracy is less common than most beginners fear. Focus on delivering value instead of worrying about theft.
🏫 Should I launch on my own platform or Udemy?
Own platform:
- 💰 Higher margins
- 🎛️ Full control
- 📧 You own your email list
- 🏗️ Better for long-term brand building
Udemy:
- 👥 Existing traffic
- ⚡ Easier first sales
- 💸 Lower prices
- 🚫 No real ownership of the audience
💡 Option: Start on Udemy to validate, then move to your own platform. Or skip Udemy if you already have an audience.
❓ How do I handle technical questions I can't answer?
Be honest.
Say:
“Great question! I don’t know, but I’ll research it and get back to you.”
Then update the course with the answer.
💡 Students respect honesty and continuous improvement.
🎯 Can I create a course in a saturated niche?
Yes. Competition validates demand.
Your unique angle can be:
- 🧍 Your story
- 🎤 Your teaching style
- 👥 Your specific audience
- 🧠 Your framework
- 🔄 Your updated method
Example:
- ❌ “Weight loss”
- ✅ “Weight loss for busy moms who hate cooking”
💡 Specific beats broad.
⭐ What if I get negative reviews?
Expect some.
Not everyone will love your teaching style.
Best response:
- 💬 Respond professionally
- 🔍 Look for legitimate feedback
- 🛠️ Improve the course
- 🧠 Don’t take it personally
💡 If reviews are mostly positive, a few negative reviews can actually increase trust because all 5-star reviews can look fake.
💰 How do I price my first course?
Consider:
- ⏳ Time to complete
- 🏆 Competition prices
- 👥 Your audience’s budget
- 🎯 Transformation value
- 📦 Bonuses or support included
Good beginner range:
- 💵 $47–$97 for short/simple courses
- 💰 $97–$147 for most starter courses
- 🚀 $200+ if the transformation is strong or includes support
💡 You can always raise prices later as you add testimonials.
💳 Should I offer payment plans?
Yes, especially if your course is $200+.
Common structure:
- 💰 $297 one-time
- 💳 Or 3 × $99 monthly
Payment plans can make a higher price easier to say yes to, but they may add refund or failed-payment risk.
🔁 How do I deal with refunds?
Have a clear refund policy, such as 30 days.
Best approach:
- ✅ Honor valid refunds graciously
- ❓ Ask why so you can improve
- 🧠 Don’t take it personally
- 📄 Set clear terms upfront
💡 Most refunds happen in the first 7 days. If someone completes the course and then refunds, handle that individually.
🎥 Do I need to show my face?
No, but it can help build trust.
Alternatives:
- 🖥️ Screen recordings only
- 🎙️ Voiceovers with slides
- 🎨 Visual walkthroughs
- 🧑🎨 Animated characters
- 📊 Presentation-style lessons
💡 Face-on-camera can convert better, but plenty of successful courses are screen-only.
©️ What about copyrighted music or images in my course?
Use royalty-free or properly licensed resources.
Good options:
- 🎵 Epidemic Sound for music
- 🖼️ Unsplash or Pexels for images
- 🎨 Canva for licensed graphics
- 📦 Paid asset libraries when needed
🚫 Don’t use copyrighted material unless you have explicit permission or a license.
⏰ Can I create courses while working full-time?
Many creators start as a side hustle.
A realistic approach:
- 🌙 Evenings and weekends
- 📅 Several weeks of focused work, not a set deadline
- 🧱 Build one module at a time
- ⚙️ Plan for ongoing updates after launch
💡 After launch, maintenance is usually lighter than creation — but not zero.
13. Important Considerations
Before you start building your course, understand these key realities so you avoid wasted time and maximize your chances of success.
⏳ This Is Not Instant Hands-Off Income
Course creation is front-loaded work.
- 🛠️ You’ll spend 60–150+ hours creating your course
- 📅 Most creators take 3–6 months to see consistent income
- 🌱 Early months may generate little to no revenue
👉 Recurring sales, if they come, come after the work — not before.
❗ Validation Comes Before Creation
One of the biggest mistakes is creating a course nobody wants.
Always:
- 💳 Pre-sell your course
- 📋 Survey your audience
- 🧪 Test demand with free content
- 💬 Ask what people would actually pay for
👉 If people won’t pay for it upfront, don’t build it yet.
📉 Most Course Creators Fail, But Here’s Why
Many course creators earn little, especially at first.
The difference between success and failure:
- 📣 Consistent marketing
- 👥 Building an audience
- 🔁 Iterating after feedback
- 🚫 Not quitting after the first launch
👉 The opportunity is real — but so is the competition.
📣 Marketing Is More Important Than Content
You can have an amazing course, but without marketing, it won’t sell.
You need:
- 📧 An email list
- 📱 Content on YouTube, TikTok, blog, or social media
- 🧲 A lead magnet
- 🛒 A simple funnel or launch strategy
🚫 “Build it and they will come” does not work.
💰 Pricing Impacts Your Audience Quality
Low prices can attract:
- 😐 Low commitment
- 🔁 Higher refund rates
- 📉 Poorer student results
- 😤 More demanding buyers
Higher pricing can:
- 🎯 Attract serious students
- 🏆 Increase perceived value
- 📈 Lead to better outcomes
- 💵 Give you more room for support and bonuses
🎥 Perfection Is Not Required or Helpful
Many beginners delay launch trying to make everything perfect.
Reality:
- 🎯 Students care about results, not cinematic production
- ✅ Clear audio matters more than fancy visuals
- 🧠 Useful lessons beat overproduced lessons
- 🚀 “Good enough + valuable” beats “perfect + never launched”
🧠 You Don’t Need to Be an Expert
You only need to be:
- 📍 A few steps ahead of your audience
- 💬 Able to explain clearly
- 🧩 Able to solve a specific beginner problem
- 🔁 Willing to keep improving
👉 If you can solve a beginner’s problem, you can build a course.
🔄 Courses Require Ongoing Updates
Your course isn’t fully “set it and forget it.”
You’ll need to:
- 🛠️ Update outdated content
- ➕ Add lessons based on feedback
- 📉 Improve weak sections
- ❓ Answer student questions
- 🔁 Refresh examples and tools
💡 The best courses evolve over time.
📧 You Must Own Your Audience
Relying only on platforms is risky.
Always build:
- 📧 An email list
- 👥 A direct connection with your audience
- 🧲 A lead magnet
- 🏗️ Your own brand presence
👉 Platforms can change — your audience shouldn’t disappear with them.
🚫 Not Everyone Will Succeed, And That’s Okay
Course creation rewards:
- 🔁 Consistency
- 🧪 Iteration
- 🧠 Long-term thinking
- 📣 Marketing
- 🎯 Audience understanding
Most people fail because they:
- ❌ Quit too early
- ❌ Don’t market
- ❌ Build before validating
- ❌ Expect fast results
14. Your Next Steps
🚀 ACTION STEP
📅 This Week
- 🎯 Choose your course topic and spend 2 hours brainstorming
- 🔍 Research 5 competitors and study what they teach
- 📋 Survey 10 people in your target market
- 🧱 Create a rough course outline using bullet points
🗓️ This Month
- ✅ Validate demand through pre-selling or confirmed interest
- 🏫 Set up a free platform trial, such as Thinkific or Teachable
- 🎥 Record your first module, even if imperfect
- 🧲 Create one lead magnet to start building your email list
🚀 Next 90 Days
- 🛠️ Complete course creation using the 90-day plan
- 📧 Start a permission-based email list
- 🛒 Create your sales page and email sequences
- 📣 Launch to people who already care about the topic
- ⭐ Serve your first students well and collect honest feedback
15. The Bottom Line
🎯 KEY TAKEAWAY
Course creation is front-loaded work with possible leverage later. Hours invested do not guarantee sales — results still depend on demand, teaching quality, and consistent marketing.
🙋 If you:
✔ Validate your topic with pre-sales or surveys before building
✔ Commit the 60–150 hours to create a results-focused course
✔ Build an email list and show up with consistent content
✔ Improve the course from real student feedback
🏗️ You can build:
💰 Course revenue that varies with price, enrollments, refunds, fees, and marketing — not a set monthly total
🔁 Repeat sales are possible after launch, with ongoing promotion and updates
📈 Additional courses or funnels can help only after one offer has real demand
🚀 Package a useful outcome — validate demand first, then build the smallest version you can teach well.
16. Recommended Websites & Tools
🛠 TOOLS & RESOURCES
You do not need every resource listed below. This directory brings together the major platforms, tools, and resources from this guide, along with additional research and learning options, so you can find them in one place when you need them.
Start with the essentials. Add tools only when your course business develops a specific need for them.
🎓 Course Hosting & Selling Platforms
- Teachable — Course platform for hosting lessons, building sales pages, accepting payments, and delivering structured online courses.
- Thinkific — Course platform for creating, hosting, selling, and managing online courses with beginner-friendly tools.
- Podia — Creator platform for selling courses, digital downloads, memberships, webinars, and email-based offers.
- Kajabi — All-in-one course, funnel, website, email, and membership platform for creators building a premium education business.
- Udemy — Marketplace course platform for reaching existing learners without building your own audience first.
- Skillshare — Class marketplace for creators teaching creative, business, design, productivity, and lifestyle skills.
- Coursera — Online learning platform mentioned as an example of established course-based education.
- Gumroad — Simple selling platform for mini-courses, digital products, templates, guides, and course-related downloads.
- LearnDash — WordPress learning management system for building and selling courses on your own website.
- MemberVault — Course and membership platform for organizing free and paid educational content.
💡 PRO TIP
Pick one platform and launch. Teachable, Thinkific, or Podia are all enough for a first course — migrating later is easier than delaying your launch.
👥 Communities, Memberships & Student Support
- Skool — Community and course platform for building student groups, discussions, accountability, and paid learning communities.
- Circle — Community platform for hosting student discussions, memberships, coaching groups, and course communities.
- Memberful — Membership platform for selling gated content, communities, subscriptions, and member-only course resources.
- Zoom — Video meeting platform for live workshops, coaching calls, group sessions, office hours, and student Q&A.
🎥 Recording, Screen Capture & Video Editing Tools
- OBS Studio — Free screen recording and streaming software for recording lessons, demos, tutorials, and course videos.
- Loom — Screen recording tool for quick lessons, walkthroughs, feedback videos, and simple course modules.
- ScreenPal — Screen recording tool for creating tutorials, walkthroughs, and beginner-friendly training videos.
- Camtasia — Screen recording and video editing software for polished course tutorials and educational videos.
- ScreenFlow — Mac screen recording and video editing tool for professional-looking course lessons.
- CapCut — Beginner-friendly video editor for cutting lessons, adding captions, creating short promos, and editing course clips.
- iMovie — Free Apple video editor for basic lesson editing, trimming, and simple course video production.
- Adobe Premiere Rush — Lightweight Adobe video editor for quick edits, mobile-friendly videos, and simple course content.
- Adobe Premiere Pro — Professional video editing software for advanced course creators who need more editing control.
- Final Cut Pro — Professional Mac video editing software for polished lessons, promos, and course production workflows.
- DaVinci Resolve — Advanced video editor for course creators who need professional editing, color correction, and production quality.
- Descript — Text-based audio/video editing tool for cleaning lessons, editing transcripts, creating captions, and repurposing course content.
📝 QUICK NOTE
Your phone and free editing software are enough for course one. Upgrade gear only when students point at a specific quality problem.
🎙️ Course Recording Gear & Production Equipment
- Logitech C920 — Beginner-friendly webcam for recording talking-head lessons, webinars, and course introductions.
- Logitech Brio 4K — Higher-quality webcam for clearer course videos, live lessons, and professional creator setups.
- Blue Snowball — Budget USB microphone for improving course audio beyond a built-in laptop mic.
- Blue Yeti — Popular USB microphone for clearer narration, lessons, webinars, and course recordings.
- Audio-Technica ATR2100x — USB/XLR microphone option for stronger course audio and more professional recording setups.
🖼️ Slides, Design & Course Asset Creation
- Canva — Design tool for course slides, worksheets, workbooks, lead magnets, thumbnails, graphics, and student resources.
- Google Slides — Presentation tool for building simple course slides, lesson decks, and workshop materials.
- PowerPoint — Presentation software for creating structured course decks, webinars, and training lessons.
- Keynote — Apple presentation tool for clean course slides, visual lessons, and training decks.
- Pitch — Presentation design platform for modern course decks, pitch-style lessons, and visual teaching materials.
- Adobe Creative Cloud — Adobe design suite for advanced graphics, video, PDFs, course branding, and polished visual assets.
📧 Email, Payments & Sales Systems
- Kit — Email platform for building a course audience, sending newsletters, creating automations, and promoting course launches.
- ActiveCampaign — Email marketing and automation platform for advanced launch sequences, segmentation, and student follow-up.
- Stripe — Payment processor for selling courses, subscriptions, payment plans, and digital education products.
- PayPal — Payment option for collecting course payments, selling downloads, and offering familiar checkout choices.
📝 QUICK NOTE
The email list matters more than the platform. Even 100 engaged subscribers can outsell a large social following.
🧩 Software, No-Code & Tech Topics Mentioned for Course Ideas
- QuickBooks — Accounting software mentioned as a course topic for bookkeeping, small business finance, and software training.
- LinkedIn — Professional platform mentioned as a teachable topic for career growth, networking, client acquisition, and personal branding.
- Python — Programming language mentioned as a course topic for coding, automation, data, and beginner tech education.
- JavaScript — Programming language resource mentioned for web development and coding course topics.
- WordPress — Website platform mentioned as a teachable topic for blogging, web design, and business website courses.
- Webflow — No-code web design platform mentioned as a course topic for website-building and visual development.
- Shopify — E-commerce platform mentioned as a course topic for online store setup, product selling, and web design education.
- Notion — Workspace tool mentioned as a course topic for dashboards, templates, productivity systems, and business workflows.
- Airtable — Database-style no-code tool mentioned as a course topic for systems, dashboards, CRMs, and project workflows.
- Zapier — Automation tool mentioned as a course topic for workflow automation, business systems, and no-code processes.
- ChatGPT — AI assistant mentioned as a course topic for AI workflows, prompt writing, productivity, and business use cases.
- Midjourney — AI image generation tool mentioned as a course topic for creative workflows, design, and AI-powered visuals.
🎯 KEY TAKEAWAY
You do not need every tool on this page. One course platform, one way to record, and one email tool are enough to launch your first course.
🧭 How to Use This Directory
🧰 Start With a Simple Setup
Do not start by creating accounts with every service listed above. For most beginners, a simple setup is enough:
- One course hosting platform
- One recording tool
- One email platform
That is enough to start building. Add tools only when you can name the specific problem they will solve.
🎯 KEY TAKEAWAY
Tools support the business. They are not the business.
Your biggest advantages will come from:
A validated topic → Real student results → Consistent marketing → A growing email list
17. Explore Similar Side Hustles
 Online Tutoring: Get Paid to Teach What You Know — Teach students live while you also test a recorded course.
 Consulting: Get Paid for What You Know — Turn your course topic into high-ticket one-on-one services.
- Self-Publishing on Amazon KDP — Package the same knowledge into a book that funnels readers to your course.
 Newsletter Monetization: Get Paid to Write About What You Love — Build the email list that becomes your course launch engine.
 Selling Digital Products — Sell templates and workbooks as lower-priced companions to your course.
 Faceless Video Content Creation: Go Viral Without Showing Your Face — Create videos that promote your course around the clock.
Ready to turn a skill into a course? View the starter kit above and outline your first version when the topic, student, and outcome are clear.