Affiliate disclosure: Some links in this guide may be paid referral links. If you purchase or sign up through one, One Stop Side Hustles may earn a commission. How our affiliate links work.
STOCK PHOTOGRAPHY STARTER GUIDE
Turn your photography hobby into a way to license images online. Whether you shoot with an iPhone or professional DSLR, there's a market for quality images that help businesses, bloggers, and creators tell their stories. Licensing can keep earning after upload, but it still needs a useful portfolio, keywords, and ongoing uploads.
2. Why Photography & Stock Photos Are a Great Side Hustle
3. Types of Photos That Sell Best
4. How Much Can You Earn & Pricing Strategies
5. Equipment & Tools You Actually Need
6. Best Platforms for Selling Stock Photos
7. How to Start Selling Stock Photos
8. Tips to Sell More Photos Faster
9. Learning, Templates & Resources
10. Your First 6 Months Photography & Stock Photos Plan
11. View the Stock Photography Starter Kit
12. Frequently Asked Questions
Quick Snapshot
Earn: Varies widely — some files earn little at first; higher figures usually take a larger portfolio, useful subjects, and consistent uploads
Work: Shoot and upload at your own pace; later licenses can keep earning, but the library still needs work
Start: Medium cost — a camera or smartphone and editing app
Best for: Visual thinkers who shoot what buyers actually need
Grow: Small portfolio → niche focus → stock + client shoots
1. What Is Stock Photography?
Stock photography is the business of licensing your photos to individuals and companies who need images for websites, social media, advertisements, blogs, presentations, and marketing materials. You upload your photos to stock platforms once, and can earn a royalty if someone downloads or licenses them.
🔄 How It Works (Simple 4-Step Process)
- Take quality photos of subjects people need (not just what looks pretty)
- Upload to stock platforms with proper keywords and descriptions
- Your photos appear in search results when buyers look for specific images
- Earn royalties each time someone downloads or licenses your work
🎯 KEY TAKEAWAY
After upload, each extra license does not require reshooting the photo. Keywording, more uploads, and platform rules still take work, and no portfolio is guaranteed to earn a set amount.

2. Why Photography & Stock Photos Are a Great Side Hustle
Photography and stock photos are a strong side hustle because they turn visual skill, everyday scenes, and commercially useful images into income that can grow over time.
💰 One strong image can keep earning long after the shoot
Stock photography has upside because a useful image can be licensed again and again.
That long-tail potential usually grows through:
- More approved uploads
- Better keywording
- Commercially useful subjects
- Consistent publishing
- Multi-platform distribution
This makes each successful photo more valuable than a one-time creative project.
📸 Everyday scenes can become marketable assets
You do not need exotic travel, expensive sets, or rare moments to start.
Buyers often need practical content like:
- Workspaces
- Food and drinks
- Home routines
- Technology use
- Small business scenes
That means ordinary environments can still produce highly usable content when photographed with intention.
💻 You can begin with a simple setup
Many beginners can start with tools they already own instead of building a full studio immediately.
A practical starter setup usually includes:
- Smartphone or camera
- Natural light
- Basic editing app
- Contributor accounts
- Simple tracking system
Strategy and usefulness often matter more at the beginning than high-end gear.
🕒 It fits flexible, self-paced work
Photography and stock uploads can be built around your schedule rather than around client appointments every time.
A common rhythm might include:
- Planning shot lists
- Shooting in batches
- Editing in one session
- Keywording later
- Uploading consistently
That makes it easier to build the business gradually on evenings, weekends, or during free pockets of time.
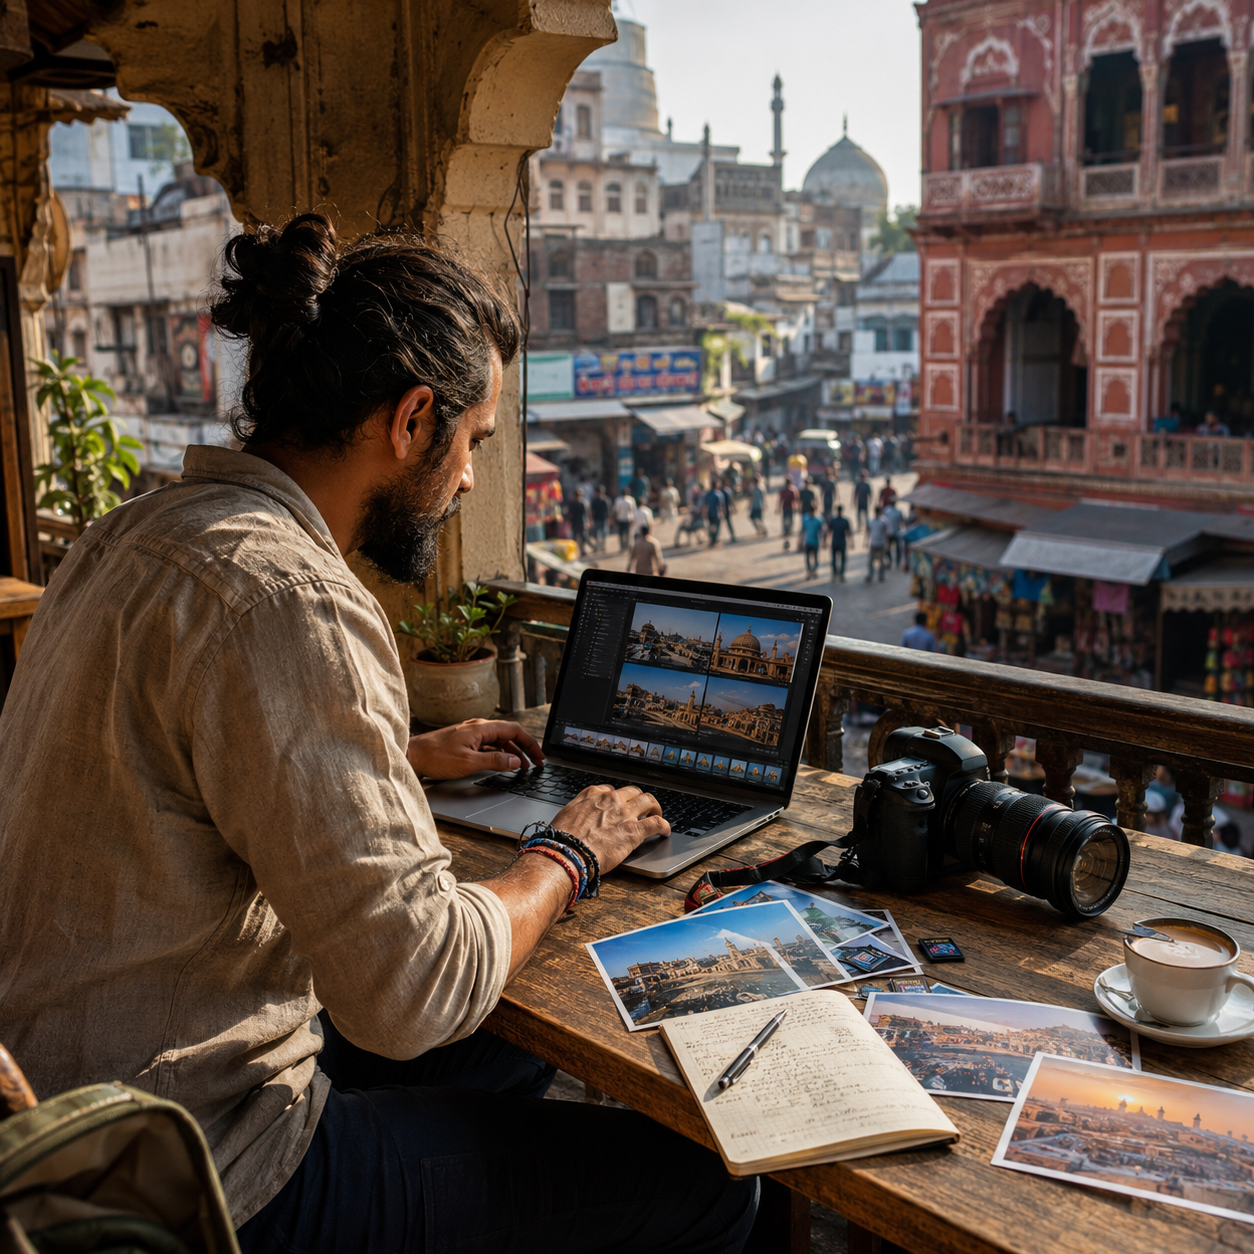
📈 The model scales as the portfolio grows
Stock income usually improves when you keep adding useful images that buyers can actually discover and use.
Common growth levers include:
- More quality uploads
- Better keywords
- Stronger niches
- Seasonal planning
- Multiple platforms
The bigger advantage is not only volume — it is building a searchable library that keeps working for you.
🎯 Buyer demand matters more than fancy gear
The photos that sell are usually not just beautiful — they solve a visual need for a business, creator, or marketer.
Buyers often care most about:
- Clean lighting
- Clear composition
- Copy space
- Authentic scenes
- Searchable concepts
That makes stock photography a smart fit for people who can think commercially, not only artistically.
🌍 There is constant global demand for useful visuals
Brands, publishers, and creators always need images for digital products and content.
Common buyers include:
- Bloggers
- Brands
- Designers
- Course creators
- Social media teams
Because the use cases are broad, one good niche can lead to opportunities across many industries.
🧪 It can lead into a broader photography business
Stock work can become the foundation for higher-paying or more active photo services over time.
Common next steps include:
- Brand shoots
- Product photography
- Portrait sessions
- Photo editing
- Prints or digital packs
So even if stock starts as the entry point, it can open the door to a much larger creative income mix.
3. Types of Photos That Sell Best
Successful stock photography is less about taking random beautiful pictures and more about creating images that businesses, marketers, bloggers, creators, and designers can actually use.
Stock images commonly appear in websites, advertisements, blog posts, presentations, product pages, and social media campaigns. A good beginner strategy is to choose one or two photography niches, build a useful portfolio around them, and upload consistently.
Below are the main stock photography categories you can explore.
💼 Business, Work & Technology
💼 Business & Office Photos
- 💻 Hot Topics: Remote work setups, home offices, video calls, laptop work, coffee shop work, coworking spaces, business meetings, productivity themes, diverse teams collaborating
- 📈 Demand: Very high and consistent
- 👥 Common Buyers: Businesses, bloggers, SaaS companies, course creators, agencies, presentation designers, career websites
- ⭐ Difficulty: ⭐⭐ Easy to moderate
- 🌟 Best for: Photographers who can create clean, modern, professional-looking work scenes
💡 PRO TIP
Show diversity in age, ethnicity, work style, environment, and device use. Avoid stiff “corporate handshake” clichés unless you can make them feel modern and natural.
💻 Technology & Digital Life Photos
- 📱 Hot Topics: Smartphones, tablets, smart home devices, AI concepts, robotics, streaming, social media, e-commerce, online shopping, digital payments, apps, cybersecurity, remote collaboration
- 📈 Demand: Very high
- 👥 Common Buyers: Tech blogs, software companies, digital marketers, cybersecurity brands, app developers, online businesses
- ⭐ Difficulty: ⭐⭐⭐ Moderate
- 🌟 Best for: Photographers who can stage modern tech scenes without relying too much on visible brand logos
💡 PRO TIP
Keep tech current, but avoid making the image too branded or too tied to one device generation. Generic screens, hands using devices, and concept-based shots have a longer shelf life.

👨👩👧 Lifestyle, People & Wellness
👨👩👧 Lifestyle & People Photos
- 😊 Hot Topics: Authentic family moments, friends dining, couples, daily routines, cooking, cleaning, reading, parenting, real emotions, candid expressions, multi-generational interactions
- 📈 Demand: Always popular
- 👥 Common Buyers: Marketers, brands, lifestyle blogs, family websites, wellness companies, social media managers
- ⭐ Difficulty: ⭐⭐⭐ Moderate
- 🌟 Best for: Photographers who are comfortable directing people naturally and capturing emotion
- ⚠️ Model Release: Required for any recognizable person
💡 PRO TIP
Authentic beats perfect. Buyers are looking for relatable human images, not overly posed stock-photo clichés.
🧘 Health, Fitness & Wellness Photos
- 🧘 Hot Topics: Home workouts, yoga, running, outdoor exercise, gym classes, meditation, mindfulness, healthy eating, mental health, spa care, self-care, active aging, senior fitness
- 📈 Demand: High and growing
- 👥 Common Buyers: Fitness brands, wellness blogs, health coaches, gyms, nutrition businesses, mental health platforms, lifestyle brands
- ⭐ Difficulty: ⭐⭐⭐ Moderate
- 🌟 Best for: Photographers who can capture movement, calm environments, body-positive imagery, and realistic wellness routines
💡 PRO TIP
Show a variety of body types, ages, fitness levels, and abilities. The wellness market is moving away from overly polished “perfect body” imagery.

🍽️ Food, Home & Everyday Living
🍽️ Food & Beverage Photos
- 🥗 Hot Topics: Restaurant meals, healthy meal prep, ingredients, coffee shop moments, cocktails, baking, cooking processes, farm-to-table themes, organic food, international cuisines, flat lay food styling
- 📈 Demand: Huge market
- 👥 Common Buyers: Food bloggers, restaurants, recipe sites, meal kit services, nutrition coaches, hospitality brands, social media managers
- ⭐ Difficulty: ⭐⭐⭐ Moderate
- 🌟 Best for: Photographers who enjoy styling, lighting, color, and clean composition
💡 PRO TIP
Natural light, simple backgrounds, overhead flat lays, and visible texture perform well. Leave copy space when possible so designers can add text.
🏡 Home, Decor & Daily Life Photos
- 🏠 Hot Topics: Cleaning routines, cozy interiors, home organization, reading corners, home offices, family kitchens, simple décor, morning routines, household products, lifestyle flat lays
- 📈 Demand: High
- 👥 Common Buyers: Home bloggers, cleaning brands, lifestyle websites, Pinterest creators, product sellers, organization businesses
- ⭐ Difficulty: ⭐⭐ Easy to moderate
- 🌟 Best for: Beginners who can use their own home, desk, kitchen, or everyday environment as a photo set
💡 PRO TIP
Clean, bright, uncluttered spaces usually sell better than overly busy rooms. Think “usable background” instead of “personal snapshot.”

🌎 Travel, Nature & Seasonal Content
🏔️ Nature & Travel Photos
- 🌄 Hot Topics: Iconic landmarks, lesser-known destinations, adventure travel, sustainable tourism, road trips, national parks, wilderness, cityscapes, golden hour, weather, local culture
- 📈 Demand: Steady, but competitive
- 👥 Common Buyers: Travel blogs, tourism boards, adventure brands, hotels, magazines, destination marketers
- ⭐ Difficulty: ⭐⭐⭐ Moderate to hard
- 🌟 Best for: Photographers who travel often or live near visually interesting locations
💡 PRO TIP
Generic sunsets and basic landmark shots are hard to sell. Add value with unique angles, people interacting with the place, local details, or activity-based travel scenes.
🎄 Seasonal & Holiday Photos
- 🎄 Hot Topics: Christmas, winter holidays, back-to-school, summer vacation, Halloween, autumn, Valentine’s Day, New Year, spring, Mother’s Day, Father’s Day, graduation, patriotic holidays
- 📈 Demand: High, but timing matters
- 👥 Common Buyers: Businesses, bloggers, email marketers, advertisers, social media managers, retailers
- ⭐ Difficulty: ⭐⭐ Easy to moderate
- 🌟 Best for: Photographers who can plan ahead and shoot content before buyers need it
💡 PRO TIP
Upload seasonal content 3–4 months early. Businesses plan holiday campaigns long before the season actually starts.
📅 Seasonal Upload Timeline
- 🎄 Christmas/Winter Holidays: Upload by September
- 🎒 Back to School: Upload by June
- ☀️ Summer Vacation/Travel: Upload by March
- 🎃 Halloween/Autumn: Upload by August
- 💌 Valentine’s Day: Upload by December
- 🎆 New Year/Fresh Starts: Upload by November
- 🌸 Spring/Renewal: Upload by January
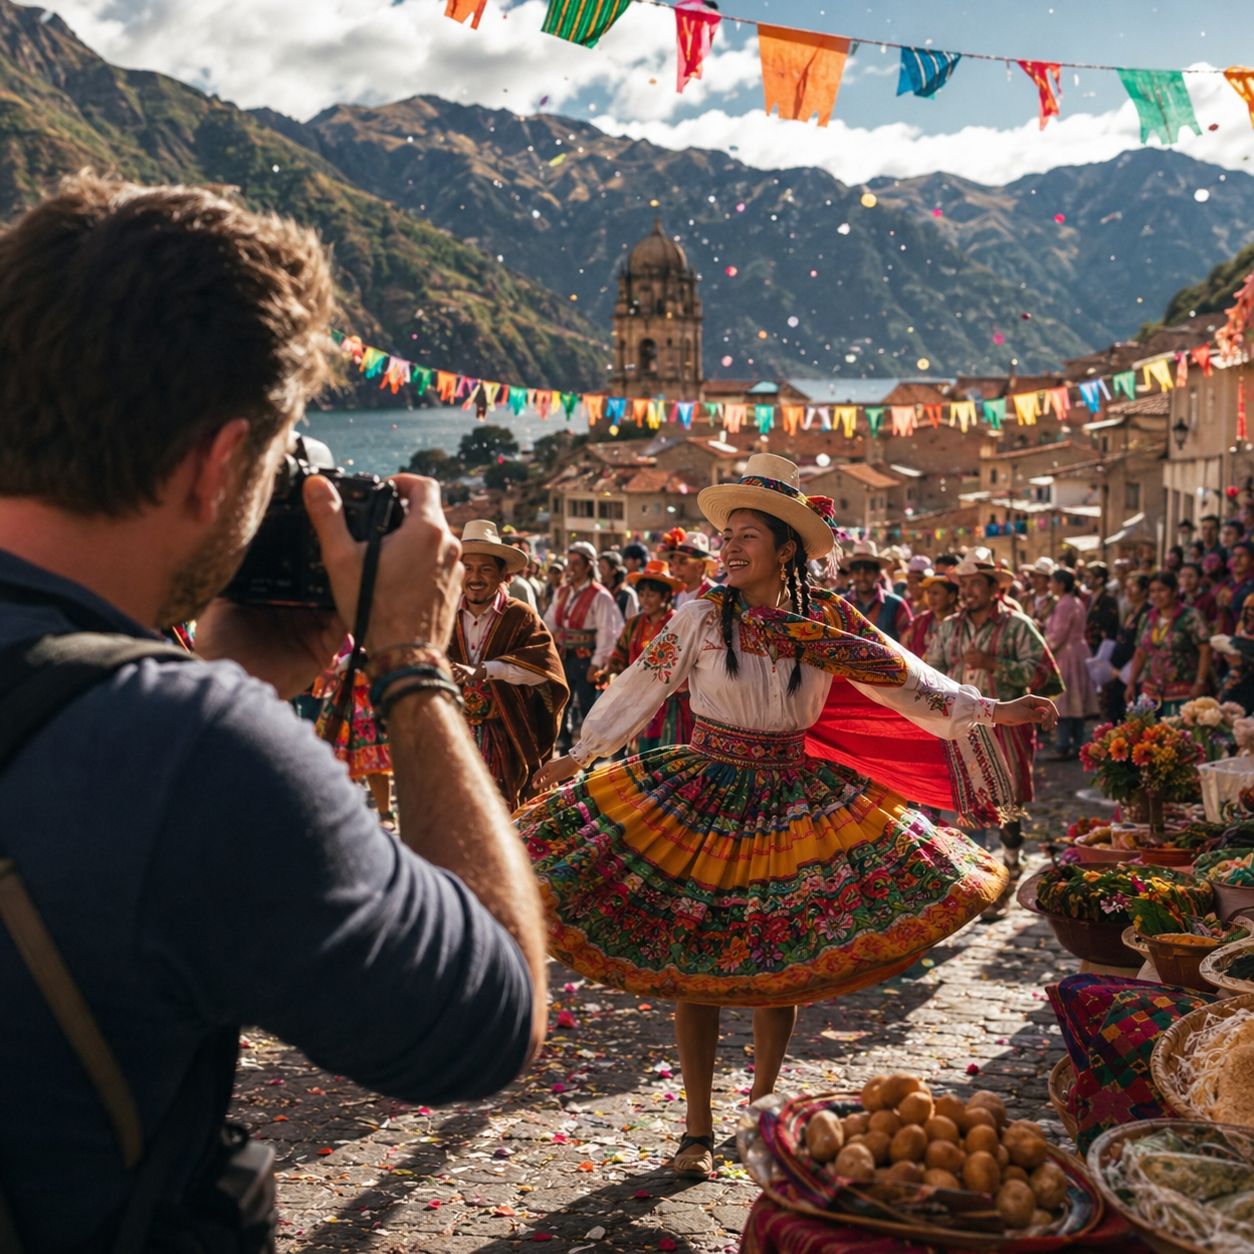
🎨 Design-Friendly Stock Photos
🎨 Abstract & Background Photos
- 🌀 Hot Topics: Solid color backgrounds, subtle textures, minimalist patterns, geometric shapes, blurred bokeh, marble textures, wood textures, fabric textures, gradients, light leaks, particles, copy-space backgrounds
- 📈 Demand: Consistent and underrated
- 👥 Common Buyers: Designers, bloggers, presentation creators, social media managers, website builders, ad creators
- ⭐ Difficulty: ⭐ Easy
- 🌟 Best for: Beginners who want simple photos that are easy to create at home
💡 PRO TIP
Backgrounds sell because they are useful. Designers need space for text, buttons, headlines, product mockups, and social media graphics.
🖊️ Flat Lays & Styled Desk Photos
- 🖊️ Hot Topics: Notebooks, laptops, coffee, planners, stationery, phones, tablets, books, creative tools, workspaces, productivity layouts
- 📈 Demand: High
- 👥 Common Buyers: Bloggers, online course creators, coaches, productivity brands, Pinterest marketers, digital product sellers
- ⭐ Difficulty: ⭐⭐ Easy to moderate
- 🌟 Best for: Photographers who enjoy composition, props, and clean visual organization
💡 PRO TIP
Leave open space in the image for text overlay. Stock buyers often need images for blog headers, Pinterest pins, ads, and landing pages.

🎯 Plan Your First Stock Photo Collection
🎯 KEY TAKEAWAY
Beginner’s Best Bet: Start with business/work photos, lifestyle flat lays, food photos, or abstract backgrounds. These categories are easier to shoot without expensive travel, large teams, or complex setups.
🚀 ACTION STEP
Write a focused first plan:
- Buyer use: Choose a category and the design problem your images will serve.
- Shot list: Plan a small coordinated collection with useful angles and copy space.
- Rights: Check model or property releases and marketplace licensing rules.
- Upload workflow: Edit, keyword, and submit consistently; track acceptance and buyer demand.
4. How Much Can You Earn & Pricing Strategies
Use this chapter to connect commercial demand, portfolio strategy, licensing, and client work to your photography income plan.
🧠 Reality Check (What Actually Separates Earners)
- Most beginners earn very little at first
- Not because photography cannot pay
- 👉 Many upload random photos instead of images buyers actually need
- 👉 Or they rely only on stock sites without building higher-value services
- The photographers who earn more typically:
- Shoot with commercial demand in mind
- Build a larger portfolio over time
- Learn what niches sell repeatedly
- Combine client work with recurring licensing income
💡 PRO TIP
Great photos alone do not guarantee income. The real difference is creating images that are useful, searchable, and marketable.
🎯 KEY TAKEAWAY
Commercial usefulness, technical quality, rights, and accurate metadata matter more than uploading the largest possible portfolio.
🔑 Smart Pricing Strategy
📸 Commercial Portfolio & Stock Income
- Start by building a portfolio around:
- Business and office scenes
- Lifestyle images
- Product-style photos
- Niche local or commercial themes
- Use stock sites for recurring licensing income, but treat them as a volume game
📦 Client Sessions, Licensing & Packages
- For client work, move toward:
- Flat-rate session pricing
- Licensing-based pricing for business use
- Package deals for shoots + edits
🎯 KEY TAKEAWAY
Separate platform-set stock royalties from client pricing. For direct shoots, quote production and agreed usage; stock contributors may not control the customer’s license price.
🧪 Real Example
📋 REAL-WORLD EXAMPLE
📌 Same Camera, Different Outcomes
These scenarios illustrate possible income mixes, not verified typical results or forecasts. They exclude production, equipment, travel, overhead, and taxes. Combining client work with stock changes the workload and does not guarantee greater stability.
🌱 Scenario A: Hobby shooter
- Uploads occasional scenic or artistic photos
- Little keyword strategy
- Income: $20–$100/month
🎯 Scenario B: Strategic stock creator
- Uploads business, lifestyle, and commercial-use images consistently
- Better keywording and niche focus
- Income: $300–$1,500/month
🚀 Scenario C: Hybrid photographer
- Builds stock portfolio + books portrait or brand shoots
- Same core photography skill
- Income: $2,000–$6,000+/month
💡 Same equipment category. Big difference in market demand, portfolio strategy, and service mix.
🎯 KEY TAKEAWAY
Use these scenarios to understand the model, not to predict your own income. Compare actual results and risks with your written plan.
🎯 What Actually Drives Income
🧮 Buyer Usefulness × Discoverability × Licensing Demand = Income Potential
This is a business framework, not a mathematical earnings forecast.
📊 Key Income Drivers
- Type of photography
- General scenic shots = more competition
- Business, lifestyle, product, and commercial content = stronger demand
- Portfolio size
- More quality images = more chances to earn
- Keywording and discoverability
- Better titles, tags, and descriptions improve sales
- Client type
- Businesses and brands usually pay more than individuals
- Licensing value
- Commercial usage often supports higher pricing than casual personal use
💡 PRO TIP
In stock photography, volume matters. In client photography, positioning and specialization matter even more.
📈 Stock Royalties & Shoot Costs (Income Reality)
📖 Read the Numbers in Context
A license purchase price is not necessarily your contributor royalty. Platform terms, license type, exclusivity, and payout thresholds affect receipts. Shooting, editing, keywording, releases, travel, and equipment have costs. Direct client revenue and stock royalties are different income streams.
🎯 KEY TAKEAWAY
Look beyond headline income: assess the complete economics, risks, and real cash available.
🚀 Build Your First Commercial Photography Test
Start with one commercial theme, a small rights-cleared image set, and one contributor platform. Use four weeks to learn production, submissions, and metadata—not to forecast long-term licensing income.
🧭 Run a Focused Stock Portfolio Test
- Choose a useful commercial theme. Identify a specific buyer use, such as a generic home-office workflow. Plan a small, varied image set with copy space and practical compositions. Use equipment you already own rather than buying gear based on assumed future downloads.
- Check rights and submission rules. Review contributor terms, permitted content, releases, exclusivity, and technical requirements. Obtain appropriate model or property releases where required. Avoid unlicensed artwork, protected branding, or confidential information; editorial and commercial use have different restrictions.
- Produce and review a small set. Shoot, select, and edit for clean exposure, focus, consistency, and usefulness. Inspect at full size for artifacts and hidden personal data. Keep originals, permission records, and releases organized. Reject weak files instead of uploading near-duplicates just to increase volume.
- Submit through one platform for four weeks. Add accurate titles, descriptions, and keywords without irrelevant tags or misleading claims. Track review outcomes and correct recurring issues. Distinguish accepted files from downloads and earnings. Consider direct client services separately, with clear deliverables and usage terms.
- Review production and actual demand. Record all shooting, editing, keywording, and admin time, expenses, acceptance, licenses, and royalties. Four weeks may produce no downloads or insufficient data. Improve buyer fit and quality before expanding; do not treat acceptance as proof of income.
🎯 KEY TAKEAWAY
Commercial usefulness, technical quality, rights, and accurate metadata matter more than uploading the largest possible portfolio.
💡 Example: A Four-Week Photography Test
- Theme: A generic home-office workflow useful to business publishers
- Set: A small original collection with varied compositions and copy space
- Rights: Required permissions and releases checked; no exposed personal data or unauthorized logos
- Quality: Technical inspection and consistent editing before submission
- Platform: One suitable stock contributor account
- Test: Four weeks of production, submission, and review tracking
- Signals: Acceptance reasons, relevant downloads, actual royalties, costs, and all work time
This is a portfolio-learning test, not a promise of downloads. Long-tail licensing may require a longer review period. Client shoots must be tracked separately from stock income and need their own scope and licensing agreements.

✍️ Write Your One-Line Earnings Test Plan
Use this structure to make the plan easy to review:
“For [buyer use], I will submit [small rights-cleared image set] to [platform] over [period]. I will review [quality, acceptance, metadata, licenses, royalties, costs, and production time] before expanding.”
✅ Completed example
“For business publishers needing generic home-office imagery, I will create and submit a small original collection to one stock platform over four weeks, check releases and technical quality, and review acceptance, downloads, actual royalties, costs, and all production time before expanding.”
🚀 ACTION STEP
Before starting:
Keep the first plan focused. Build a workable process before adding more complexity.
📋 Pricing & Revenue Planning Reference
Treat stage ranges and income models as illustrative references, not verified typical royalties or guaranteed timelines. Downloads, platform terms, rights, and production costs affect results. Hybrid client income is not comparable with stock-only royalties without separating workload and costs.
💵 What Photography Income Streams Can Earn
📊 Income Progression by Stage
🚀 Stage | 📸 Income Model | 💰 Typical Monthly Income | ⏳ Timeline | 📌 What’s Happening |
Beginner | Small stock portfolio / first shoots | $0–$200 | 0–3 months | Learning what sells, uploading consistently |
Developing | Growing portfolio + some client work | $200–$1,500 | 3–6 months | Better keywording, stronger image quality |
Established | Mixed stock + paid photography | $1,500–$5,000 | 6–12 months | Repeat sales, client referrals, better niches |
Advanced | Strong portfolio + premium shoots | $5,000–$10,000+ | 12–24 months | Higher rates, stronger specialization |
Professional | Multiple income streams / brand | $10,000+/month | 2+ years | Large portfolio, premium clients, scalable offers |
🎯 KEY TAKEAWAY
The stages describe possible progression, not guaranteed income or a required timeline. Use your own capital or business records to plan realistically.
📊 Key Metrics & Margin Snapshot
📈 Stock Royalties & Shoot Costs (Income Reality)
📊 What Your Portfolio Is Actually Earning
Metric | What to Record |
Submission quality | Track accepted files, rejections, and reasons |
Licensing activity | Separate downloads, license types, and actual royalties |
Production effort | Log shoot, edit, keywording, release, and admin hours |
Costs and rights | Record travel, tools, permissions, and relevant equipment costs |
Income mix | Keep client invoices and stock royalty receipts separate |
🎯 KEY TAKEAWAY
Accepted files and portfolio size are not earnings. Measure actual licensing demand and complete production effort.

💸 Common Photography Income Models
🧾 Common Photography Income Models
💡 Pricing Model | 💰 Typical Rates | 📈 Best Use Case |
🖼️ Stock photo royalties | A few cents to $100+ per sale | Recurring licensing income from large image libraries |
📷 Portrait / lifestyle sessions | $100–$1,000+ per shoot | Active client work |
🏢 Commercial / brand shoots | $500–$5,000+ | Business, product, marketing use |
🎉 Event photography | $200–$3,000+ | Parties, local events, small weddings |
📦 Licensing bundles / digital image packs | $50–$500+ | Niche collections and usage rights |
🎯 KEY TAKEAWAY
Platform-set royalties and direct licensing quotes work differently. Confirm current contributor terms and specify usage for client work.
🧮 Check Your Project & Revenue Economics
Photography contribution = actual royalties or collected client fees − stream-specific production and selling costs.
Avoid subtracting agency deductions twice if already reflected in royalties. Track equipment, software, travel, and broader overhead appropriately. Keep stock and client work separate when comparing total hours and profit; taxes still reduce take-home income.
🚀 ACTION STEP
🗓️ Build a Monthly Photography Revenue Snapshot
Use actual records and a sustainable plan—not projections alone—to decide what to continue.

5. Equipment & Tools You Actually Need
🛠 TOOLS & RESOURCES
📸 Beginner Camera Upgrades
Camera | Estimated Cost | Best For | Why It’s Useful |
$450-$550 | Beginner DSLR users | Reliable, simple, affordable | |
$400-$500 | Simple photography learning | Great image quality and easy controls | |
$550-$650 | Compact mirrorless setup | Lightweight, sharp, strong autofocus | |
$600-$700 | Photos and video | Flip screen, compact, creator-friendly | |
18-55mm Kit Lens | Often included | General stock photography | Good enough for starting |
Recommendation: Do not overspend on camera gear at the beginning. A basic DSLR or mirrorless camera with a kit lens is enough to shoot clean, usable stock photos.
🏆 Pro-Level Equipment
Equipment | Estimated Cost | Best For | Buy When |
Full-Frame Camera | $1,500-$3,000 | Low light, portraits, premium quality | After consistent sales |
50mm f/1.8 Prime Lens | $100-$250 | Portraits, products, shallow depth of field | First serious lens upgrade |
35mm f/1.8 Prime Lens | $200-$500 | Lifestyle, indoor, wider shots | When shooting people or spaces |
70-200mm Telephoto Lens | $800-$2,000+ | Portraits, events, isolated subjects | Advanced stock work |
External Flash / Speedlight | $100-$300 | Indoor lighting control | When natural light is limiting |
Upgrade rule: Invest in pro gear only after you are consistently earning from your photos. Gear should support revenue, not replace strategy.
🖥️ Essential Editing Software
Software | Cost | Best For | Difficulty |
Free / $10/mo | Quick edits and mobile workflow | Easy | |
$10/mo | Professional photo organization and batch editing | Medium | |
Free | Simple phone editing | Very Easy | |
Free | Free Photoshop alternative | Hard | |
$10/mo | Advanced retouching | Hard | |
Free / $13/mo | Graphics, thumbnails, simple layouts | Very Easy |
Starter Stack: Use Lightroom Mobile + Snapseed at first. You do not need paid editing software until you are uploading consistently and making money.
💡 Must-Have Accessories
Accessory | Estimated Cost | Purpose | Priority |
Reflector | $15-$25 | Bounces natural light for better portraits/products | ⭐ High |
Tripod | $20-$40 | Stable shots, flat lays, low light photos | 🔥 Essential |
Extra Memory Cards | $15-$30 | Backup storage during shoots | ⭐ High |
External Hard Drive | $60-$100 | Backup your photo library | 🔥 Essential |
Remote Shutter | $15-$30 | Avoid camera shake | Medium |
Light Diffuser | $30-$50 | Softens harsh sunlight | Medium |
Continuous LED Light | $80-$200 | Product, food, and indoor photography | Optional |
Backdrop Stand + Backdrops | $100-$200 | Studio-style product photos at home | Optional |
Smart buying strategy: Start with a tripod, reflector, and backup storage. Add lighting and backdrops only when you know what type of stock photos you want to specialize in.
🔎 Keywording & Research Tools
Tool | Purpose | Cost | Best Use |
Trend research and stock photo ideas | Free | Finding topics buyers search for | |
Portfolio tracking and keyword support | Free / paid options | Monitoring stock photo performance | |
Visual research and related searches | Free | Studying popular image styles | |
Search trend validation | Free | Seasonal and trending photo ideas | |
Visual trend research | Free | Lifestyle, food, home, and creator niches |
Tip: Good keywords matter almost as much as good photos. A great image will not sell if buyers cannot find it.
🗂️ Organization & Workflow Tools
Tool | Purpose | Cost | Best For |
Organize photos by shoot, theme, and season | $10/mo | Serious photo libraries | |
Track uploads, keywords, earnings, and platforms | Free | Beginner-friendly tracking | |
Shoot planning, content calendar, portfolio notes | Free-$10/mo | Organized creators | |
Visual workflow boards | Free | Planning shoots and uploads | |
Cloud backup and file storage | Free / paid | File organization |
Recommended workflow: Track every photo batch: shoot date, subject, platform uploaded, keywords used, approval status, and earnings.
📄 Legal & Release Tools
Tool / Resource | Purpose | Cost | When You Need It |
Model Release Template | Permission to sell photos with recognizable people | Free from many stock sites | Any photo with identifiable people |
Property Release Template | Permission for private property, interiors, or branded locations | Free from many stock sites | Homes, businesses, private spaces |
Digital signatures for releases | Free / paid | Remote or professional shoots | |
PDF editing and signing | Free / paid | Release forms and contracts | |
Store signed releases and records | Free / paid | Keeping files organized |
Important: Avoid logos, trademarked products, private property, and recognizable people unless you have the correct release.
✅ Your Minimal Starter Stack
Need | Starter Option | Cost |
Camera | Smartphone you already own | Free |
Lighting | Natural window light | Free |
Editing | Free | |
Organization | Free | |
Planning | Free | |
Research | Free | |
Backup | Cloud storage or external hard drive | Free-$100 |
Total to launch: $0-$100 if you already have a decent phone.
Reality: Your first goal is not perfect gear. Your first goal is learning what stock platforms accept, what buyers search for, and which images actually earn.
💡 Essential Tip: Start by shooting simple, high-demand subjects: work-from-home setups, food prep, clean desk scenes, hands using tools, family routines, seasonal backgrounds, and small business visuals. Clean lighting, clear composition, and strong keywords will outperform expensive gear with poor strategy.
6. Best Platforms for Selling Stock Photos
Stock platforms differ in buyer audience, approval standards, licensing models, royalties, and portfolio fit. Use this chapter to compare broad marketplaces, specialized options, and a manageable multi-platform upload strategy.
📝 QUICK NOTE
Contributor terms and royalty rates can change. Verify current requirements, payout rules, exclusivity terms, and accepted content directly with each platform before committing your portfolio.
📷 Broad Stock Marketplaces — Start Here
Stock Images, Photos, Vectors, Video, and Music | Shutterstock
⭐ Best for Beginners
Feature | Details |
Approval | Moderately selective, test upload required |
Payout | $0.25-$0.38 per download (most common) |
Traffic | Highest among all platforms |
Best for | High volume uploaders, commercial content |
Minimum payout | $35 |
Exclusivity | Not required |
Pros: Huge buyer base, fastest path to sales, good learning ground Cons: Low per-download earnings, strict technical requirements
Stock Photos, Images, Videos & AI Editing Tools | Adobe Stock
⭐ Higher Earnings
Feature | Details |
Approval | More selective than Shutterstock |
Payout | $0.33 (standard) up to $3.50 (extended license) |
Traffic | Integrated into Adobe Creative Cloud |
Best for | Quality over quantity |
Minimum payout | $25 |
Exclusivity | Not required |
Pros: Better rates, design-focused buyers, easier upload from Lightroom Cons: Slower approval, fewer sales for beginners
Royalty-free Images, Photo Stock, Video & Music | DepositPhotos
⭐ Good Supplemental Income
Feature | Details |
Approval | Easier than Shutterstock |
Payout | $0.30-$0.50 per download |
Traffic | Growing international market |
Best for | Building portfolio alongside others |
Minimum payout | $50 |
Pros: Less competitive, accepts more photos Cons: Lower traffic than big players
Stock Images, Royalty-Free Images, Illustrations, Vectors and Videos - iStock
⭐ Premium Option
Feature | Details |
Approval | Selective, application process |
Payout | 15-45% royalty based on exclusivity |
Traffic | High-end clients, agencies |
Best for | Professional-quality work |
Exclusivity options | Can boost earnings significantly |
Pros: Higher-paying clients, prestigious platform Cons: Harder to get accepted, more competition
🎯 Specialized Platforms — Match the Buyer and Use Case
Get creative with stock photos and videos from Alamy
- Best for Editorial & High-Res
- Payout: 50% commission (highest in industry!)
- Average earning: $7-$80 per license
- Best for: Travel, news, editorial, high-resolution
- Accepts: Phone photos if high quality
- Minimum payout: $0 (paid monthly)
Why consider: Best commission rates, accepts more editorial/news content
- Premium Licensing
- Payout: 60% on exclusive, 30% non-exclusive
- Traffic: Professional buyers
- Best for: Fine art, landscape, artistic work
- Application: Must meet quality standards
- Also functions as: Portfolio showcase
Why consider: Higher payouts, respectable platform for portfolio
Sell your photos, stickers, videos and graphics online - Canva
- Fastest Growing
- Payout: $0.35 per use in Canva designs
- Traffic: 100+ million Canva users
- Best for: Backgrounds, textures, lifestyle, simple compositions
- Unique advantage: Photos used in templates earn repeatedly
- Application: Must apply and be approved
Why consider: Huge user base, photos can go viral in templates
🧭 Platform Strategy — Build a Manageable Upload Mix
🚀 Beginner Strategy (Months 1-6): Start with 2-3 platforms to learn without overwhelm
📈 Shutterstock (volume and traffic)
🎨 Adobe Stock (better rates)
🧩 Depositphotos or Canva (variety)
📦 Intermediate Strategy (Months 6-12): Expand to 4-5 platforms once you have efficient workflow
🌍 Add Alamy (for editorial)
⭐ Add iStock (if accepted)
🔁 Keep uploading to original platforms
🏆 Advanced Strategy (Year 2+): Maximize exposure across 6-8 platforms
✅ All major platforms covered
⚙️ Automated upload workflows
📊 Tracking which platforms perform best for your style
💡 Time-Saving Tip: Use tools like Xpiks or Lightroom plugins to upload to multiple platforms simultaneously with the same keywords.
7. How to Start Selling Stock Photos
Use this step-by-step system to go from researching what buyers want → shooting commercially useful images → uploading consistently → improving based on performance data.
Stock photography is not just about taking pretty pictures. It is about creating images that businesses, bloggers, marketers, and creators can use in real-world projects.
Use the seven tabs in order for your first batch, then reopen the phase you need. Chapter 6 covers where to sell; this chapter takes one commercial idea through research, rights, shooting, editing, keywording, upload, and review.
🎯 PHASE 1 — Learn What Sells Before You Shoot
📋 Steps 1–3: Browse buyer search results, study high-demand themes, and turn that research into a first 50-photo shot list.
✅ Ready to move on: You can name 2–3 commercial categories, a 50-photo shot list, and which images may need releases.
🔎 Step 1: Research Buyer Demand Before You Shoot
Before shooting a single photo, learn what stock photo buyers are actually searching for.
Start by browsing major stock platforms for at least 2 hours.
🛍️ What to Do on the Platforms
- Browse Shutterstock and Adobe Stock for at least 2 hours
- Search buyer-friendly terms like:
- Remote work
- Healthy eating
- Small business
- Family budgeting
- Online learning
- Home office
- Notice what appears in search results
- Study subject matter, lighting, composition, colors, and backgrounds
- Look for repeated patterns in best-selling images
- Identify topics that look oversaturated or underserved
👀 What to Look For
- What types of people are shown?
- What emotions are being communicated?
- Is there copy space for text?
- Are the photos horizontal, vertical, or square?
- Are the images bright, clean, and commercially useful?
📈 Step 2: Analyze Trends and Market Gaps
Now look for patterns and opportunities.
🧪 Research Ideas
- Check trending searches on stock platforms
- Read photography blogs about best-selling stock themes
- Join stock photography Facebook groups
- Study top contributor portfolios
- Look at seasonal content trends
- Notice what types of images appear in ads, blogs, and websites
🔥 High-Demand Themes
High-demand stock photo themes often include:
- Business and entrepreneurship
- Remote work
- Health and wellness
- Family and parenting
- Food and meal prep
- Fitness
- Education
- Technology
- Diversity and inclusion
- Home organization
- Personal finance
- Lifestyle and productivity
📝 Step 3: Plan Your First Commercial Shoot
Turn your research into a simple action plan.
Avoid shooting only what you think is pretty.
Shoot what buyers need.
Those are often different things.
✅ First-Shoot Planning Checklist
- List 10 subject areas you can shoot easily
- Identify 5 with strong commercial demand
- Pick 2–3 categories to focus on first
- Create a shot list for your first 50 photos
- Plan props, locations, models, lighting, and backgrounds
- Decide which photos need model or property releases
🧪 Example First 50-Photo Shot List
📋 REAL-WORLD EXAMPLE
Theme | Shot Ideas |
💻 Remote work | Laptop desk, coffee, notebooks, video call setup |
🥗 Healthy eating | Meal prep containers, ingredients, smoothie prep |
🏡 Home lifestyle | Cleaning, organizing, family routines |
📚 Online learning | Student with laptop, notes, tablet, headphones |
💼 Small business | Packing orders, invoices, workspace, products |
⚠️ Shoot What Buyers Need
⚠ COMMON MISTAKE
Avoid shooting only what you think is pretty.
Shoot what buyers need.
Those are often different things.
🚀 Your First 5 Actions
🚀 ACTION STEP
Keep week one on one commercial theme—not a 1,000-image library.
📐 PHASE 2 — Master Technical, Legal, and File Standards
📋 Steps 4–8: Confirm resolution, file format, technical quality, restricted content, and the releases you need before you invest in a large edit batch.
✅ Ready to move on: You know the size and JPEG/sRGB settings, you can inspect a file for technical faults, and you know when a model or property release is required.
📐 Step 4: Meet Resolution and Size Standards
Every stock platform has minimum standards. Learning these early helps you avoid unnecessary rejections.
Most platforms require high-resolution images.
Use the highest-quality camera settings available on your camera or phone.
📏 Common Size Standards
- Minimum: 4MP, roughly 2400 × 1600 pixels
- Better: 12MP+, roughly 4000 × 3000 pixels or larger
- Some platforms may require 8MP minimum
🗂️ Step 5: Set the Correct File Format and Color
Use the correct file type and color settings.
💾 Recommended Settings
- Upload final images as JPEG
- Shoot in RAW when possible
- Edit RAW files, then export as JPEG
- Use sRGB color space
- Avoid Adobe RGB unless the platform specifically allows or requires it
🔍 Step 6: Inspect Technical Quality Before Upload
Your photos should be clean, sharp, and professional.
✅ Technical Quality Checklist
- Sharp focus
- No motion blur
- Proper exposure
- Low ISO
- Minimal noise or grain
- No chromatic aberration
- No compression artifacts
- Clean backgrounds
- Straight horizons
- No distracting objects
🚫 Step 7: Follow Content and Legal Rules
Stock platforms are strict about legal and commercial usage.
🚫 Avoid These in Commercial Files
- Visible logos
- Trademarks
- Branded products
- Copyrighted artwork
- Private property without permission
- Recognizable people without model releases
- Inappropriate or restricted content
📄 Step 8: Collect the Releases You Need
Get the right permission before you treat an image as commercially usable.
📋 Release Quick Reference
Release Type | When Needed |
Model Release | Recognizable people appear in the photo |
Property Release | Private homes, businesses, artwork, or protected locations appear |
Editorial Use Only | Newsworthy images with people, logos, or public events |
💡 Learn the Rules Before You Edit a Huge Batch
💡 PRO TIP
Stock platforms may reject a large percentage of beginner submissions. Learn the technical and legal requirements first so you do not waste time editing and uploading photos that cannot be approved.
📸 PHASE 3 — Shoot Clean, Flexible, Commercially Useful Images
📋 Steps 9–14: Shoot for copy space, multiple orientations, authentic representation, a searchable story, and clean light.
✅ Ready to move on: One scene exists in more than one orientation, has copy space, and would make sense on a blog, ad, or website.
📸 Step 9: Shoot With Commercial Intent
Commercial stock photography should be useful, flexible, and easy for buyers to adapt.
Your goal is to create photos that can work in blog posts, ads, websites, presentations, social media, and digital products.
✅ Shooting Rule
🎯 KEY TAKEAWAY
A stock photo should be clean, clear, flexible, and commercially useful.
⬜ Step 10: Leave Copy Space for the Buyer
Buyers often need space to add text.
🖼️ Include
- Negative space
- Clean backgrounds
- Empty space at the top or sides
- Simple compositions
- Room for headlines, captions, or ad copy
↔️ Step 11: Shoot Both Orientations of the Same Scene
Capture the same scene in multiple formats.
One scene can create multiple licensing opportunities when you shoot it several ways.
📐 Orientation Uses
Orientation | Best For |
Horizontal | Websites, blog headers, ads, presentations |
Vertical | Pinterest, Instagram Stories, mobile content |
Square | Social media posts, thumbnails, product graphics |
🌍 Step 12: Show Authentic Diversity and Inclusion
Buyers often need modern, authentic representation.
Representation should feel natural and respectful, not staged or tokenized.
👥 Consider Variety In
- Age
- Ethnicity
- Body type
- Family structure
- Work style
- Lifestyle
- Ability
- Profession
- Setting
📖 Step 13: Tell a Story the Buyer Can Search
A useful stock photo communicates a situation, feeling, or solution.
❓ Ask Before You Click
- What problem does this photo solve?
- What emotion does it create?
- What story does it tell?
- Could a buyer use this in a blog post, ad, or website?
- Is the image specific enough to be searchable?
🛒 Common Stock Photo Use Cases
Shoot with these buyer uses in mind:
- Blog header images
- Website hero sections
- Social media posts
- Pinterest pins
- Ad backgrounds
- Presentation slides
- Course materials
- Email newsletters
- Product mockups
- Digital downloads
💡 Step 14: Light for Clean Commercial Images
Avoid harsh midday sun when possible because it creates strong shadows and blown-out highlights.
☀️ Natural Light
Best beginner-friendly lighting options:
- Golden hour
- Overcast days
- Window light
- Open shade
- Bright rooms with soft light
🔦 Artificial Light
Useful once you are comfortable:
- Continuous LED lights
- Speedlight flash
- Reflectors
- Softboxes
- DIY diffusers, such as a white sheet or paper
✨ PHASE 4 — Make Photos Clean, Natural, and Buyer-Ready
📋 Steps 15–16: Use a seven-step commercial edit, avoid overprocessing, and batch similar photos so the series stays consistent.
✅ Ready to move on: The file is bright, natural, sharp, and free of heavy filters or blown-out highlights.
✨ Step 15: Edit for Commercial Appeal
Editing should make your photos look clean, bright, natural, and professional.
The goal is not to create heavy artistic effects. The goal is to make the photo useful for buyers.
🛠️ Basic Editing Workflow
- Adjust Exposure — Make the photo bright enough without blowing out highlights.
- Correct White Balance — Keep colors accurate and natural.
- Increase Clarity Slightly — Add crispness without making the image harsh.
- Boost Vibrance Carefully — Use vibrance instead of heavy saturation.
- Sharpen Subtly — Add detail without creating halos or artifacts.
- Crop Intentionally — Remove distractions and improve composition.
- Check the Histogram — Make sure the exposure range is balanced.
🚫 Step 16: Avoid Overprocessing and Keep the Series Consistent
Avoid edits that make your photo look fake or overprocessed.
🚫 What Not to Do
- ❌ Heavy HDR effects
- ❌ Strong filters
- ❌ Excessive vignetting
- ❌ Unnatural color grading
- ❌ Oversharpening
- ❌ Extreme skin smoothing
- ❌ Crooked horizons
- ❌ Overly dark shadows
- ❌ Blown-out highlights
🎨 Commercial Editing Style
Aim for a look that is:
- Clean
- Natural
- Slightly bright
- Colorful but realistic
- Sharp
- Professional
- Consistent across a series
💡 Batch-Edit Similar Photos
💡 PRO TIP
Edit one strong photo, save the settings as a preset, and apply it to similar photos from the same shoot.
This can save hours and help your portfolio look consistent.
🔑 PHASE 5 — Make Every File Searchable
📋 Steps 17–19: Build a keyword mix, write a clear title and description, and use the words a buyer would actually search.
✅ Ready to move on: The file has 20–50 relevant keywords, a searchable title, and a 1–2 sentence description of the scene and use case.
🔑 Step 17: Keyword Like a Buyer Would Search
Keywording is one of the most important parts of stock photography.
A great photo will not sell if buyers cannot find it.
Use a mix of descriptive, conceptual, emotional, color, and composition keywords.
🔎 1. Descriptive Keywords
What is physically in the photo?
Examples:
- Woman
- Laptop
- Coffee
- Office
- Desk
- Working
- Typing
🔎 2. Conceptual Keywords
What does the photo represent?
Examples:
- Remote work
- Productivity
- Freelancer
- Work from home
- Digital nomad
- Entrepreneurship
- Online business
🔎 3. Emotional Keywords
What feeling does the image communicate?
Examples:
- Focused
- Confident
- Peaceful
- Motivated
- Successful
- Relaxed
- Professional
🔎 4. Color Keywords
Describe the visual palette.
Examples:
- White
- Blue
- Neutral tones
- Bright
- Minimalist
- Warm
- Pastel
🔎 5. Orientation & Composition Keywords
Describe how the photo is framed.
Examples:
- Horizontal
- Vertical
- Copy space
- Close-up
- Overhead view
- Flat lay
- Portrait
- Lifestyle
📝 Step 18: Write a Searchable Title and Description
Keep titles clear and searchable. Use 1–2 sentences that explain the scene and use case.
🏷️ Good Title Examples
- Woman Working on Laptop in Coffee Shop
- Remote Worker Using Computer in Cafe
- Healthy Meal Prep Containers on Kitchen Counter
📄 Example Description
📋 REAL-WORLD EXAMPLE
Young professional woman working remotely on her laptop in a modern coffee shop. Freelancer or digital nomad focused on computer work in a casual urban cafe setting.
✅ Step 19: Follow Keyword Best Practices
Use the words a buyer would actually type into the search bar.
✅ Do This
✅ Use 20–50 keywords per image
✅ Put the most important keywords first
✅ Use both specific and broad terms
✅ Include synonyms
✅ Research suggested platform keywords
✅ Think like a buyer searching
✅ Include use-case keywords when relevant
🚫 Avoid
- ❌ Keyword stuffing
- ❌ Irrelevant keywords
- ❌ Extremely vague keywords
- ❌ Repeating the same word unnecessarily
- ❌ Nonsense words
- ❌ Misleading terms
🧪 Example: Woman Working on Laptop in Coffee Shop
📋 REAL-WORLD EXAMPLE
Good keywords:
Woman, laptop, computer, coffee shop, cafe, working, remote work, freelancer, digital nomad, typing, technology, wireless, internet, business woman, entrepreneur, professional, concentrated, focused, casual, modern, millennial, sitting, table, window light, urban, city, work from anywhere, productivity, online, browsing, white laptop, neutral tones, copy space
Bad keywords:
Person, thing, place, stuff, nice, pretty, good, happy, woman working, laptop computer
📤 PHASE 6 — Upload Consistently and Keep Files Organized
📋 Steps 20–21: Choose a batch or weekly upload rhythm, then keep folders, releases, and a portfolio tracker in one system.
✅ Ready to move on: You have an upload schedule, a folder structure, and a spreadsheet that records titles, releases, and approval status.
📤 Step 20: Upload on a Repeatable Schedule
Once your photos are edited and keyworded, upload them consistently and keep your files organized.
📦 Option A: Batch Upload
Best for building your initial portfolio quickly.
- 📸 Shoot 50–100 photos
- ✨ Edit in one session
- 🔑 Keyword in batches
- 📤 Upload all at once
Best for:
Reaching your first 200–300 photos faster.
📅 Option B: Consistent Weekly Uploads
Best for long-term consistency.
- 📅 Upload 10–20 photos per week
- 🌿 Keep your portfolio fresh
- 👀 Show platforms you are active
- 🧱 Build a sustainable workflow
Best for:
Avoiding burnout while growing steadily.
🎯 Recommended Strategy
🎯 KEY TAKEAWAY
Start with batch uploads until you reach 200–300 photos, then switch to a weekly upload schedule.
🗂️ Step 21: Organize Files and Track the Portfolio
Use a simple folder structure so you can find photos, releases, and upload-ready files quickly.
Good organization helps you avoid uploading duplicates, losing release forms, or forgetting which images perform best.
📁 Example Folder Structure
Stock Photography
→ 2025-Q1
→ Jan-Business
→ Feb-Food
→ Mar-Lifestyle
→ Edited-Ready-to-Upload
→ Uploaded
→ Releases
📊 Track in a Spreadsheet
- Upload dates
- Platforms used
- Titles
- Descriptions
- Keywords
- Releases
- Approval/rejection status
- Downloads
- Earnings per image
- Seasonal content deadlines
📊 PHASE 7 — Measure Results and Improve the Next Shoot
📋 Steps 22–23: Track platform, category, and portfolio metrics, then double down, update, fill gaps, or retire weak files.
✅ Ready to move on: You know which subjects and keywords earn, why files get rejected, and what the next shoot should repeat.
📊 Step 22: Track Performance Across Platforms and Categories
Stock photography improves when you follow the data.
Do not only shoot what you enjoy. Watch what actually gets accepted, viewed, downloaded, and licensed.
🌐 Per Platform
- Total downloads this month
- Earnings per download
- Acceptance rate
- Best-performing photos
- Rejection reasons
- Search ranking trends
🧩 Per Photo Category
- Which subjects sell best
- Which keywords drive views
- Which styles get accepted most often
- Seasonal trends
- Time to first download
- Most profitable image types
📈 Overall Portfolio
- Total portfolio size
- Average downloads per photo
- Monthly income trend
- Total earnings
- Time invested
- Hourly rate: income ÷ hours invested
🔁 Step 23: Optimize What the Data Shows
Let the market guide your next shoot.
If buyers keep downloading a certain style, subject, or format, create more of it.
🏆 Double Down on Winners
If something sells, create more variations.
- If business photos sell, shoot more business scenes
- If flat lays perform, create more flat lay series
- If seasonal images sell, plan ahead for holidays
- If vertical images perform well, shoot more vertical layouts
🔄 Update Old Photos
Improve existing portfolio assets.
- Add better keywords
- Rewrite weak titles
- Improve descriptions
- Re-edit images when appropriate
- Remove or replace weak images
🧭 Fill Market Gaps
- Search niche topics with limited high-quality images
- Create seasonal content early
- Respond to emerging trends
- Shoot practical business and lifestyle use cases
- Create content for specific audiences and industries
🧹 Refresh Portfolio Quality
Keep your portfolio strong.
- Remove outdated content
- Delete consistently rejected images
- Avoid uploading weak filler photos
- Improve your editing standards over time
- Focus on quality and commercial usefulness
✅ Final Rule
🎯 KEY TAKEAWAY
Let the market guide your next shoot.
If buyers keep downloading a certain style, subject, or format, create more of it.
⭐ ADVANCED STRATEGY
As the portfolio grows, create reusable systems. Keep these as optional operating-system choices, not beginner prerequisites.
The purpose is not bureaucracy.
It is to stop researching, keywording, and organizing from scratch every week.
🔎 Research
- Buyer-search notes
- Theme shortlist
- Seasonal calendar
- Shot-list template
📐 Rights & Specs
- Platform spec checklist
- Model-release folder
- Property-release folder
- Editorial vs. commercial flag
📸 Production
- Scene shot list
- Orientation checklist
- Lighting notes
- Commercial-edit preset
🔑 Metadata
- Keyword mix template
- Title formula
- Description formula
- Suggested-keyword research log
📤 Publishing
- Batch vs. weekly calendar
- Folder structure
- Upload tracker
- Duplicate-upload check
📊 Performance
- Acceptance-rate log
- Download and royalty tracker
- Rejection-reason log
- Next-shoot decision notes
🔄 Your Stock Photography Workflow
Use the same cycle:
Research → Specs → Shoot → Edit → Keyword → Upload → Track → Improve
Then use Chapter 8 to sell more photos faster. That separation is important: this chapter produces files a buyer can license; Chapter 8 helps you increase volume, visibility, and repeat sales.
🎯 The Goal
Your goal is not: “Upload as many pretty pictures as possible.”
It is: “Build a searchable library of commercially useful images I can keep improving.”
Let the market guide your next shoot.
8. Tips to Sell More Photos Faster
Use this section to build trust, present your stock photography professionally, communicate clearly, deliver consistently high-quality images, market and upsell with purpose, specialize strategically, and avoid the mistakes that cost new stock photographers sales, income, and energy. Chapter 7 gets you started; this chapter helps you look credible, price client work confidently, and keep earning from your portfolio.
⭐ ADVANCED STRATEGY
1️⃣ Build Proof Before You Upload 📁
Non-negotiable
Buyers and platform reviewers judge you by what they can see. Before you spend months on volume, show that you can deliver sharp, useful, properly released images in a consistent style.
🧠 Why Proof Builds Trust
A single good photo proves little. A coherent set proves you can repeat quality.
Think like a buyer. Before uploading, ask:
- What blog would use this image?
- What business needs this visual?
- What problem does this photo solve?
- Would I pay for this if I needed it?
- Could it work in an ad, article, website, email, or social post?
Rule: Pretty is good. Useful sells faster.
☑️ Minimum Proof Checklist
- One clear starter theme, such as remote work or home cooking
- A first shot list of about 50 photos based on buyer demand research
- 10–20 variations of at least one theme
- Sharp, well-exposed files at or above platform size minimums
- Releases saved for every identifiable person or private property
- Keywords and titles written for buyers, not for you
- A simple tracker for batches, platforms, and approval status
🛡️ How to Create Proof Before Your First Approval
✨ Option 1: Create Collections and Series
Buyers often license multiple photos from one set, and related images give you more chances to appear in search.
What to do:
- Shoot 10–20 variations of the same theme
- Vary angles, distance, and orientation
- Keep styling and lighting consistent across the set
- Upload the set together when you can
Example: “Morning Routine” could include coffee, breakfast, getting ready, laptop work, commuting, journaling, skincare, and packing a bag.
🔍 Option 2: Research Before You Shoot
Avoid uploading pretty photos nobody needs.
What to do:
- Browse what is already selling in your target niche
- Look for gaps, such as fresher scenes or better copy space
- Note which categories and concepts keep appearing
- Plan a shot list before the camera comes out
- Skip oversaturated subjects you cannot do differently
🧪 Option 3: Submit a Small Test Batch
Learn what reviewers accept before you invest in a large shoot.
What to do:
- Upload a small first batch to one platform
- Read every rejection reason
- Fix the pattern, not just the single photo
- Record the acceptance rate for each batch
- Scale up after you can pass review consistently
{cap("tip","Treat the first batch as a test. Rejections are data, not failure.")}
🧾 Option 4: Set Up Your Release System First
Prepare before you photograph people or private places.
What to do:
- Choose model and property release templates
- Decide where signed releases will be stored
- Practice asking for permission clearly
- Learn each platform’s current rules on logos, trademarks, and recognizable property
- Avoid branded products and visible logos in your shots
2️⃣ Showcase Your Portfolio 🗂️
📸 What to Include in Your Portfolio
Portfolio Piece | What It Shows |
Series of 10–20 related images | You can deliver depth, not one lucky shot |
Clean, sharp hero images | Your technical quality |
Authentic people and lifestyle scenes | You can create believable, commercial images |
Images with copy space | You think about how buyers will use them |
Seasonal sets | You plan ahead |
Your best conceptual or niche images | Your specialty and point of view |
Keep it tight:
- Lead with your strongest, most useful images
- Remove weak duplicates
- Show a consistent style
- Keep every image properly released
🛡️ Where to Show Your Portfolio
Place | Best For |
Stock platform contributor page | Showing your full catalog to buyers |
500px | Photography community and featured work |
Instagram | Behind the scenes and fresh concepts |
Pinterest | Evergreen visual discovery |
Personal website | Client work, licensing inquiries, and credibility |
Challenge and contest entries | Visibility and a read on what buyers want now |
Presentation tips:
- Use consistent titles and descriptions
- Group images by theme
- Keep a short bio and contact method
🏆 Participate in Challenges
🎯 Why Challenges Help
- Many platforms run monthly themes
- Featured content can get extra visibility
- Awards and recognition can attract buyers
- Challenges can reveal what platforms currently want
📌 How to Use Them Well
- Treat themes as content prompts, not distractions
- Enter work that also fits your portfolio style
- Follow each challenge’s rules and release requirements
- Track whether featured images perform better
⚠️ Reality check: A strong portfolio helps, but it does not guarantee sales. Results vary with niche, competition, keywords, platform algorithms, and the volume of quality images you build.
💡 PRO TIP
Review your portfolio every month. Replace weak images, expand themes that get views, and retire concepts that never move.
3️⃣ Be Recognizable and Honest ✨
Buyers return to contributors whose work is consistent, reliable, and clearly described.
🪜 Position Yourself Clearly
Do not try to shoot everything. Pick 1–2 themes so buyers and search results learn what you offer.
Beginner: “I take photos”
Better: “Lifestyle and food photos for blogs and small businesses”
Best: “Authentic home-cooking, wellness, and remote-work scenes with copy space for marketers and bloggers.”
Why a tight focus wins:
- Easier to build depth in a niche
- Stronger, more coherent series
- Faster workflow and reuse of props and locations
- Easier for buyers to recognize your work
🎨 Master One Style
Choose one visual style and get consistent.
Options:
- Bright and airy
- Dark and moody
- Minimalist and clean
- Warm and cozy
- Natural and lifestyle-focused
Why it matters: A consistent style makes your portfolio easier to recognize and easier for buyers to trust.
💼 Make Your Presence Recognizable
- Use one contributor name and profile photo across platforms
- Keep your bio and specialty consistent
- Write titles and descriptions in a steady voice
- Link your portfolio sites where platform rules allow
Avoid:
- Mixing unrelated styles in one set
- Vague claims like “photos of everything”
🤝 Be Honest About Your Work
Do:
- Describe images accurately
- Say whether an image is staged or editorial where required
- Disclose editing or generated content according to platform rules
- Use releases that cover how the image will be used
Avoid:
- Misleading titles or keywords
- Claiming rights you do not hold
- Copying other photographers’ work
- Promising buyers uses the license does not allow
4️⃣ Communicate Like a Professional 💼
Platforms, models, and clients all judge your reliability by how clearly you communicate.
📝 Respond to Feedback
Do:
- Read each rejection reason before re-uploading
- Fix technical issues immediately
- Track acceptance rates by platform
- Adjust shooting and editing based on patterns
- Ask support politely if a reason is unclear
Avoid:
- Re-uploading the same rejected image unchanged
- Arguing with reviewers
- Taking rejection personally
Rejections are data, not failure.
👥 Build a Model Network
Do:
- Use friends and family, with releases
- Trade services with other creatives
- Pay models for focused shoots
- Join Model Mayhem or similar platforms
- Build repeat relationships with reliable models
- Confirm time, location, wardrobe, and use of images in writing
Avoid:
- Vague verbal permission
- Shooting without agreed terms
- Last-minute schedule changes
📅 Shoot and Collaboration Status
Status | What to Tell Models and Collaborators |
Open | “I’m booking model shoots for [theme]. Send your availability.” |
Limited | “I have a few shoot slots left this month.” |
Waitlist | “My schedule is full. I can add you to my list for the next round.” |
Weather or reschedule | “Weather moved our outdoor shoot to the next available day.” |
⏱ Response time: State when you usually reply and when you shoot, so models and clients know what to expect.
📝 QUICK NOTE
People-focused stock photos often sell well, but only when releases are handled properly.
5️⃣ Release & Follow-Up Templates 📝
✅ Model Release Request
Hi [Name],

Thanks for agreeing to model! I would like to
photograph you for commercial stock images.
Before we start, I will ask you to sign a
model release that explains how the images may
be licensed.

Shoot date: [date]
Location: [place]
Compensation: [paid / trade / none]

Please confirm and I will send the release.
[Your Name]
🏠 Location or Property Release Request
Hi [Owner / Manager],

I am a stock photographer and would like to
photograph at [location] on [date]. I would
like your permission and a signed property
release that covers commercial licensing.

Please let me know the best time and any
house rules.
[Your Name]
💼 Client Shoot Quote and Licensing Terms
Hi [Client Name],

Thanks for reaching out! Here is your quote:

Shoot: [type and length]
Deliverables: [number of edited images]
License: [personal / commercial / limited use]
Usage: [channels and duration]
Price: [amount]
Payment: [deposit and balance]
Release: [model / property if needed]

Reply to confirm and I will send the contract.
[Your Name]
🔁 Rejection or Support Follow-Up
Hi [Support Team],

My submission [batch ID] was rejected for
[reason]. I have corrected [fix] and would
like to understand whether the revised files
meet the requirement. Could you confirm?

Thank you,
[Your Name]
⭐ Review or Testimonial Request
Hi [Name],

Thanks again for working with me. If you are
happy with the photos, I would really
appreciate a short review or testimonial I can
share with your permission.

[Your Name]
🙏 Thank-You and Image Delivery
Hi [Name],

Thank you for the shoot! Your images are ready
here: [link]. A signed copy of the release is
saved for our records. Let me know if you need
anything else.

[Your Name]
📋 Terms to Cover in Writing
- Who is being photographed and where
- How images may be used and for how long
- Whether the release covers stock licensing
- Payment or trade terms
- Delivery timeline and format
- Cancellation and rescheduling
- Whether the person may receive copies
🗂️ Keep Organized Release Files
- Save digital copies of every release
- Attach releases to matching photo batches
- Keep cloud backups
- Label files by shoot date, model name, and location
- Platforms may audit releases at any time
Location releases: Get them when needed. Commercial spaces, even rented ones, and private homes may require them. Public spaces are generally safer, but check platform rules. When in doubt, get the release.
🛠 TOOLS & RESOURCES
Keep a release template and the messages above in a notes app or Google Drive folder so every shoot starts with the same clear paperwork.
6️⃣ Marketing Hook Mastery & Smart Upselling 🎣
Good images still need to be found and to match what buyers are planning.
🪝 Hooks That Get Attention
Hook Type | Example |
Buyer problem | “Remote work desk with copy space for a headline” |
Seasonal | “Cozy winter flat lay uploaded in September” |
Concept | “Work-life balance” or “financial planning” |
Trend | “Sustainability, AI, wellness, or budgeting” |
Series | “Morning Routine, 12 variations” |
Authentic detail | “Real food and genuine expressions” |
Use hooks in: titles, descriptions, keywords, challenge entries, and social posts.
📈 Trend Responsiveness
- Monitor news, culture, and industry shifts
- Create content around trending topics
- Examples: sustainability, AI, remote work, mental health, wellness, diversity, budgeting, side hustles
- Be tasteful and avoid exploiting tragedy or sensitive events
Best approach: Focus on long-term trends, not only short-lived viral moments.
📅 Seasonal Planning: Critical
Upload seasonal content 3–4 months early so buyers can find it before they need it. Businesses, bloggers, and marketers plan campaigns months ahead.
Upload By | Content | For |
June | Back-to-school content | Late summer |
March | Summer and vacation content | Summer |
August | Halloween and autumn content | Autumn |
September | Christmas and winter content | Winter holidays |
November | New Year content | January |
December | Valentine’s Day content | February |
January | Spring themes | Spring |
📤 Upload Regularly
- Platforms often favor active contributors
- Consistent uploads can improve visibility
- Even 5–10 photos weekly helps
- Small uploads compound into a larger portfolio
Consistency beats random bulk uploading.
➕ Smart Ways to Earn More From One Shoot
- Offer client work such as portraits, events, or commercial shoots
- Sell licensing bundles or prints where allowed
- Add related shots to a successful series
- Submit the same image to other platforms where rules allow
- Keep stock royalties and client income separate in your records
🚀 ACTION STEP
Pick one season about four months away, plan a 20-photo shot list around it, and schedule the shoot this week.
7️⃣ Image Quality Checklist ✅
Platforms reject technically weak images, even when the idea is strong. Make quality routine before you focus on volume.
🎯 Nail the Basics Every Time
- Sharp focus, non-negotiable
- Proper exposure; slightly bright is usually okay
- Clean composition without distracting clutter
- Good color and accurate white balance
- Straight horizons and clean framing
Why it matters: Technical quality is the first gate to approval.
📷 Shoot More Than You Think
- Take 3–5 versions of every shot
- Capture different angles, distances, and orientations
- Try slight variations in expression, action, or styling
- Shoot both vertical and horizontal formats when possible
- One setup should create multiple usable files
Why it matters: More shots mean more upload options.
🧺 Use Natural Props
- Real food instead of fake-looking setups
- Actual workspaces instead of overly staged desks
- Genuine expressions
- Authentic scenarios
- Everyday objects buyers can relate to
Goal: Make the photo feel usable, believable, and commercial.
🖌️ Edit for Buyers
- Keep edits natural; commercial buyers usually want natural, not heavily stylized
- Remove dust, distractions, and logos
- Export JPEG in sRGB at the required size
- Leave copy space where it makes sense
- Check the file at 100% before submitting
🚦 Pre-Upload Checklist
Check | What to Confirm |
Sharpness | Sharp at 100%, no motion blur |
Resolution | Meets the platform minimum |
Format and color | JPEG in sRGB |
Logos and trademarks | None visible |
Releases | Signed for every person or property |
Keywords and title | Accurate and specific |
Duplicates | Removed or clearly distinct |
🔎 Every-Shoot Routine
- Review the shot list
- Scout and prepare the location
- Confirm releases before shooting
- Shoot multiple variations
- Cull and edit
- Keyword and caption
- Upload and track results
Safety:
- Respect private property and posted rules
- Be mindful when photographing minors and bystanders
- Protect gear, backups, and personal safety on location
🛠 TOOLS & RESOURCES
Keep a reusable checklist in your notes app and run through it before every upload. Lightroom Mobile, Snapseed, Google Sheets, Notion, or Trello can help you track batches.
8️⃣ Specialization & Pricing Strategy 🎯
Stock income is a volume and quality game. Specialization helps you build depth, and pricing strategy helps you decide where your time pays off.
⏰ Time Management & Efficiency
Time is a major profit driver. The faster you produce approved images, the more each hour is worth.
Build these habits:
- Plan shot lists in advance
- Batch shoots by theme
- Reuse props and locations
- Edit and keyword in batches
- Track acceptance and sales by theme
{cap("tip","One well-planned setup can produce a full series. That beats several unplanned one-off shots.")}
📊 Learn From Your Data
- Track which themes get approved and viewed
- Compare performance by platform
- Notice which keywords lead to downloads
- Double down on what sells
- Drop what does not after a fair test
Note: Platform terms, royalty rates, and search behavior change, so verify current details.
🔍 Generic vs. Specific
Generic | Specific |
“Business photo” | “Remote worker with laptop and copy space” |
One random shot | A 15-image themed series |
Random upload times | Seasonal content uploaded early |
Copying popular subjects | A fresh take on a niche |
💵 Income Models to Compare
Model | Typical Range | Best Use |
Stock royalties | A few cents to $100+ per sale | Long-term, volume-based income |
Portrait sessions | $100–$1,000+ | Local client work |
Commercial and brand | $500–$5,000+ | Business clients |
Events | $200–$3,000+ | Weddings and events |
Licensing bundles | $50–$500+ | Direct licensing |
These ranges are illustrative planning references, not guaranteed earnings. Stock royalties vary by platform, license, and sales volume.
🌍 Diversify Across Platforms
🧩 Why Spread Out
- Do not rely on one platform
- Different platforms attract different buyers
- Spread risk and maximize exposure
- Track which platforms perform best for your style
🪜 Suggested Rollout
- Beginner: 2–3 platforms in months 1–6
- Intermediate: 4–5 platforms
- Advanced: 6–8 platforms
- Check each platform’s exclusivity and duplicate rules before submitting the same photo
🏆 The Skill Stack That Wins
⚡ Speed and 🎯 Quality
Speed: Plan shoots, batch edits, and reduce wasted time.
Quality: Deliver sharp, useful, properly released images.
💰 Sales and 💼 Systems
Sales: Use keywords, seasonal timing, series, and multiple platforms.
Systems: Track batches, releases, platforms, approvals, and earnings.
Winning formula: Efficiency + Quality + Sales + Systems = Scalable Profit
⭐ ADVANCED STRATEGY
Raise client-work prices when your calendar fills or you are turning down shoots you would happily take at a higher rate. Price the whole project, including planning, travel, editing, delivery, and usage rights. Stock royalties are set by platforms, so improve results through quality, keywords, and volume.
9️⃣ Common Mistakes: Research, Quality, Keywords & Positioning ⚠️
❌ Shooting Without Research
The trap: Uploading pretty photos no one needs.
The reality: Buyers search for specific uses and concepts.
The fix: Research demand and plan a shot list before you shoot.
❌ Ignoring Technical Requirements
The trap: Submitting soft, noisy, or undersized files.
The reality: High rejection rates kill motivation.
The fix: Check sharpness, exposure, resolution, and format before every upload.
❌ Poor Keywording
The trap: Rushing titles and keywords.
The reality: Great photos stay invisible without strong keywords.
The fix: Write specific, accurate keywords from the buyer’s point of view.
❌ Copying Other Photographers
The trap: Recreating the same popular shot.
The reality: Oversaturated subjects are harder to sell, and copying raises ethical and rights issues.
The fix: Find a fresh angle, niche, or concept of your own.
❌ Over-Editing
The trap: Heavy filters and artistic effects.
The reality: Commercial buyers usually want natural images they can adapt.
The fix: Keep edits clean and natural with accurate color.
❌ Ignoring Trends and Seasons
The trap: Uploading Christmas content in December.
The reality: Missing seasonal opportunities costs sales.
The fix: Upload seasonal content 3–4 months early and track long-term trends.
⚠ COMMON MISTAKE
Unplanned shoots, weak files, thin keywords, and copied ideas make it much harder to earn a fair return on your time.
🔟 Common Mistakes: Releases, Consistency, Platforms & Business Systems ⚠️
❌ No Model Releases
The trap: Shooting people without signed paperwork.
The reality: You may lose access to your best people photos or face rejection.
The fix: Get releases for people and, where needed, property before submitting.
❌ Inconsistent Uploads
The trap: Uploading in bursts, then disappearing.
The reality: Your portfolio goes stale and visibility can drop.
The fix: Aim for a steady weekly schedule you can maintain.
❌ Giving Up Too Soon
The trap: Expecting meaningful sales in a few weeks.
The reality: It can take 6–12 months to build momentum, and results vary.
The fix: Track progress, treat early months as a test, and improve each batch.
❌ Only Uploading to One Platform
The trap: Relying on a single marketplace.
The reality: You may be leaving money on the table and be exposed to policy changes.
The fix: Add platforms gradually, following each one’s rules.
❌ Skipping Contracts and Rights Checks
The trap: Doing client shoots on a handshake.
The reality: Disputes about usage, payment, and ownership are common.
The fix: Put scope, usage rights, price, delivery, and payment in writing.
❌ Losing Files and Records
The trap: Keeping releases and originals in scattered places.
The reality: Platforms may audit releases, and lost files can cost sales.
The fix: Back up originals, edits, and signed releases in organized cloud folders.
❌ Revenue Is Not Profit
The trap: Judging success by gross royalties alone.
The reality: Gear, props, models, software, fees, and taxes reduce what you keep.
The fix: Track expenses, separate business and personal money, and set aside money for taxes.
❌ Burning Out
The trap: Shooting and uploading constantly for slow early returns.
The reality: Motivation drops when results lag.
The fix: Set a sustainable schedule, celebrate approvals, and review progress monthly.
🧰 Basic Business Skills to Build
💼 Everyday Systems
- Tracking shoots and batches
- Storing releases and originals
- Recording keywords and titles
- Logging approvals and rejections
- Recording earnings by platform
- Managing expenses
- Following up with clients
📊 Business Management Skills
- Tracking monthly earnings and expenses
- Monitoring which themes and platforms perform best
- Creating standard shoot and upload checklists
- Planning seasonal calendars
- Understanding platform terms and taxes
- Hiring editors or assistants only after systems are steady
🚀 ACTION STEP
This week, save your release templates, set up one tracker for batches, platforms, approvals, and earnings, and schedule your next upload.
9. Learning, Templates & Resources
🛠 TOOLS & RESOURCES
Stock Photography brings together useful imagery, technical quality, licensing, and searchable metadata. You do not need to master everything at once. Choose resources that help you complete the next practical step.
🎓 Learning (Free & Paid)
Start with one source that fits your current level. Practice what it teaches before collecting more courses or tools.
🎬 Photography Tutorials & YouTube
Study lighting, composition, and editing demonstrations when improving a particular type of stock image.
Watch Mango Street (YouTube Channel) for tutorials, examples, and practical ideas you can apply to photography and stock photo sales.
🟢 Beginner
Watch SLR Lounge (YouTube Channel) for tutorials, examples, and practical ideas you can apply to photography and stock photo sales.
🟢 Beginner
Watch Peter McKinnon (YouTube Channel) for tutorials, examples, and practical ideas you can apply to photography and stock photo sales.
🟡 Intermediate
Watch Sean Tucker (YouTube Channel) for tutorials, examples, and practical ideas you can apply to photography and stock photo sales.
🟡 Intermediate
Watch The Photographic Eye (YouTube Channel) for tutorials, examples, and practical ideas you can apply to photography and stock photo sales.
🟡 Intermediate
🆓 Free Photography Learning
Learn exposure, focus, releases, and submission basics using the camera you already own.
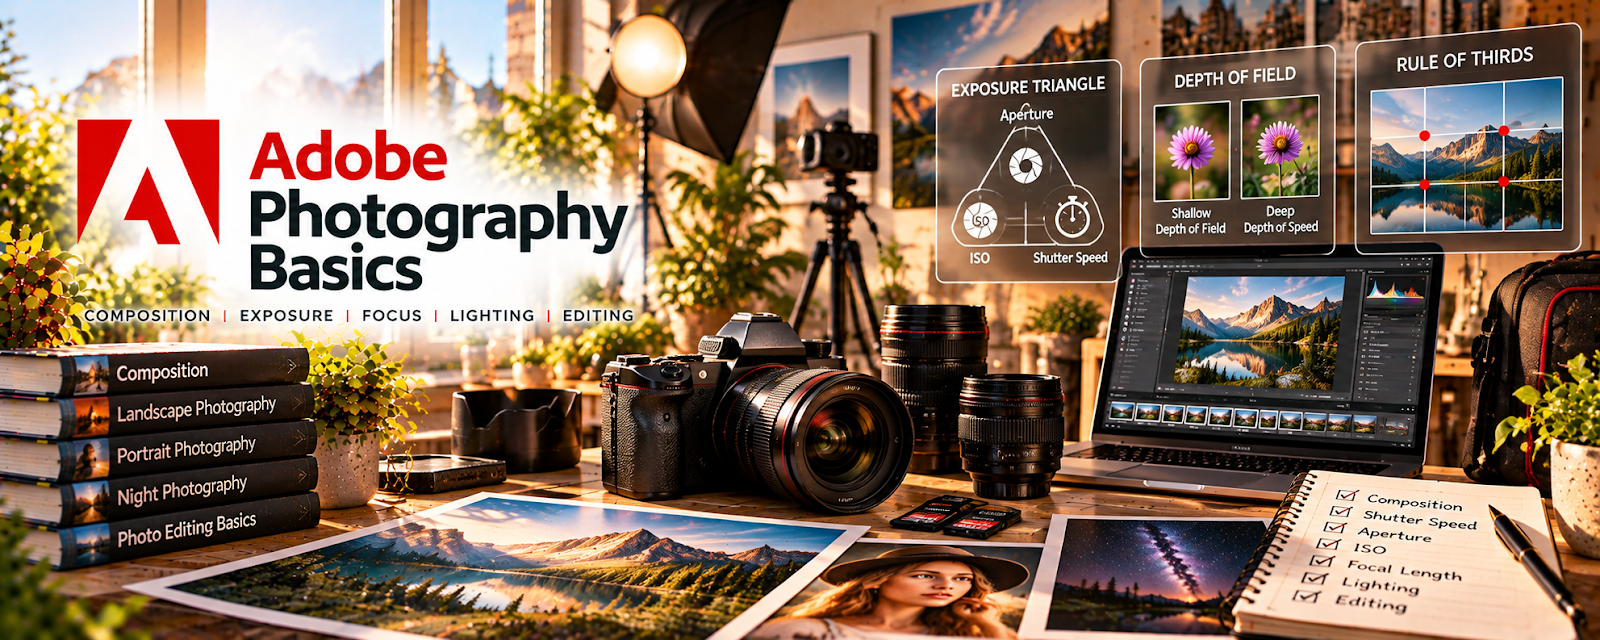
Use Adobe Photography Basics to learn beginner concepts, examples, and workflows before starting photography and stock photo sales.
🟢 Beginner

Use Canon Learning to learn beginner concepts, examples, and workflows before starting photography and stock photo sales.
🟢 Beginner
Use Nikon Learn & Explore to learn beginner concepts, examples, and workflows before starting photography and stock photo sales.
🟢 Beginner
Use Digital Photography School to learn beginner concepts, examples, and workflows before starting photography and stock photo sales.
🟢 Beginner
Use PetaPixel to learn beginner concepts, examples, and workflows before starting photography and stock photo sales.
🟡 Intermediate
💬 Photography Communities & Forums
Seek critique of image quality and metadata while verifying licensing and release advice with the marketplace.
Use r/AskPhotography to ask questions, study real examples, and network with people doing photography and stock photo sales.
🟢 Beginner

Use r/photography to ask questions, study real examples, and network with people doing photography and stock photo sales.
🟢 Beginner
Use DPReview Forums to ask questions, study real examples, and network with people doing photography and stock photo sales.
🟡 Intermediate
Use r/stockphotography to ask questions, study real examples, and network with people doing photography and stock photo sales.
🟡 Intermediate

Use Professional Photographers of America to ask questions, study real examples, and network with people doing photography and stock photo sales.
🔴 Advanced
💰 Paid Photography Courses
Choose targeted photography instruction when your own portfolio reveals a technical or storytelling gap.

Use Skillshare — Photography Classes for structured training, courses, or credentials that build confidence in photography and stock photo sales.
🟢 Beginner

Use Udemy — Photography Courses for structured training, courses, or credentials that build confidence in photography and stock photo sales.
🟢 Beginner

Use Coursera — Photography Courses for structured training, courses, or credentials that build confidence in photography and stock photo sales.
🟡 Intermediate

Use LinkedIn Learning — Photography for structured training, courses, or credentials that build confidence in photography and stock photo sales.
🟡 Intermediate
📝 QUICK NOTE
Contributor rules and release requirements vary. Verify rights and marketplace policies directly; do not assume a public location or a visible logo is cleared for every commercial use.
📝 What Should You Learn First?
Follow this order:
1️⃣ Buyer needs
Study practical image uses and plan original subjects rather than copying popular photos.
2️⃣ Camera fundamentals
Practice exposure, focus, composition, and lighting with equipment you already own.
3️⃣ Rights & releases
Learn commercial versus editorial requirements and when releases or permissions are needed.
4️⃣ Editing & technical QA
Check sharpness, artifacts, noise, color, and export specifications.
5️⃣ Submission & metadata
Write accurate titles and relevant keywords and follow each marketplace’s contributor rules.
6️⃣ Portfolio review
Use acceptance reasons and licensing results to improve future shoots.
🎯 KEY TAKEAWAY
Learn through a small, realistic practice task. Build confidence in the core workflow before adding more tools, paid courses, or commitments.
📄 Four Practical Starting Templates
Create these in a document, spreadsheet, or Notion page. They are working outlines—not ready-made legal agreements or professional advice. Use fictional data for practice and keep real records secure.
Shoot Planner
Record: Buyer use | Subject | Location | Props | Lighting | Permissions
Plan a useful, feasible image set.
Asset & Release Register
Record: File | Creator | Model/property release | Usage limits | Record location
Check permissions before commercial submission.
Upload Checklist
Record: Focus | Artifacts | Dimensions | Title | Keywords | Platform rules
Review each batch before submitting it.
Submission & License Log
Record: Asset | Platform | Submitted | Accepted/rejected | Reason | Royalties
Track outcomes without assuming accepted photos will sell.
🚀 ACTION STEP
Choose one learning resource and draft your Shoot Planner. Use a small practice example to identify the next skill you need before taking on live work or spending more money.
🧰 Resources
Use these resources to put your stock photography learning into practice. Start with a small, dependable setup and add a tool only when its purpose, cost, and limitations are clear.
🛒 Stock Photo Marketplaces
Compare contributor terms, submission requirements, and licensing models. Start with a manageable platform rather than uploading everywhere at once.
Use Dreamstime to upload photos, submit stock content, and earn royalties from approved images.
🟢 Beginner
Use Adobe Stock Contributor to upload photos, submit stock content, and earn royalties from approved images.
🟡 Intermediate

Use Alamy Contributor to upload photos, submit stock content, and earn royalties from approved images.
🟡 Intermediate
Use Shutterstock Contributor to upload photos, submit stock content, and earn royalties from approved images.
🟡 Intermediate
Use Getty Images Contributor to upload photos, submit stock content, and earn royalties from approved images.
🔴 Advanced
🖥️ Editing & Post-Production Tools
Prepare technically sound images and consistent exports. Inspect edits at full size before submitting to a marketplace.

Use Snapseed to record, edit, clean up, or package media assets for photography and stock photo sales.
🟢 Beginner

Use Canva / Canva Mockups to record, edit, clean up, or package media assets for photography and stock photo sales.
🟢 Beginner

Use Lightroom to record, edit, clean up, or package media assets for photography and stock photo sales.
🟡 Intermediate
Use Adobe Photoshop to record, edit, clean up, or package media assets for photography and stock photo sales.
🔴 Advanced
Use Capture One to record, edit, clean up, or package media assets for photography and stock photo sales.
🔴 Advanced
📷 Portfolio & Exposure Platforms
Show a focused portfolio and make your work easy to assess. Use it when presenting your style to buyers or collaborators.

Use Unsplash to create visuals, templates, mockups, portfolios, or branded assets for photography and stock photo sales.
🟢 Beginner

Use Flickr to create visuals, templates, mockups, portfolios, or branded assets for photography and stock photo sales.
🟢 Beginner

Use Behance to create visuals, templates, mockups, portfolios, or branded assets for photography and stock photo sales.
🟡 Intermediate

Use Adobe Portfolio to create visuals, templates, mockups, portfolios, or branded assets for photography and stock photo sales.
🟡 Intermediate

Use Squarespace to create visuals, templates, mockups, portfolios, or branded assets for photography and stock photo sales.
🟡 Intermediate
🤝 Client & Gig Platforms
Explore related photography work where appropriate. Distinguish a custom client assignment from licensing an existing stock image.
Use Facebook Groups to find paid opportunities, pitch services, or connect with clients for photography and stock photo sales.
🟢 Beginner
Use Fiverr to find paid opportunities, pitch services, or connect with clients for photography and stock photo sales.
🟢 Beginner

Use Snappr to find paid opportunities, pitch services, or connect with clients for photography and stock photo sales.
🟡 Intermediate
Use Upwork to find paid opportunities, pitch services, or connect with clients for photography and stock photo sales.
🟡 Intermediate

Use Thumbtack to find paid opportunities, pitch services, or connect with clients for photography and stock photo sales.
🟡 Intermediate
📣 Marketing & Social Platforms
Share useful examples and behind-the-scenes context. Obtain permissions and avoid implying that exposure guarantees licenses.

Use Instagram to promote your offer, capture leads, and build an audience around photography and stock photo sales.
🟢 Beginner

Use Pinterest to promote your offer, capture leads, and build an audience around photography and stock photo sales.
🟢 Beginner

Use TikTok to promote your offer, capture leads, and build an audience around photography and stock photo sales.
🟢 Beginner
Use YouTube Shorts to promote your offer, capture leads, and build an audience around photography and stock photo sales.
🟢 Beginner

Use Google Business Profile to promote your offer, capture leads, and build an audience around photography and stock photo sales.
🟡 Intermediate
💼 Photography Business Tools
Organize shoots, assets, release records, and business tasks. Keep rights documentation linked to the correct files.
Use Google Drive to store, organize, and share project files with authorized recipients for Photography & Stock Photos.
🟢 Beginner
Use Google Forms to collect structured intake details, requests, and feedback through online forms for Photography & Stock Photos.
🟢 Beginner

Use Notion to organize project notes, documents, tasks, and reusable workflows in one workspace for Photography & Stock Photos.
🟢 Beginner

Use Pixieset to organize and share photography galleries and client image deliveries for Photography & Stock Photos.
🟡 Intermediate

Use HoneyBook to manage client inquiries, project communication, contracts, and invoicing workflows for Photography & Stock Photos.
🔴 Advanced
💳 Payments & Invoicing
Invoice custom work and track receipts where relevant. Keep client-project revenue separate from marketplace royalty records.
Use PayPal Business to handle payments, invoices, income tracking, or taxes for your photography and stock photo sales work.
🟢 Beginner

Use Wave to handle payments, invoices, income tracking, or taxes for your photography and stock photo sales work.
🟢 Beginner
Use Square Invoices to handle payments, invoices, income tracking, or taxes for your photography and stock photo sales work.
🟡 Intermediate

Use Stripe to handle payments, invoices, income tracking, or taxes for your photography and stock photo sales work.
🟡 Intermediate

Use Quickbooks to handle payments, invoices, income tracking, or taxes for your photography and stock photo sales work.
🟡 Intermediate
10. Your First 6 Months Photography & Stock Photos Plan
Your first 6 months in photography and stock photos should be focused on building photo quality, a consistent shooting workflow, keywording skills, and a portfolio of images that buyers can actually use.
The goal is to move from:
Camera Skills → Photo Practice → Portfolio → Stock Uploads → Keywording → Sales Data → Improvement
By the end of 6 months, you should know what types of photos you can create consistently, which stock platforms fit your work, how to prepare images for upload, and how to improve based on downloads, views, and buyer demand.
🎯 6-Month Goal
By the end of your first 6 months, aim to have:
✅ One clear photography niche or stock photo category
✅ Basic camera or phone photography skills improved
✅ 300–600 usable photos taken
✅ 100–250 polished images uploaded to stock platforms
✅ A simple editing and export workflow
✅ Keywording and title-writing practice
✅ Accounts created on 2–3 stock photo platforms
✅ Basic tracking for views, downloads, and earnings
✅ A plan to double down on the subjects that get traction
🎯 KEY TAKEAWAY
Stock photography is a volume-and-quality game. The more useful, searchable, and commercially relevant your images are, the better your chances of long-term downloads.
📅 Month 1: Learn the Basics & Choose Your Photo Direction
🎯 Main Goal
Build your photography foundation and choose the type of photos you want to create.
✅ What to Do
- Learn basic composition, lighting, and focus
- Decide whether you will use a phone, DSLR, or mirrorless camera
- Practice shooting in natural light
- Study stock photo examples
- Choose 2–3 stock photo categories to test
- Create a folder system for your photos
- Take your first 100–150 practice photos
- Start learning basic editing
🏁 Month 1 Success Looks Like
- You understand basic lighting and composition
- You chose a few photo categories to test
- You created a photo organization system
- You practiced shooting consistently
- You know what kind of images stock buyers may need
⚠️ Beginner Mistake: Taking random pretty pictures with no buyer use in mind. Stock photos should solve a visual need for websites, ads, articles, designs, or social media.
🗂️ Stock Photo Categories to Consider
Category | Why It Works |
Business and office | Useful for websites, blogs, and ads |
Lifestyle | Broad commercial use |
Food and drinks | High demand for blogs and marketing |
Fitness and wellness | Useful for health brands and creators |
Technology | Strong demand for digital content |
Nature and landscapes | Popular but competitive |
Travel and local places | Useful for destination content |
Textures and backgrounds | Easy to use in designs |
Hands, tools, and workspaces | Great for practical business visuals |
📅 Month 2: Build Your First Stock Photo Portfolio
🎯 Main Goal
Create a focused batch of usable images that can become your first upload set.
✅ What to Do
- Plan simple photo shoots by category
- Shoot 150–250 more images
- Focus on clear subjects and clean backgrounds
- Capture horizontal and vertical versions
- Edit photos lightly and naturally
- Remove blurry, noisy, or poorly composed images
- Create your first polished portfolio folder
- Start learning platform upload requirements
🔧 What to Refine in Early Shoots
- Clear subjects
- Clean backgrounds
- Natural lighting
- Horizontal and vertical framing
- Simple editing
- Strong commercial use cases
🏁 Month 2 Success Looks Like
- You have a stronger photo library
- You understand which photos look more commercial
- You have started editing consistently
- You have a folder of upload-ready images
- You know which categories are easiest for you to shoot
🎯 KEY TAKEAWAY
Stock photos do not need to be complicated. Clean, useful, well-lit images often perform better than overly artistic shots with limited commercial use.
💡 Beginner Stock Photo Shoot Ideas
Shoot Type | Photo Ideas |
Home office | Laptop, notebook, coffee, desk setup |
Fitness | Shoes, water bottle, weights, stretching |
Food | Meal prep, ingredients, coffee, snacks |
Local lifestyle | Walking, errands, hands holding items |
Technology | Phone, keyboard, apps, charging cables |
Cleaning/organization | Supplies, baskets, shelves, before/after |
Tools and work | Hands using tools, workspace details |
Backgrounds | Wood, fabric, paper, walls, nature textures |
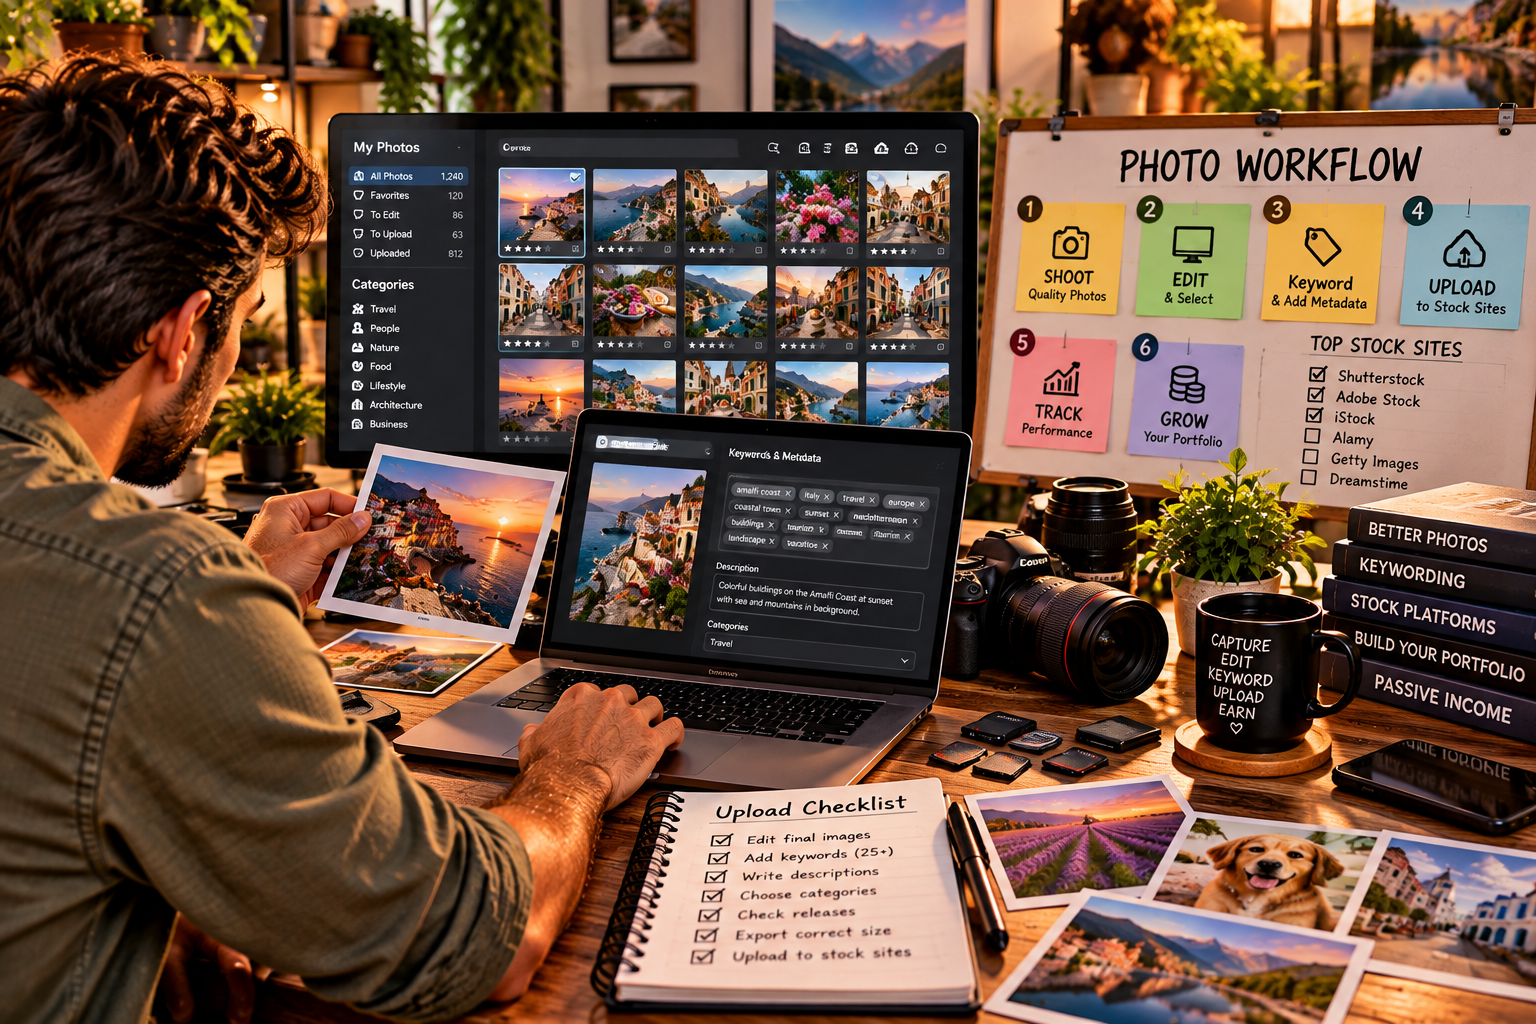
📅 Month 3: Create Stock Accounts & Upload Your First Images
🎯 Main Goal
Start uploading to stock platforms and learn how approval, titles, descriptions, and keywords work.
✅ What to Do
- Create accounts on 2–3 stock platforms
- Read each platform’s contributor rules
- Upload your first 50–100 images
- Write clear titles and descriptions
- Add accurate keywords
- Avoid keyword stuffing
- Track accepted and rejected photos
- Learn from rejection reasons
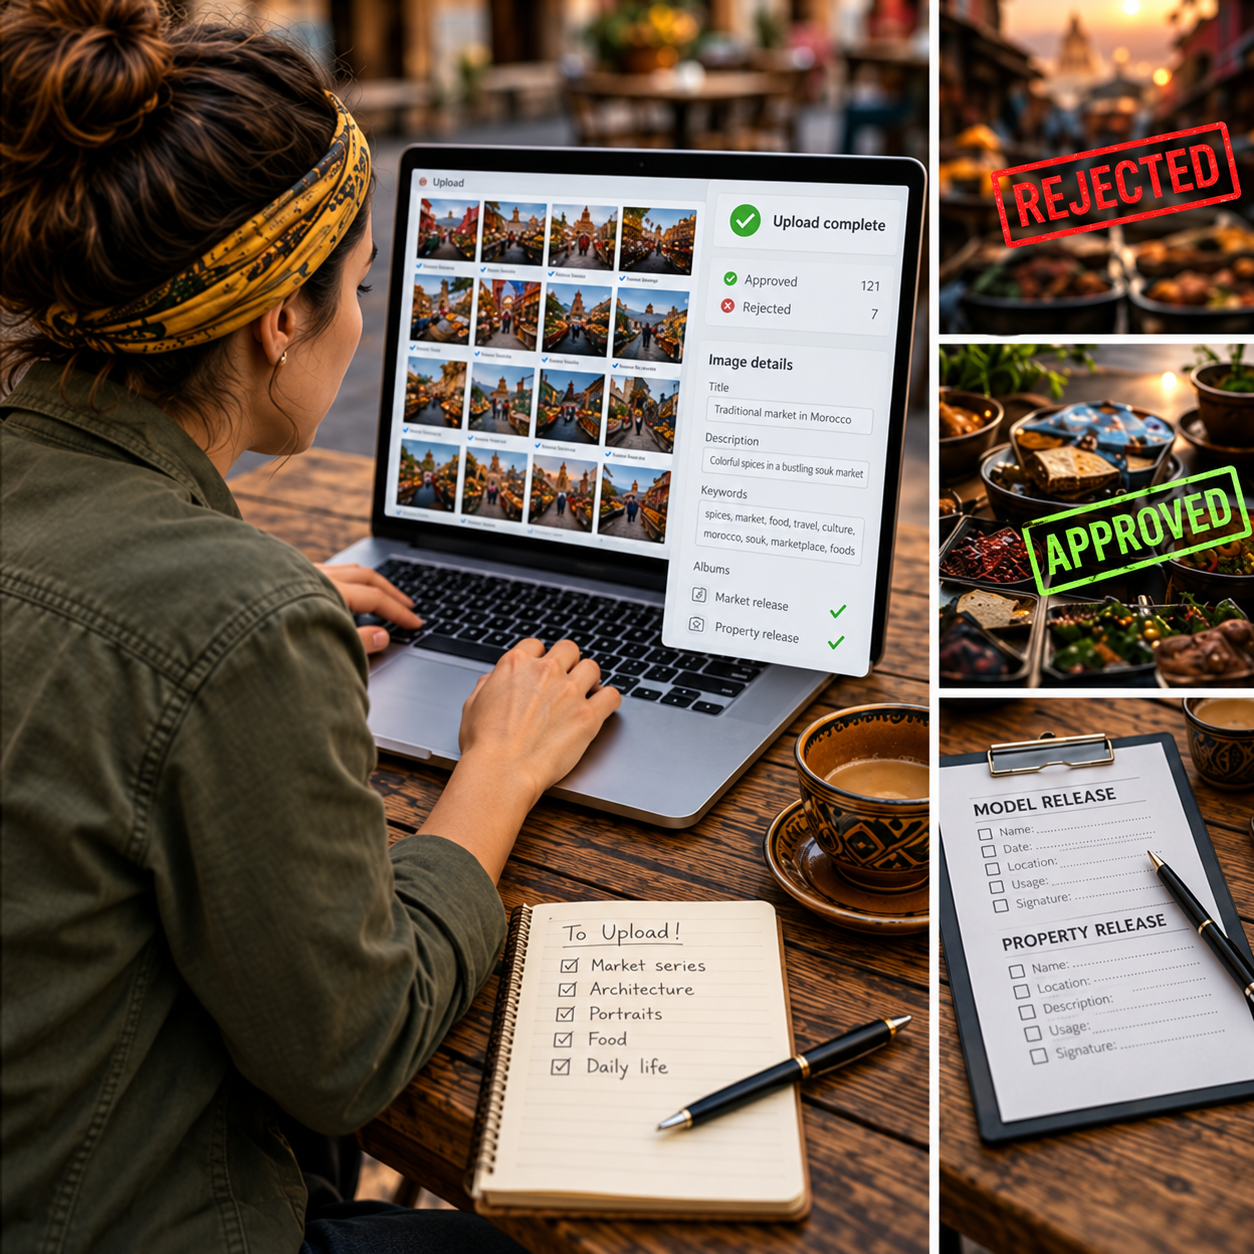
🏁 Month 3 Success Looks Like
- Your contributor accounts are set up
- Your first images are uploaded
- You understand approval rules better
- You are learning how to keyword photos
- You have your first accepted images online
🎯 KEY TAKEAWAY
Rejections are normal. Use them as feedback to improve sharpness, lighting, editing, keywording, and subject choice.
🧰 Stock Platforms to Consider
Platform | Best For |
Adobe Stock | Commercial stock photos and design buyers |
Shutterstock | Large marketplace and broad demand |
iStock/Getty Images | Commercial and editorial-style content |
Alamy | Broad stock and editorial photos |
Dreamstime | Beginner-friendly stock uploads |
Pond5 | Video, audio, and some photography |
Etsy | Selling photo prints or digital photo packs |
Your own website | Portfolio and direct licensing later |
☑️ Upload Checklist
Item | Why It Matters |
Sharp focus | Prevents quality rejections |
Good lighting | Makes photos more useful |
Clean editing | Avoids unnatural images |
Accurate title | Helps buyers understand the image |
Relevant keywords | Helps buyers find the photo |
No trademarks | Avoids legal issues |
Model/property releases | Needed for some commercial uses |
Correct category | Helps platform organization |
📅 Month 4: Build a Repeatable Shooting & Upload System
🎯 Main Goal
Turn photography into a consistent workflow for shooting, editing, keywording, and uploading.
✅ What to Do
- Plan weekly photo shoots
- Batch similar images together
- Edit photos in groups
- Create title and keyword templates
- Upload consistently every week
- Track accepted photos by platform
- Review which subjects get views
- Create a backlog of future shoot ideas
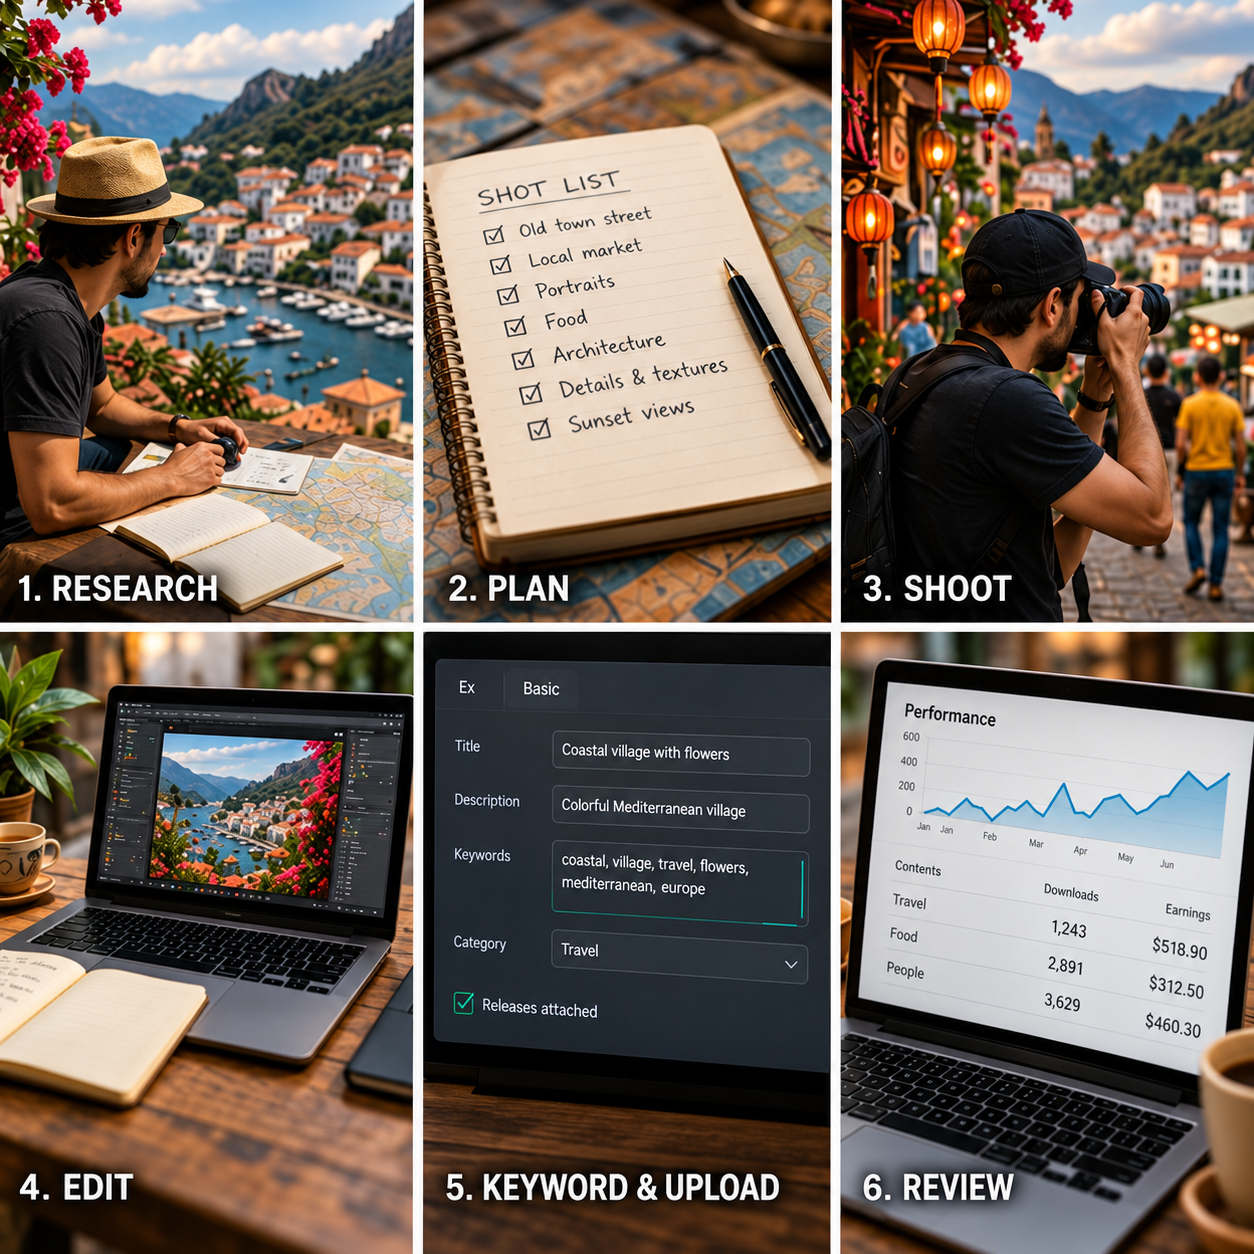
🏁 Month 4 Success Looks Like
- You have a repeatable photo workflow
- You are uploading consistently
- Your keywording is improving
- Your rejection rate is decreasing
- Your portfolio is growing steadily
⚠️ Scale Smart: Do not upload 20 nearly identical photos. Choose strong variations that give buyers real options without making your portfolio feel repetitive.
🗓️ Simple Weekly Workflow
Day | Task |
Monday | Research photo ideas and buyer demand |
Tuesday | Plan shot list and gather props |
Wednesday | Shoot photos |
Thursday | Edit and select best images |
Friday | Title, keyword, and upload |
Weekend | Review approvals and plan next batch |
🔄 Simple Stock Photography Workflow
Step | What Happens |
Research | Find subjects buyers may need |
Shot list | Plan images before shooting |
Shoot | Capture multiple angles and layouts |
Select | Remove weak, blurry, or repetitive images |
Edit | Adjust exposure, color, crop, and clarity |
Export | Save in platform-ready format |
Keyword | Add accurate titles, descriptions, and tags |
Upload | Submit to stock platforms |
Review | Track approvals, views, downloads, and earnings |
📅 Month 5: Improve Commercial Value & Expand Your Portfolio
🎯 Main Goal
Create better images based on buyer needs, platform feedback, and early performance data.
✅ What to Do
- Review which images get views or downloads
- Shoot more of your best-performing categories
- Add seasonal and business-friendly images
- Improve lighting and composition
- Add more useful copy space
- Create vertical images for mobile and social use
- Improve titles and keywords on older images
- Start testing short stock videos if interested
🏁 Month 5 Success Looks Like
- You know which categories show early promise
- Your photos look more commercially useful
- You are improving older uploads
- Your portfolio is larger and more organized
- You understand what buyers may actually search for
🎯 KEY TAKEAWAY
A good stock photo is not just attractive. It is useful for a buyer who needs to communicate a message quickly.
📈 Ways to Increase Stock Photo Value
Improvement | Why It Helps |
Copy space | Makes images useful for ads and text overlays |
Clean backgrounds | Helps designers use the photo easily |
Multiple orientations | Gives buyers more layout options |
Clear concepts | Makes the image easier to search and buy |
Seasonal themes | Matches marketing calendars |
Diverse use cases | Increases commercial usefulness |
Strong keywords | Helps buyers find the image |
Consistent uploads | Builds portfolio momentum |

📅 Month 6: Review, Double Down & Build a Growth Plan
🎯 Main Goal
Review your first 6 months and decide which photo categories, platforms, and workflows deserve more focus.
✅ What to Do
- Review total photos taken
- Review total photos uploaded
- Review accepted vs. rejected images
- Identify your most-viewed or downloaded photos
- Identify your best-performing categories
- Review keywording and title quality
- Remove or stop shooting weak categories
- Create a 90-day plan for months 7–9
❓ 6-Month Review Questions
- Which photos were accepted most often?
- Which categories got the most views?
- Which images got downloads or saves?
- Which platforms performed best?
- Which photos were rejected most often?
- Which shoots were easiest to repeat?
- Which subjects had the clearest buyer use?
- What keywords seemed to work?
- What should you shoot more of next?
🏁 Month 6 Success Looks Like
- You know your strongest photo categories
- Your upload process is consistent
- Your rejection rate is improving
- You understand what platforms fit your work
- You have a 90-day plan to grow your portfolio
🎯 KEY TAKEAWAY
Stock photography grows slowly, but every useful image can keep earning attention over time. The goal is to build a searchable library that compounds.
📊 Decision Table
If This Happens | Do This |
Business photos get views | Shoot more office, laptop, and work concepts |
Food photos perform well | Create more clean food and ingredient shoots |
Rejections are high | Improve focus, lighting, and editing |
Downloads are low | Improve keywords and commercial concepts |
One platform performs best | Upload there more consistently |
Nature photos do not sell | Add stronger concepts or try different categories |
Photo shoots take too long | Batch props, locations, and shot lists |
Buyers like vertical images | Create more mobile-friendly layouts |

✅ 6-Month Success Checklist
By the end of 6 months, check whether you have:
✅ Chosen a stock photography direction
✅ Practiced lighting and composition
✅ Taken hundreds of photos
✅ Edited and exported upload-ready images
✅ Created stock contributor accounts
✅ Uploaded your first photo batches
✅ Learned title and keyword basics
✅ Tracked approvals and rejections
✅ Reviewed views, downloads, or early earnings
✅ Identified your best photo categories
✅ Built a repeatable upload workflow
✅ Created a plan for the next 90 days
⚠️ What Not to Do During the First 6 Months
Avoid these mistakes:
❌ Uploading blurry or poorly lit photos
❌ Using trademarks, logos, or copyrighted items carelessly
❌ Ignoring model or property release requirements
❌ Keyword stuffing unrelated terms
❌ Taking only random photos with no buyer use
❌ Over-editing images until they look unnatural
❌ Uploading too many near-duplicates
❌ Giving up after early rejections
❌ Ignoring platform rules
❌ Expecting big income from a tiny portfolio
⚠️ Reminder: Stock photography rewards patience, consistency, and useful images. Focus on quality, searchability, and commercial purpose.
🧭 Simple 6-Month Milestone Tracker
Month | Main Focus | Target Output |
Month 1 | Skills & direction | 100–150 practice photos |
Month 2 | Portfolio building | First polished upload-ready batch |
Month 3 | Stock uploads | 50–100 images uploaded |
Month 4 | Workflow system | Weekly shoot/edit/upload routine |
Month 5 | Commercial improvement | Stronger categories and keywords |
Month 6 | Review & growth | 90-day growth plan created |
🚀 Final 6-Month Strategy
Your first 6 months should follow this simple path:
Month 1: Learn the basics and choose your photo direction
Month 2: Build your first stock photo portfolio
Month 3: Create stock accounts and upload your first images
Month 4: Build a repeatable shooting and upload system
Month 5: Improve commercial value and expand your portfolio
Month 6: Review results and double down on what works
The stock photographers who grow fastest are not just taking beautiful pictures. They are creating useful, searchable, buyer-friendly images consistently over time.

11. View the Stock Photography Starter Kit
🎁 Your Stock Photography Toolkit
The Photography & Stock Photos Starter Kit brings together 12 browser-based tools for planning shoots, reviewing photo quality, preparing release documentation, tracking uploads and evaluating earnings.
The 12 components:
✅ 1. Stock Photo Idea Planner — Research image subjects and plan stock photography shoots; sales are not guaranteed.
✅ 2. Technical Upload Checklist — Review image quality and platform submission requirements before uploading.
✅ 3. Photo Keywording Worksheet — Organize photo captions, titles and relevant search terms.
✅ 4. Model Release Builder — Prepare model-release details and draft documentation for appropriate legal review.
✅ 5. Property Release Builder — Prepare property-permission details and draft release paperwork for independent review.
✅ 6. Stock Platform Evaluator — Compare contributor marketplaces and verify their current terms before choosing where to submit.
✅ 7. Photo Upload Tracker — Manually record photo submissions and review their acceptance or rejection outcomes.
✅ 8. Seasonal Shoot Calendar — Schedule time-sensitive and evergreen shoots around your content priorities.
✅ 9. Lighting & Shot Setup Guide — Plan lighting arrangements and prepare each shot before the shoot.
✅ 10. Editing & Quality Checklist — Plan edits and review photo quality; Lightroom preset files are not included.
✅ 11. Stock Shot List Builder — Build shot lists and creative briefs to guide stock photography production.
✅ 12. Photo Portfolio & Earnings Tracker — Log actual photo revenue and portfolio performance observations.
Also included in the editable master: A central dashboard and Start Here instructions are also present.
This is a review build, not an approved customer release. Tools do not automatically upload photos or receive live sales feeds. Check release validity, platform policies and consent independently.

12. Frequently Asked Questions
📱 Can I really make money with just my phone?
Yes, but with limitations.
Modern iPhones, especially iPhone 11 and newer, and flagship Android phones can produce images good enough for many platforms.
However, you may be limited in categories like:
- 🏃 Sports
- 🦁 Wildlife
- 👔 Professional portraits
- 📸 High-end commercial shoots
Some platforms may also reject phone photos if quality is not high enough.
💡 Best approach: start with your phone, then upgrade once you’re earning $100+/month.
🙋 Do I need to show my face or use models?
No. Many successful stock photographers never shoot people.
You can focus on:
- 🍽️ Food
- 🎨 Abstract images
- 🖼️ Backgrounds
- 🌿 Nature
- 📦 Objects
- 🐾 Pets
That said, photos with people often sell better and at higher rates, especially if they feel diverse, authentic, and natural.
⚠️ Photos with recognizable people require model releases.
⏳ How long until I make my first sale?
Income varies. Some photos sell within weeks; many earn little at first.
Some people get a sale within days, while others take months.
It depends on:
- 📸 Photo quality
- 🔑 Keyword accuracy
- 📊 Subject demand
- 🌐 Platforms used
- 📈 Upload consistency
👉 Don’t get discouraged. Keep uploading.
🔁 Can I upload the same photo to multiple platforms?
Yes.
Unless you sign an exclusivity agreement, you can and should upload the same photos to multiple platforms.
This helps you:
- 👀 Increase exposure
- 💰 Increase income potential
- 📊 Learn which platforms perform best
- 🔁 Maximize each photo’s value
💡 Tools like Xpiks can help with batch uploading and keywording.
📸 What if I'm not a “real photographer”?
Stock photography does not care about credentials.
It cares about whether your images are:
- ✅ Sharp
- ✅ Well-lit
- ✅ Properly exposed
- ✅ Useful to buyers
- ✅ Clean and technically acceptable
💡 Many top contributors are self-taught hobbyists.
🧾 Do I need to pay taxes on stock photo income?
Yes.
In the U.S., stock photo income is usually self-employment income reported on Schedule C.
Track:
- 💰 Income
- 📸 Equipment
- 💻 Software
- 🎨 Props
- 🌐 Subscriptions
- 🚗 Mileage if relevant
Platforms may send 1099 forms if you earn $600+.
💡 International contributors should check local tax laws. Consider a tax professional once you’re earning consistently.
©️ What about copyright and stealing?
You own the copyright to your photos.
Stock platforms license them on your behalf.
Your photos may appear in Google Images, which is normal and can help discovery.
If someone uses your photo without licensing:
- 🛡️ Platforms may help with enforcement
- 📄 You may be able to file a DMCA takedown
- 📁 Keep original files as proof of ownership
💡 Uploading to stock platforms does not mean you give up ownership.
🚫 Why are my photos getting rejected?
Common rejection reasons include:
- 📉 Not sharp enough
- 🌀 Motion blur or soft focus
- 🌫️ Too much noise
- 🧱 Compression artifacts
- 🌈 Chromatic aberration
- 🖼️ Poor composition
- ™️ Visible logos or trademarks
- ©️ Copyrighted elements
- 📄 Missing model/property release
- 🗂️ Wrong file format or color space
👉 Study rejection reasons carefully and fix the issue before uploading more.
🎯 Should I shoot niche or general subjects?
Start general to learn and build your portfolio.
Once you reach 300–500 photos, analyze what sells and specialize.
Niche photographers often earn more per photo because they face less competition.
Strong niches can include:
- 🍽️ Food
- 💼 Business
- 🏥 Healthcare
- 💻 Technology
- 🏠 Home/lifestyle
- 🐾 Pets
- 🧰 Trades and local services
💡 Shoot what buyers need, not just what looks pretty.
✂️ Can I edit photos I didn't take?
Only if you have clear written permission and full rights from the original photographer.
Stock platforms require you to own full copyright or have the legal right to license the image.
🚫 Editing someone else’s photo without permission is copyright infringement.
🌐 What's the best platform for beginners?
Start with:
- 📸 Shutterstock
- 🎨 Adobe Stock
Why?
- Shutterstock has high traffic and more potential sales volume
- Adobe Stock often has better rates
Then add:
- 📦 Depositphotos
- 🖼️ Alamy
- 🌍 iStock/Getty if approved
💡 Start with 2 platforms first so you don’t overwhelm yourself.
💰 How many photos do I need to make $1,000/month?
There is no set photo count for a monthly total.
Results vary widely based on:
- 🎯 Niche
- 📸 Quality
- 🔑 Keywording
- 📊 Buyer demand
- 🌐 Platform mix
- 🔁 Upload consistency
Some portfolios earn more with fewer strong images in high-demand categories.
Others earn little even with a large generic library.
👉 Quality + buyer demand + keywording matter as much as volume.
13. Important Considerations
Before you dive in, understand these realities — this is what separates beginners from people who actually make money.
⚠️ This Is NOT Instant Income
- ⏳ It typically takes 2–8 weeks to get your first sale
- 📈 Real income builds over 3–12 months
- 💡 This is a compounding asset, not quick cash
👉 Expect slow early results.
🚫 Rejections Are Normal and Necessary
- ❌ A 30–70% rejection rate is common early on
- 🎯 Every rejection gives feedback
- 📚 Learning platform standards saves time long-term
👉 Don’t take rejections personally. Use them to improve.
🔑 Keywords = Visibility = Income
Bad keywords mean buyers never see your photos.
Spend time on:
- 🔍 Search intent
- 🧠 Buyer language
- 📊 Relevant categories
- 🏷️ Accurate tags
- 📄 Clear titles and descriptions
💡 Spend as much time keywording as shooting.
💼 You Must Shoot What SELLS, Not Just What Looks Good
Pretty images are not always profitable.
Examples:
- ❌ Generic sunsets = oversaturated
- ✅ Business, lifestyle, tech, healthcare, and useful concepts = higher demand
Buyers care about:
- 📌 Use cases
- 📣 Marketing needs
- 🧠 Concepts
- 🖥️ Website/social media usage
- 🧾 Commercial value
👉 Think like a buyer, not just a photographer.
📸 Volume + Quality Wins
- 📉 100 photos often earn little
- 📈 A larger portfolio can create more chances to earn, not a forecast
- 🔁 Consistency beats perfection
💡 Your portfolio becomes more valuable as it grows.
⚖️ Legal Requirements Matter
You must follow platform and copyright rules.
Important requirements:
- 📄 Model releases for recognizable people
- 🏠 Property releases for private locations
- 🚫 No logos or trademarks
- ©️ No copyrighted artwork, packaging, or designs
- 🧾 Keep release forms organized
👉 Legal mistakes can get photos rejected or accounts suspended.
🌐 Platform Strategy Matters
One platform limits your income.
Better approach:
- 📸 Upload to multiple platforms
- 🔁 Reuse the same photos when allowed
- 📊 Track which platforms perform best
- ⚖️ Balance growth vs. burnout
💡 Multi-platform upload = more exposure from the same work.
🐢 Most People Quit Too Early
Early months feel slow.
Typical phases:
- 🚧 Months 1–3: slow learning phase
- 📈 Months 4–12: momentum phase
- 🚀 Year 1+: compounding portfolio phase
💡 The winners are usually the ones who kept going.
🎯 The Reality Straight Up
- 📸 First 100 photos → often small or no results
- 📈 More photos create more chances to earn, not a set income
- 🚀 A larger library can support more licensing over time — not a guarantee
👉 The difference is consistency + strategy.
14. Your Next Steps
🚀 ACTION STEP
📅 Monday
- 📦 View the starter kit
- 🔍 Research top-selling categories on Shutterstock for 1 hour
- 📝 Make a list of 30 photos you can shoot this week
📆 Tuesday–Friday
- 📸 Shoot 10 photos per day, around 30 minutes each
- 🎨 Learn a basic editing workflow through YouTube tutorials
- 🔑 Practice keywording using the mastersheet
🗓️ Weekend
- ✨ Edit your 40 best photos
- 🌐 Create accounts on Shutterstock + Adobe Stock
- 📤 Upload your first 20 photos
- 📅 Plan next week’s shoots
⏳ What Happens Next
- 📸 Two weeks from now: Your first photos can be live on stock platforms if they are approved
- 💰 Two months from now: First sales are possible, not guaranteed
- 💤 Six months from now: Recurring licenses are possible if the portfolio, keywords, and demand line up
- 🚀 One year from now: Review actual downloads and royalties before expanding
15. The Bottom Line
🎯 KEY TAKEAWAY
Stock photography can be a practical way to license images that can sell more than once — but fees, rejections, tools, and ongoing uploads still reduce what you keep, and sales are not automatic.
🙋 If you:
✔ Upload consistently instead of waiting for perfect shots
✔ Shoot what buyers actually need, not just what looks pretty
✔ Keyword every photo accurately so buyers can find it
✔ Build volume — portfolio size drives income
🏗️ You can build:
💰 Extra income is possible; higher monthly figures usually take a larger portfolio, useful subjects, and consistent uploads — not a per-photo promise
🔁 Files can keep licensing after upload, but that is recurring income, not hands-off income
📈 A larger library can support more income when the images are useful and discoverable — not an $800/month forecast
🚀 Outline your first batch when the rights, quality, and keywords are ready.

16. Recommended Websites & Tools
🛠 TOOLS & RESOURCES
You do not need every resource listed below. This directory brings together the major platforms, tools, and resources from this guide, along with additional research and learning options, so you can find them in one place when you need them.
Start with the essentials. Add tools only when your photography workflow develops a specific need for them.
🌐 Stock Photography Platforms
- Shutterstock — Microstock platform for uploading commercial stock photos, learning buyer demand, and building a high-volume royalty portfolio.
- Adobe Stock — Stock marketplace connected to Adobe Creative Cloud, useful for quality-focused images, design-friendly photos, and commercial buyers.
- Depositphotos — Stock photo marketplace mentioned as a supplemental platform for uploading and monetizing your image portfolio.
- iStock — Premium stock marketplace with selective approval, higher-end buyers, and royalty options based on exclusivity.
- Alamy — Stock platform for editorial, travel, news, high-resolution, and broader licensing opportunities.
- 500px — Photography platform for premium licensing, fine art-style work, landscapes, portfolio visibility, and professional-quality images.
- Canva Contributor — Contributor program for selling images and design-friendly visuals that can be used inside Canva templates and designs.
💡 PRO TIP
Upload to 2–3 agencies — Shutterstock, Adobe Stock, and Getty/iStock reach different buyers. More storefronts means more sales of the same photo.
📸 Camera Brands & Starter Gear
- Canon — Camera brand mentioned for beginner DSLR and mirrorless options like the Canon EOS Rebel series and Canon M50.
- Nikon — Camera brand mentioned for beginner DSLR options like the Nikon D3500.
- Sony Cameras — Camera brand mentioned for compact mirrorless options like the Sony a6000.
🖥️ Photo Editing & Design Software
- Lightroom Mobile — Mobile photo editing app for quick edits, color correction, exposure fixes, and beginner stock photo workflows.
- Lightroom Classic — Professional photo organization and editing software for batch editing, catalog management, and serious stock portfolios.
- Snapseed — Free mobile editing app for fast phone photo edits, basic adjustments, and beginner-friendly photo cleanup.
- GIMP — Free image editing software mentioned as a Photoshop alternative for more advanced editing without paid software.
- Adobe Photoshop — Advanced image editing software for retouching, cleanup, object removal, and polished commercial photo edits.
- Canva — Design tool for simple graphics, thumbnails, layouts, portfolio visuals, and turning photo assets into usable marketing materials.
📝 QUICK NOTE
Free editors are enough to start. Pay for tools like Lightroom only when batch editing starts costing you real hours.
🔎 Keyword Research & Trend Research Tools
- Shutterstock Blog — Stock photography trend and keyword research resource for understanding buyer demand and popular visual themes.
- Microstockr — Portfolio tracking and microstock analytics tool for monitoring stock photo performance across platforms.
- Google Images — Visual research tool for studying image styles, related searches, composition patterns, and commercial photo trends.
- Google Trends — Trend validation tool for checking seasonal demand, rising topics, and search interest before planning shoots.
- Pinterest — Visual trend research platform for lifestyle, food, home, flat lay, seasonal, and creator-friendly stock photo ideas.
📝 QUICK NOTE
Keywording is half the job. A great photo with weak keywords never gets found.
🗂️ Organization, Workflow & Backup Tools
- Google Sheets — Spreadsheet tool for tracking uploads, keywords, approval status, earnings, platforms, and photo batches.
- Notion — Workspace for planning shoots, organizing content calendars, storing portfolio notes, and tracking photo ideas.
- Trello — Visual workflow board for planning photo shoots, editing batches, upload steps, and platform progress.
- Google Drive — Cloud storage tool for backing up photos, release forms, edited files, and stock submission records.
- Lightroom Classic — Catalog system for organizing photos by shoot, theme, season, approval status, and platform usage.
📄 Legal, Release & Document Tools
- DocuSign — Digital signature tool for collecting model releases, property releases, and professional shoot permissions.
- Adobe Acrobat — PDF editing and signing tool for release forms, contracts, permissions, and stock photography documentation.
- Google Drive — Storage tool for keeping signed model releases, property releases, contracts, and legal records organized.
📤 Uploading & Multi-Platform Workflow Tools
- Xpiks — Keywording and microstock upload tool for preparing metadata and uploading images to multiple stock platforms.
- Lightroom — Photo editing and organization platform mentioned for plugins, upload workflows, and managing a larger stock photo library.
🎯 KEY TAKEAWAY
You do not need every tool on this page. One camera or phone, one editor, and two agencies are enough to start earning.
🧭 How to Use This Directory
🧰 Start With a Simple Setup
Do not start by creating accounts with every service listed above. For most beginners, a simple setup is enough:
- One camera or smartphone
- One editing app
- Two stock agencies
- One backup system
That is enough to start building. Add tools only when you can name the specific problem they will solve.
🎯 KEY TAKEAWAY
Tools support the business. They are not the business.
Your biggest advantages will come from:
Consistency → Volume → Keywording → Buyer demand
17. Explore Similar Side Hustles
 UGC Creation — Brands pay for authentic photos shot with the skills you already have.
 Print-on-Demand — Put your best images on products without holding inventory.
 Art & Illustration Commissions: Get Paid for Drawing What You Love — Take custom visual commissions alongside your stock portfolio.
- Selling Digital Products — Package presets, wallpapers, or printables from your growing archive.
- Faceless Video Content Creation: Go Viral Without Showing Your Face — Turn your footage and B-roll into faceless channel content.
 Social Media Management — Offer photo-plus-posting packages to local businesses.