Affiliate disclosure: Some links in this guide may be paid referral links. If you purchase or sign up through one, One Stop Side Hustles may earn a commission. How our affiliate links work.
PRINT-ON-DEMAND STARTER GUIDE
Learn how print-on-demand works—including choosing a niche, creating designs, listing products, and testing demand before you scale. Sales are not automatic; results vary with niche fit, listing quality, and whether people actually buy.
1. What is Print-on-Demand (POD)?
2. Why Print-on-Demand Is a Great Side Hustle
3. Best-Selling Print-on-Demand Products
4. How Much Can You Earn & Pricing Strategies
5. Essential Tools, Costs & Design Software
6. Popular Print-on-Demand Platforms
7. From Design Idea to Live Product
9. Learning, Templates & Resources
10. Your First 6 Months Print-on-Demand Plan
11. Get the Print-on-Demand Starter Kit
12. Frequently Asked Questions
Quick Snapshot
Earn: Highly variable — per-sale profit and monthly totals depend on niche, traffic, fees, and whether designs actually sell
Work: Design and list products; platforms print and ship
Start: Low cost (often $0) with free design tools and platforms
Best for: Creative marketers who spot niche design demand
Grow: First designs → niche store → multiple products/brands
1. What is Print-on-Demand (POD)?
Print-on-demand lets you design and sell custom products—like t-shirts, mugs, journals, phone cases, tote bags, and more—that are only printed and shipped after a customer orders. You never touch inventory.
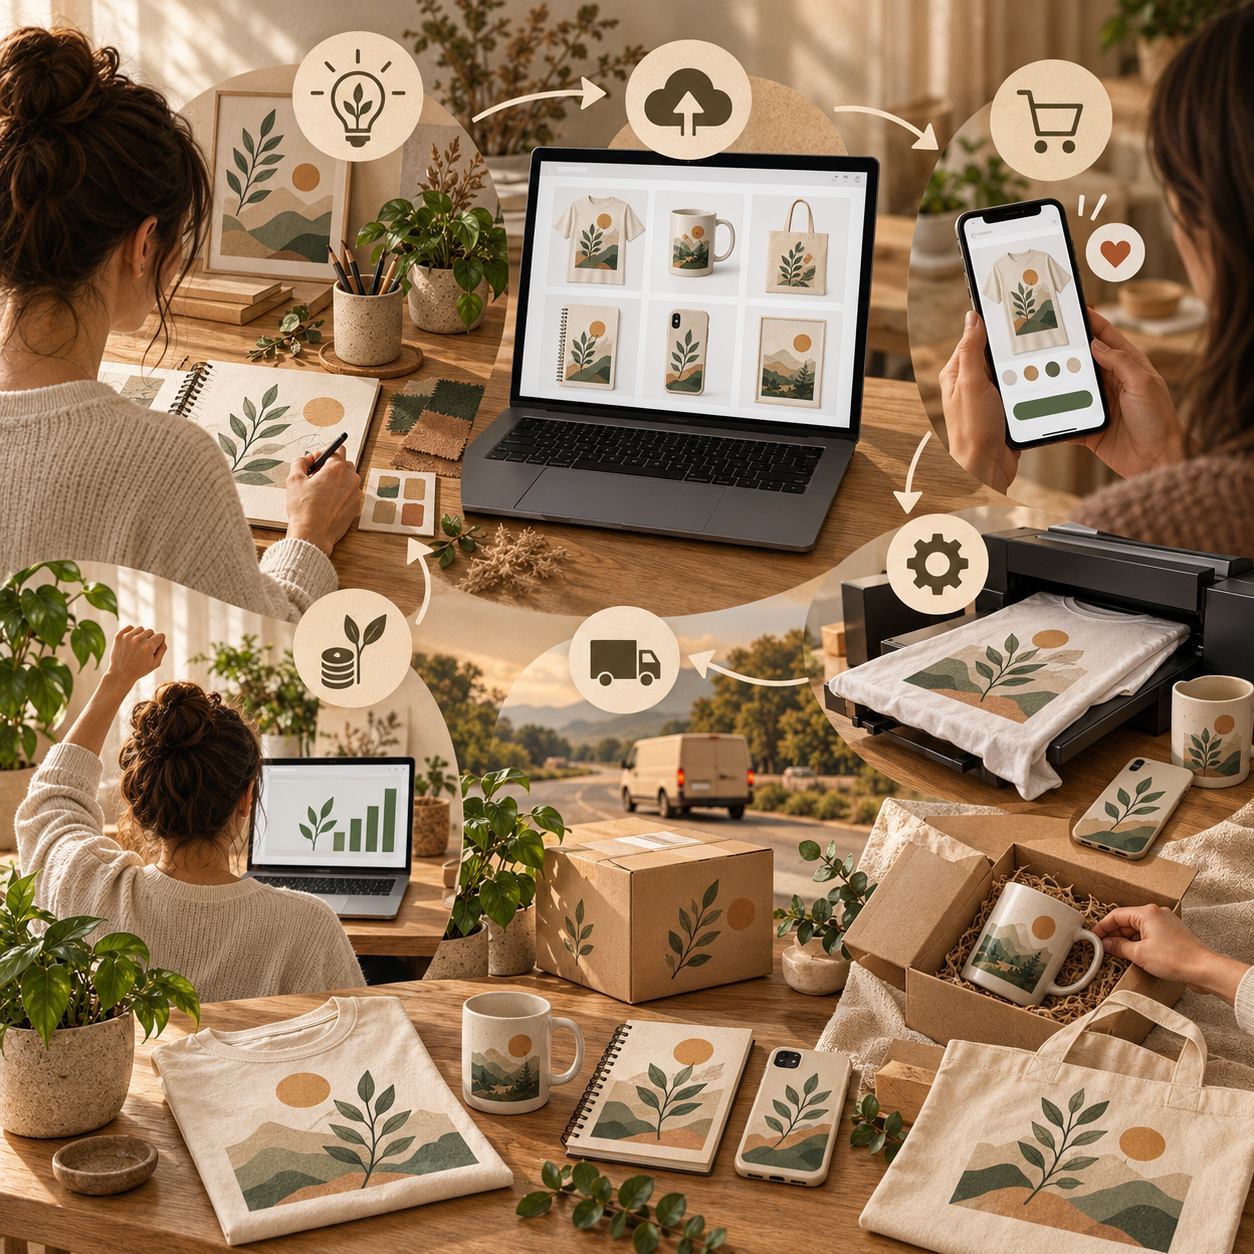
🛠️ How POD Works (5 Simple Steps)
- Create designs using tools like Canva (free)
- Upload to POD platform (Printful, Printify, Redbubble)
- List products in your store (Etsy, Shopify) or marketplace
- Customer orders → Platform automatically prints and ships
- You keep what remains after base cost, fees, and other expenses
🎯 KEY TAKEAWAY
You're essentially a product designer and marketer. The POD platform handles manufacturing, inventory, and fulfillment. Pure creativity + marketing.
2. Why Print-on-Demand Is a Great Side Hustle
Print-on-demand is a strong side hustle because it turns design ideas, niche demand, and marketplace visibility into income that can grow without inventory.
💰 One winning design can sell again and again
Print-on-demand is attractive because a single good concept can keep producing sales after the original design work is done.
That upside usually grows through:
- Strong niche ideas
- Better product-market fit
- More listings
- Better visibility
- Seasonal and evergreen designs
This gives POD more leverage than many side hustles where every dollar depends on new hourly work.
🧠 The platforms handle the physical operations
You are not running a traditional inventory business with shelves, packing stations, or fulfillment headaches.
Print-on-demand providers usually handle:
- Manufacturing
- Inventory storage
- Printing
- Packing
- Shipping
That lets you focus more on ideas, positioning, and listings than on operational logistics.
💻 The startup barrier is low
Most beginners can test the business without buying inventory upfront.
A simple starter setup often includes:
- Free design tools
- Basic mockups
- Marketplace accounts
- Research tools
- A laptop and internet
That makes POD one of the easier e-commerce models to try before risking much capital.
⚡ You can launch quickly and compound over time
A first listing can go live fast, and each additional design increases the size of your earning library.
A simple workflow often looks like:
- Research a niche
- Create a design
- Upload it
- Publish listings
- Improve what gets traction
Early effort matters because the catalog can keep working long after the first upload day.
🕒 It is flexible and easy to build around your schedule
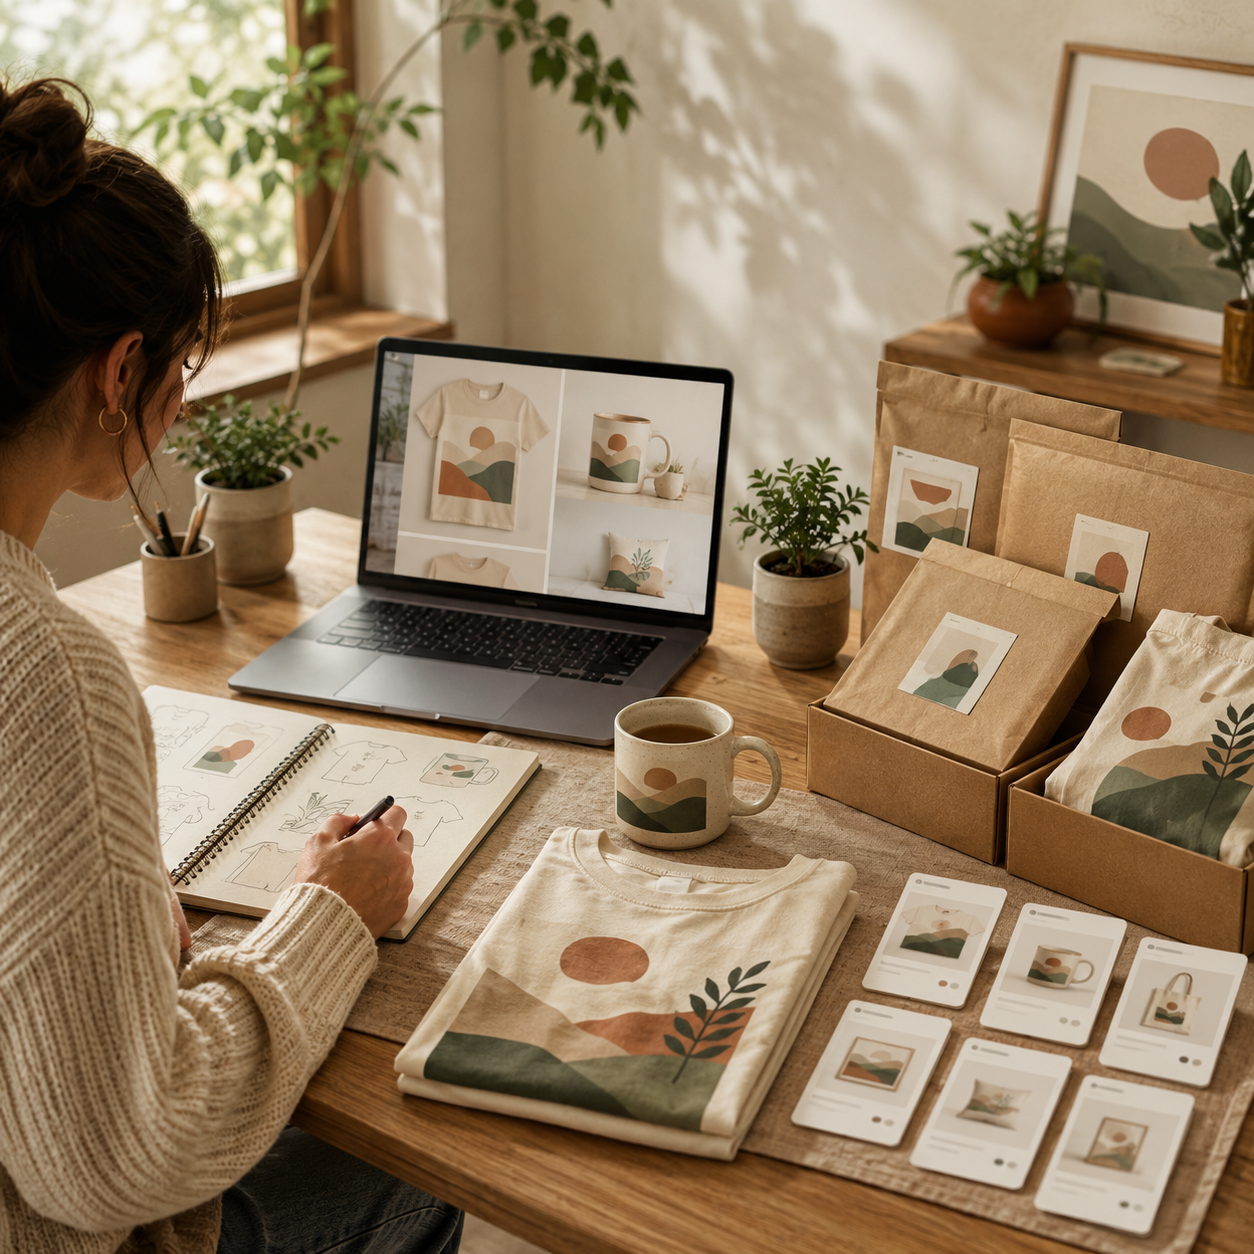
POD works well for people who want to create and manage products without being tied to fixed hours or a physical location.
Common work patterns include:
- Evening design sessions
- Weekend uploads
- Batch listing days
- Remote management
- Small daily improvements
That flexibility makes it much easier to build gradually while keeping another job or set of responsibilities.
📈 Growth does not require more work per order
Once a listing is live, another sale usually does not create a matching increase in your manual workload.
Common growth steps include:
- More designs
- Better listings
- Stronger mockups
- More products
- Better traffic channels
That creates a model where the catalog can expand faster than the amount of hands-on work required per customer.
🌍 There is broad demand for custom products
People are constantly buying identity-based, giftable, funny, seasonal, or aesthetic products.
Popular product types include:
- T-shirts and hoodies
- Mugs and tumblers
- Stickers and phone cases
- Posters and wall art
That broad demand gives sellers many angles to test instead of relying on only one type of buyer.
🎯 Designs can compound into a real brand
Every product you create becomes a reusable asset that can be expanded, adapted, or relaunched later.
Long-term upside often comes from:
- Evergreen designs
- Seasonal repeats
- Product-line expansion
- Niche collections
- Branded stores
So even small early wins can become the foundation for a larger e-commerce business over time.
3. Best-Selling Print-on-Demand Products
Print-on-demand works best when you match the right design to the right product. The product is only a canvas—buyers respond to a specific idea, identity, or occasion.
Most beginners do better by choosing one niche and 2–3 product types, testing a small set of designs, and expanding into higher-margin or specialized items only after you see what your audience likes.
📝 QUICK NOTE
The prices below are illustrative retail ranges, not verified market prices or expected profit. Base costs, shipping, platform fees, and taxes change your margin, so check each provider’s current costs and order samples before listing. Only use designs, fonts, and images you have the rights to use.
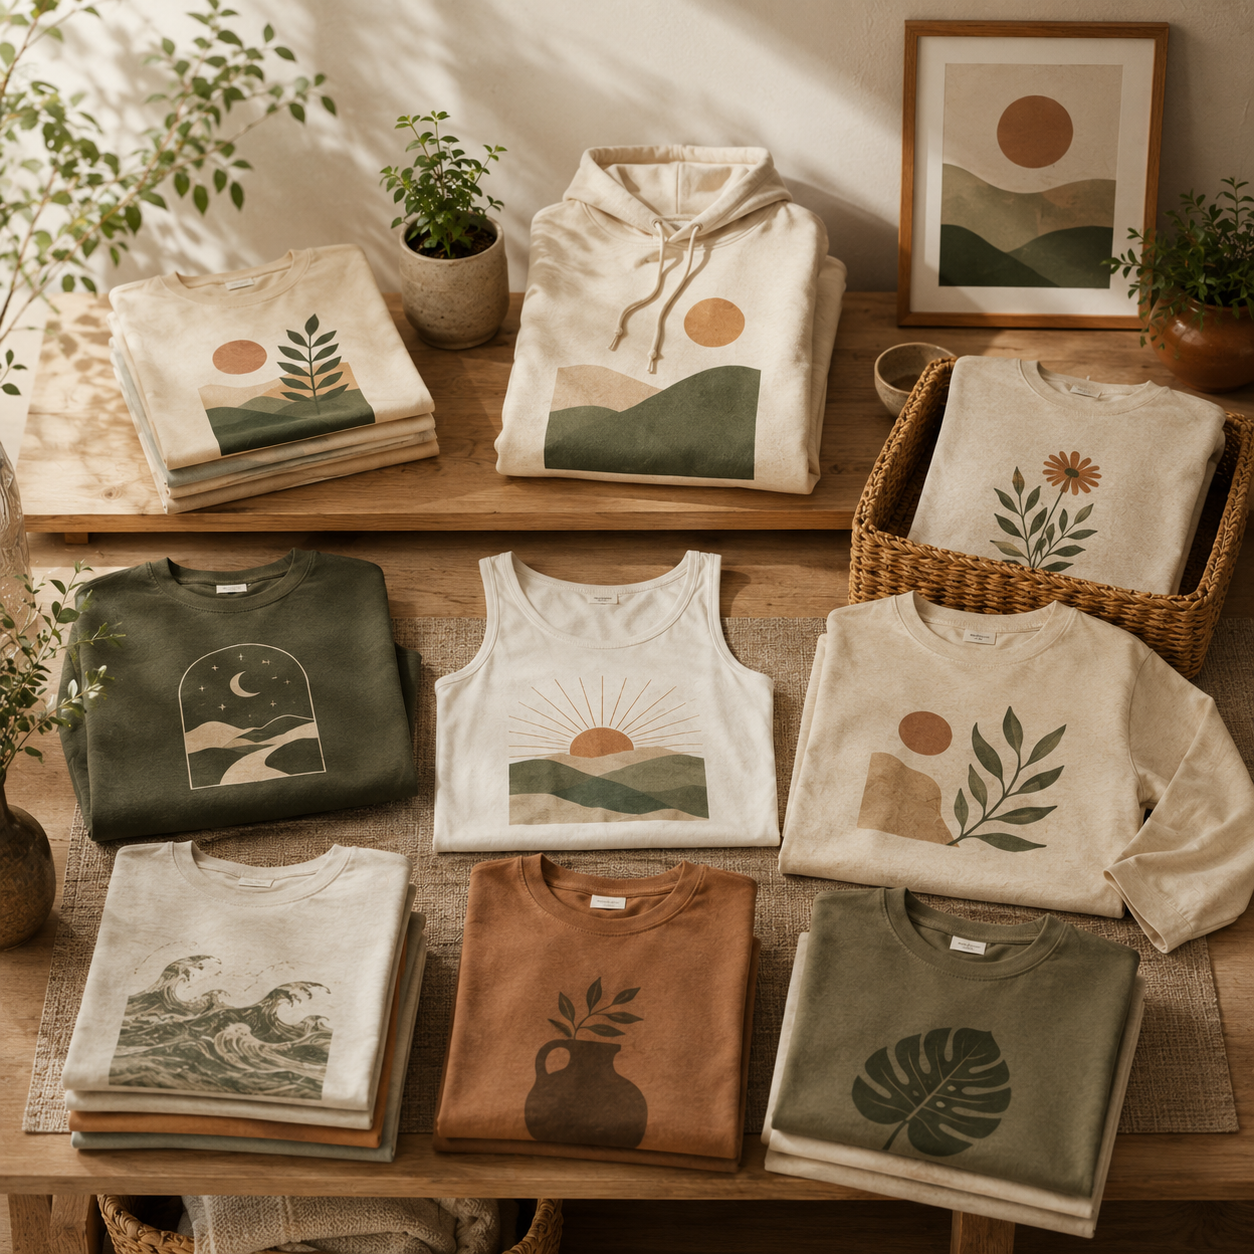
👕 Apparel Products
👕 T-Shirts & Everyday Apparel
Easy entry products with broad demand and a low barrier to testing designs.
- 📌 What you might sell: T-shirts, tank tops, and long sleeves with quote, hobby, profession, seasonal, or typography designs
- 👥 Common buyers: Hobbyists, professionals, event groups, and gift shoppers
- 💰 Illustrative retail price: Roughly $20–$35 per shirt, depending on fabric and design
- ✅ Best for: Beginners who want to find winning niches before investing in more complex products
💡 PRO TIP
Test one niche with a small set of designs before adding every size and color. Order a sample to check print quality, fit, and fabric feel.
🧥 Hoodies & Sweatshirts
Higher-ticket apparel with strong fall, winter, and gift-season demand.
- 📌 What you might sell: Cozy designs, premium typography, college-style looks, and holiday themes
- 👥 Common buyers: Seasonal shoppers, fans of a niche, and gift buyers
- 💰 Illustrative retail price: Roughly $40–$65, depending on the provider and design
- ✅ Best for: Sellers with polished designs and a clear audience
💡 PRO TIP
A higher price demands higher quality. Order a sample, plan around seasonal timing, and check production and shipping times well before peak gift season.
☕ Accessories & Everyday Goods
☕ Mugs & Tumblers
Giftable products where a specific message or name matters more than complexity.
- 📌 What you might sell: Profession sayings, pet-owner designs, names, inside jokes, and personalized messages
- 👥 Common buyers: Gift buyers, coworkers, pet owners, and hobby communities
- 💰 Illustrative retail price: Roughly $14–$25 for mugs; tumblers often cost more
- ✅ Best for: Beginners who can write short, specific, giftable messages
💡 PRO TIP
Keep text legible inside the printable area and review the provider’s care instructions before repeating any dishwasher or microwave claims.
👜 Tote Bags, Phone Cases & Stickers
Low-cost impulse products for aesthetic, bookish, student, and lifestyle niches.
- 📌 What you might sell: Artwork collections, niche slogans, sticker sets, tote designs, and device cases
- 👥 Common buyers: Students, book lovers, hobbyists, and trend-driven shoppers
- 💰 Illustrative retail price: Roughly $3–$8 for stickers, $18–$30 for totes, and $20–$35 for phone cases
- ✅ Best for: Sellers with a consistent visual style or active niche community
💡 PRO TIP
Phone cases need model-specific templates, so confirm which devices you support. Stickers work well as low-cost bundles.
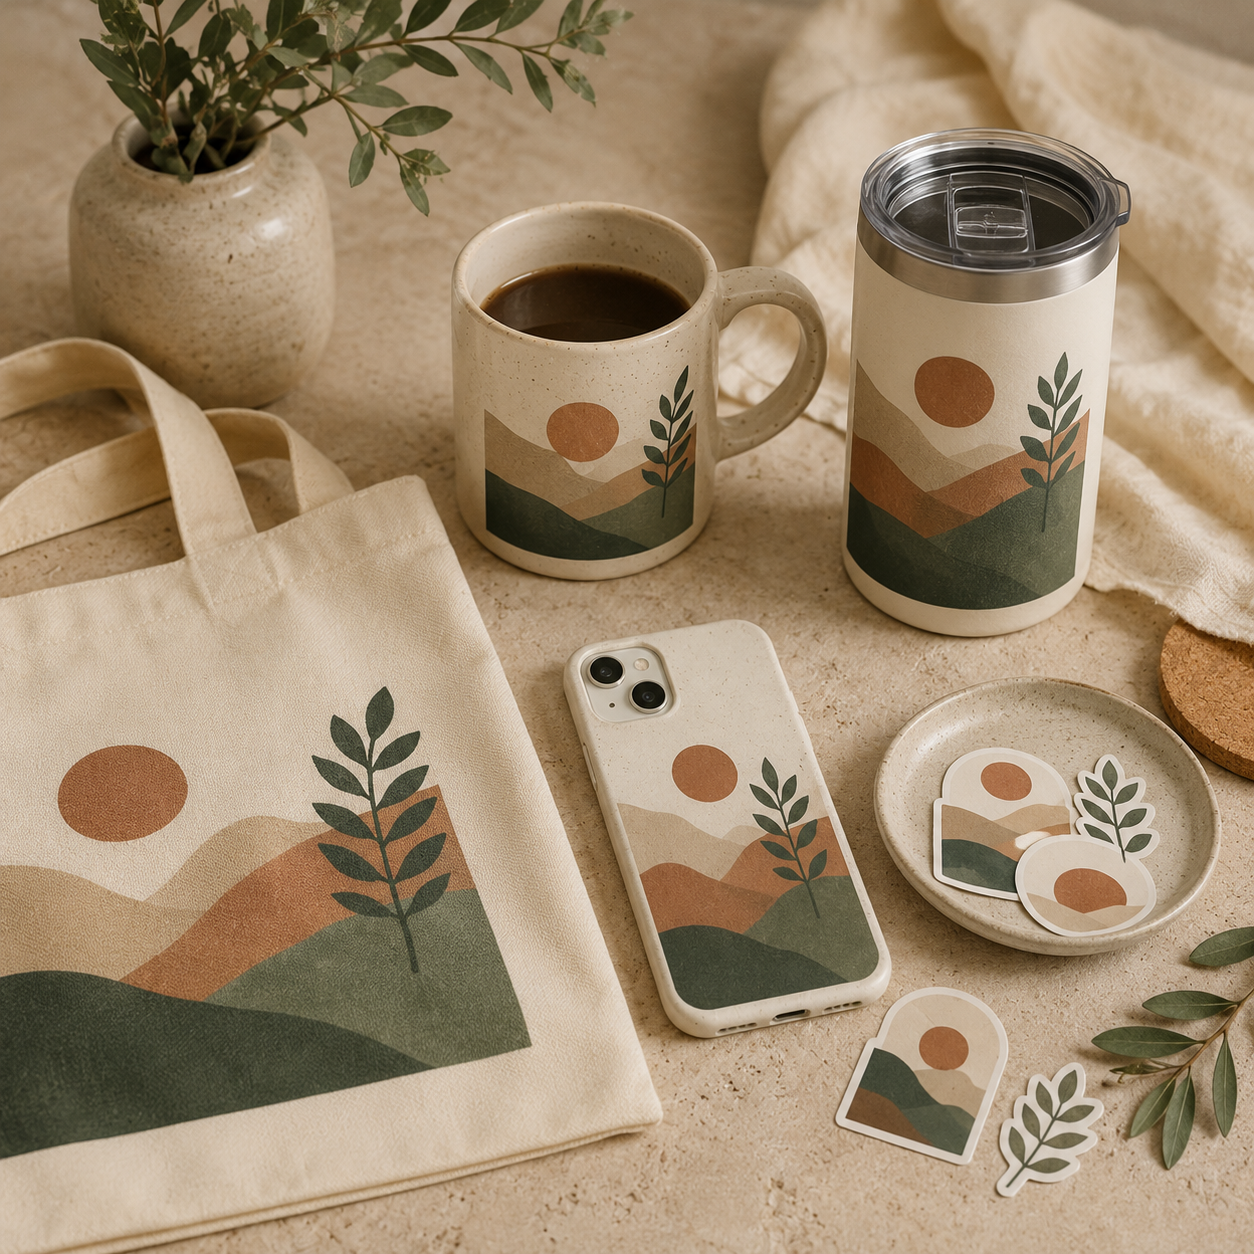
📓 Paper, Stationery & Art Products
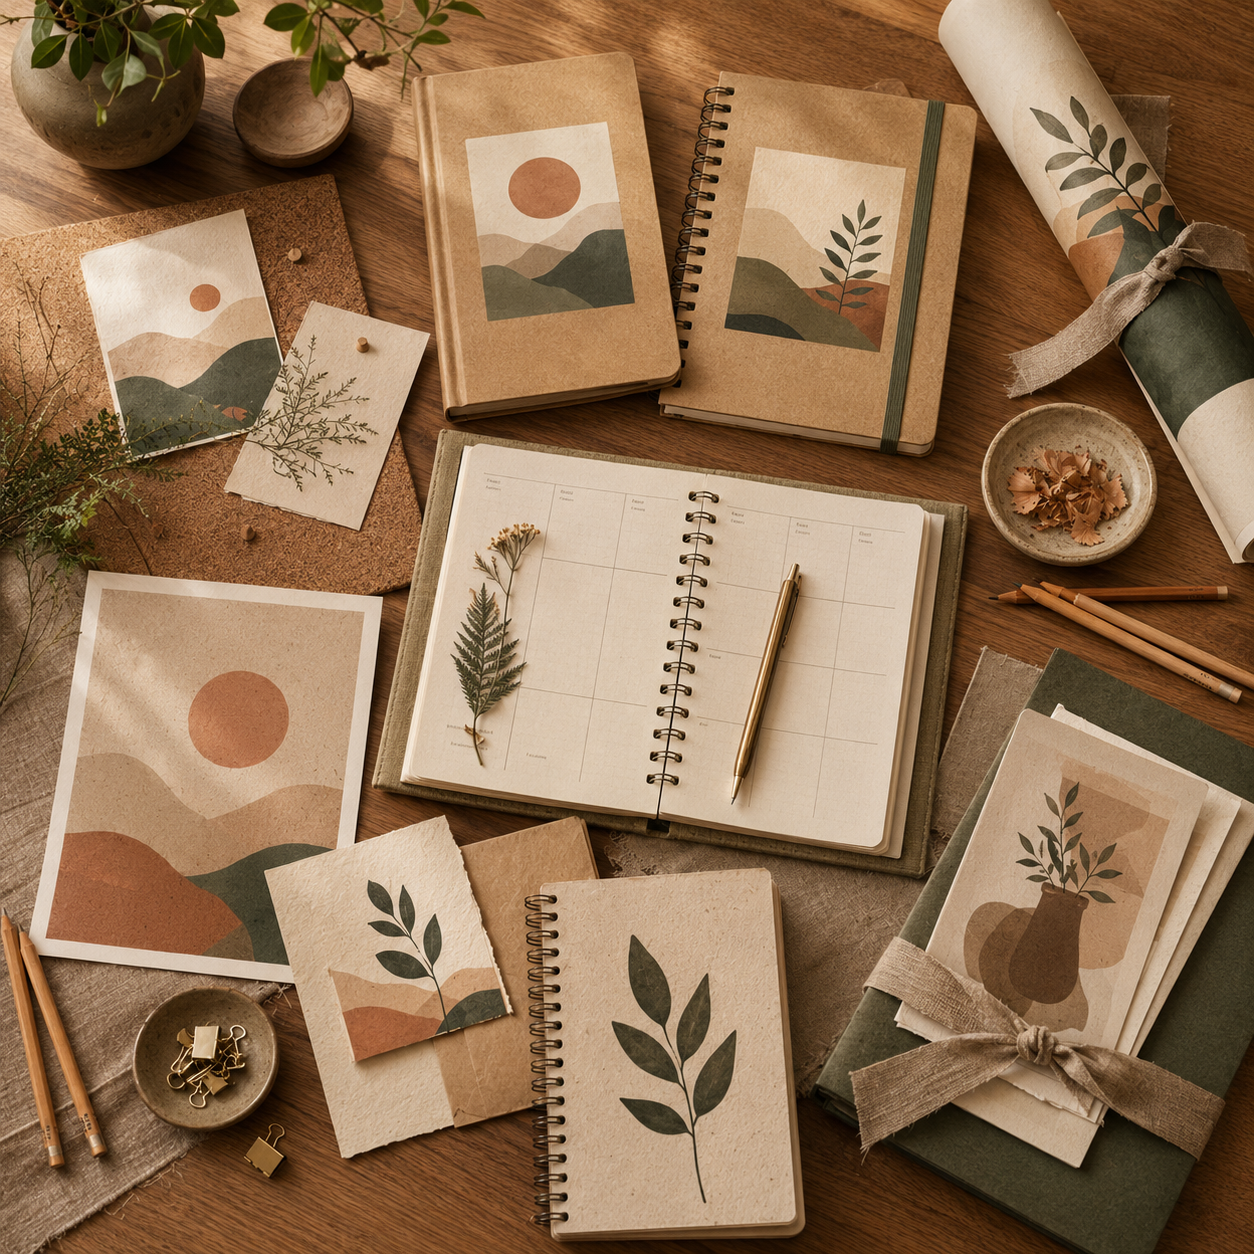
📓 Journals, Notebooks & Planners
Products that sell when the layout solves a specific problem for one type of buyer.
- 📌 What you might sell: Teacher planners, writing journals, goal trackers, faith-based notebooks, and productivity layouts
- 👥 Common buyers: Teachers, writers, students, and goal-setters
- 💰 Illustrative retail price: Roughly $15–$30, depending on page count and binding
- ✅ Best for: Designers who can tailor interior pages to one identity or use case
💡 PRO TIP
Check the provider’s page-count and file specifications before designing. A niche layout usually beats a generic cover.
🖼️ Posters, Art Prints & Cards
Decor and gift products that perform best as themed collections.
- 📌 What you might sell: Art prints, quote posters, humor cards, dorm décor, and matching collections
- 👥 Common buyers: Renters, students, gift shoppers, and style-focused buyers
- 💰 Illustrative retail price: Roughly $15–$50 for posters and prints; cards are typically lower
- ✅ Best for: Artists, illustrators, and quote-based shops with a consistent look
💡 PRO TIP
Use high-resolution files at the required print size and leave room for trimming. Only use artwork and images you have the rights to sell.
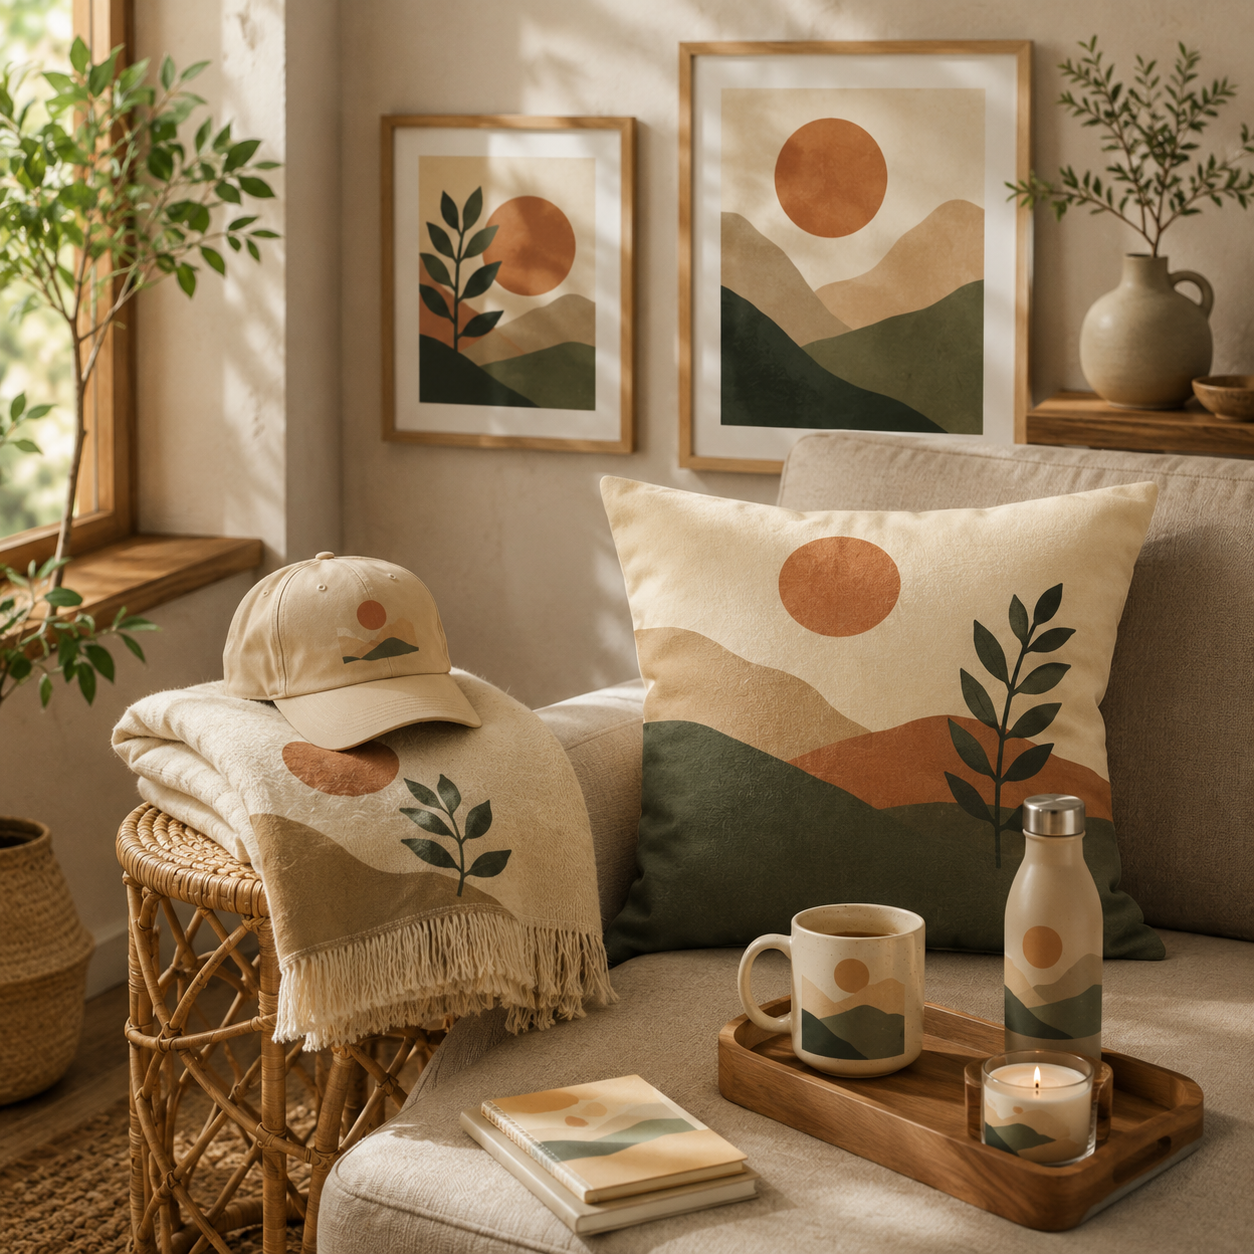
🏠 Home Decor & High-Margin Products
🏠 Wall Art & Decor
Room-based collections for buyers who care about style and atmosphere.
- 📌 What you might sell: Canvas wall art, throw pillows, nursery themes, inspirational art, and seasonal décor
- 👥 Common buyers: Homeowners, renters, new parents, and gift shoppers
- 💰 Illustrative retail price: Roughly $25–$45 for pillows and $40–$120+ for larger wall art
- ✅ Best for: Sellers with a clear visual style and stronger branding
💡 PRO TIP
Colors can print differently on canvas and fabric than on a screen. Order samples before promoting a full collection.
🎁 Blankets, Hats & Novelty Gifts
Premium or gift-focused items that often sell on emotion, personalization, or humor.
- 📌 What you might sell: Family and memorial blankets, holiday gifts, simple hat designs, and novelty items
- 👥 Common buyers: Gift buyers, families, and niche communities
- 💰 Illustrative retail price: Roughly $45–$90 for blankets and $20–$35 for hats or socks
- ✅ Best for: Sellers who can write personal, giftable concepts without trademarked content
💡 PRO TIP
Base costs and shipping can be higher, so confirm your margin before listing. Avoid trademarks, celebrity names, and copyrighted characters.
🚀 Beginner’s Best Products
🚀 Best Starter Products
A compact catalog is easier to test, price, and promote.
- T-shirts
- Mugs
- Stickers
- Tote bags
- Hoodies
✅ Begin with products you understand and can sample before scaling.
✅ Why They Work
These products are proven, simple to explain, and flexible across niches.
- They let you test demand without building a large, complicated catalog
- They make it easier to learn pricing, mockups, and product–market fit
- They give you room to expand once you know which designs resonate
✅ Start small, learn from real buyer behavior, and then expand deliberately.
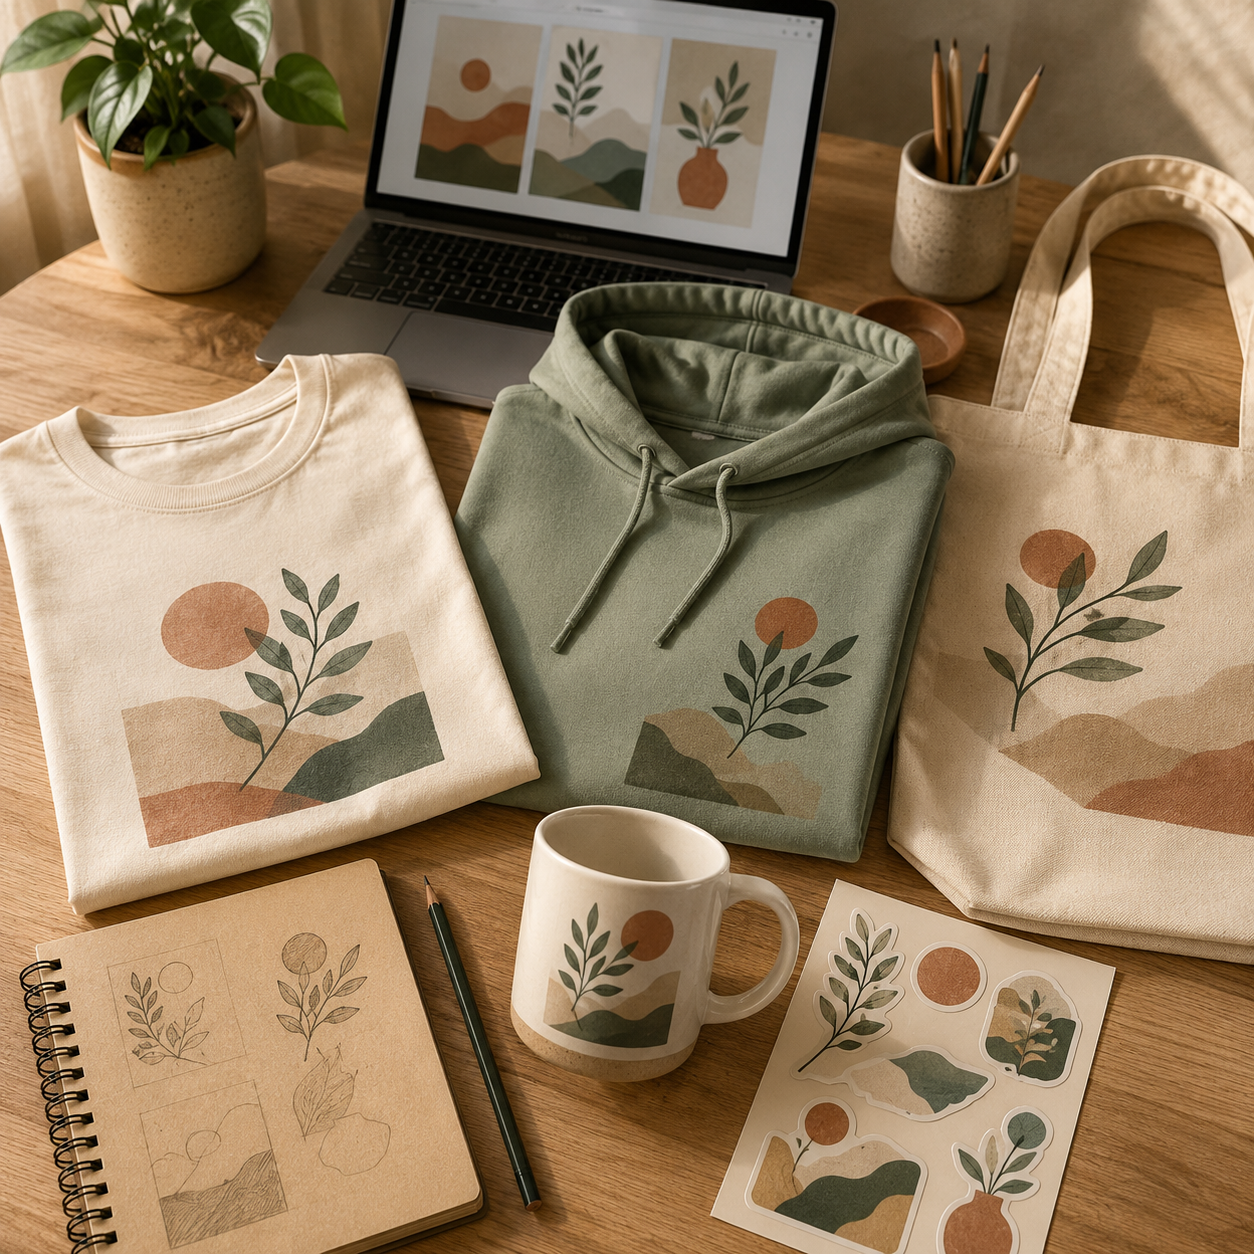
🎯 Choose Your First Print-on-Demand Collection
🎯 KEY TAKEAWAY
Start with t-shirts, mugs, stickers, tote bags, and hoodies. These products are easier to understand, easier to mock up, and flexible enough for many niches. Sales are never guaranteed, so test a small collection before expanding.
🚀 ACTION STEP
Write a focused first plan:
- Buyer & theme: Pick a specific audience and a coherent design direction.
- Products: Start with a small selection that suits your designs.
- Quality & rights: Check print specifications, order samples, and confirm design ownership before listing.
- Listing test: Calculate margins, prepare clear mockups, and test a focused collection.
4. How Much Can You Earn & Pricing Strategies
Use this chapter to connect niche demand, listing visibility, and profit per sale to your print-on-demand pricing plan.
🧠 Reality Check (What Actually Separates Earners)
- Most beginners make very little at first
- Not because print-on-demand does not work
- 👉 Many upload random designs without a niche strategy
- 👉 Or they underestimate how important keywords, trends, and product-market fit are
- The sellers who earn more typically:
- Focus on specific niches
- Create designs buyers already want
- Test multiple products and design angles
- Improve listings, mockups, and traffic sources over time
💡 PRO TIP
In POD, the design matters—but niche + demand + visibility matter just as much.
🎯 KEY TAKEAWAY
A focused collection with clear buyer fit and workable order economics is more useful than a large random catalog. Sales and profit are never guaranteed.
🔑 Smart Pricing Strategy
🧾 Pricing, Margins & Bundles
- Start with competitive pricing to get first sales
- Then optimize for:
- Better profit margins
- Bundles or multi-buy offers
- Seasonal / trend-based opportunities
🎯 Niche Fit & Mockups
- Focus on:
- Niche communities
- Problem / identity-based designs
- High-converting mockups
🎯 KEY TAKEAWAY
Price from the complete order cost, not the base product price alone. Check shipping, platform fees, discounts, refunds, and any acquisition costs before using bundles or ads.
🧪 Real Example
📋 REAL-WORLD EXAMPLE
📌 Same Number of Listings, Different Outcomes
These scenarios illustrate possible income models—not verified typical results or forecasts. Listing counts do not determine sales, and the original income labels do not define a consistent gross or net basis. Compare your own collected revenue, royalties, and full costs rather than treating these ranges as profit promises.
🌱 Scenario A: Random design shop
- 100 generic listings
- Weak keywords and no niche focus
- Income: $50–$200/month
🎯 Scenario B: Niche-focused shop
- 100 listings for a clear audience
- Better mockups and targeting
- Income: $500–$2,000/month
🚀 Scenario C: Optimized POD business
- Strong niche, multiple winning products
- Good SEO + external traffic
- Income: $3,000–$10,000+/month
💡 Same number of products. Big difference in niche, execution, and visibility.
🎯 KEY TAKEAWAY
Use these scenarios to understand the model, not to predict your own income. Compare actual results and risks with your written plan.
🎯 What Actually Drives Income
🧮 Buyer Fit × Visibility × Order Contribution = Income Potential
This is a business framework, not a mathematical earnings forecast.
📊 Key Income Drivers
- Niche selection
- Broad designs = more competition
- Niche-specific designs = better conversions
- Platform choice
- Etsy, Redbubble, Amazon Merch, and Shopify each behave differently
- Product pricing
- Too cheap cuts margin
- Too expensive can hurt conversions
- Listing quality
- Better titles, tags, and mockups improve visibility
- Traffic source
💡 PRO TIP
In POD, strong designs still need traffic and discoverability to make sales.
📈 Order Revenue & Full Costs (Pricing Reality)
📖 Read the Numbers in Context
Sale price minus base cost is not complete profit. Include shipping you absorb, platform and payment fees, discounts, ads, refunds, replacements, and applicable seller costs. Marketplace royalties and a storefront’s sales revenue are different measures. No inventory does not mean no costs or cash-flow needs.
🎯 KEY TAKEAWAY
Look beyond headline income: assess the complete economics, risks, and real cash available.
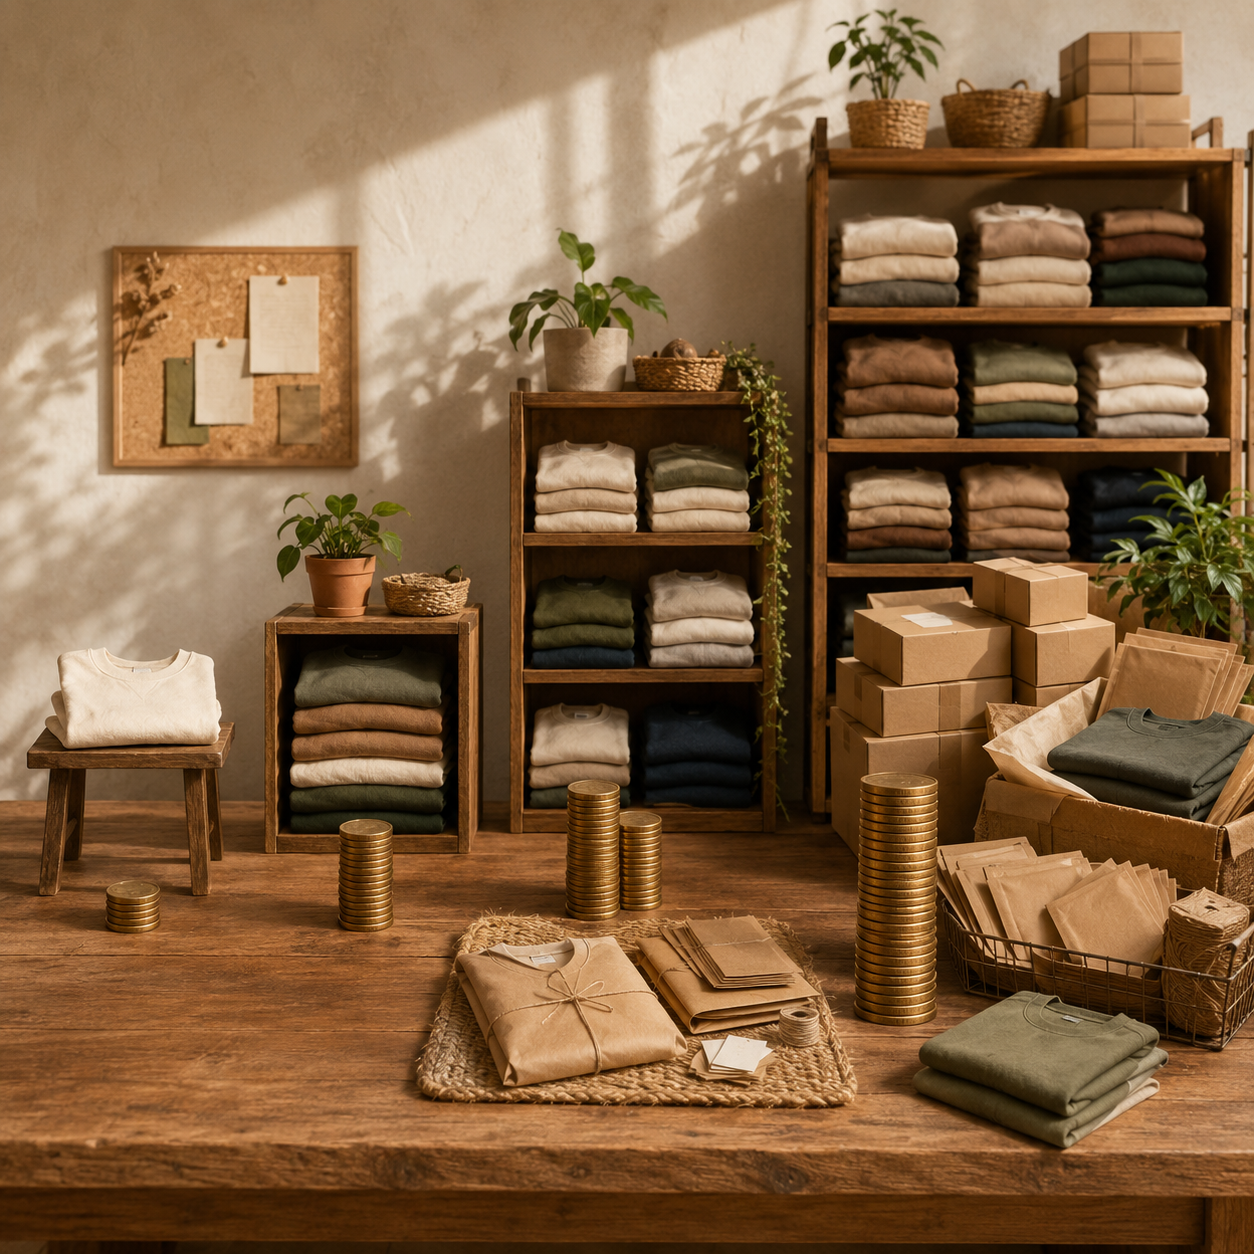
🚀 Build Your First Focused Print-on-Demand Test
Start with one buyer niche, one product type, a small original design collection, and one sales channel. Use a four-week test to learn demand, product quality, and contribution per order before expanding.
🧭 Run a Focused Product & Margin Test
- Choose one buyer and product. Pick a niche you understand and one product type that suits it. Research buyer needs without copying competing designs. Select a provider and sales channel you can manage, and review current costs, policies, payout timing, and seller responsibilities.
- Create original, rights-cleared designs. Build a small cohesive set of designs using your own work or assets licensed specifically for the intended POD use. Check restrictions on fonts, stock graphics, AI assets, phrases, and trademarks. A search is not legal clearance; avoid protected brands or characters without authorization.
- Check quality and order economics. Confirm print dimensions, resolution, placement, product variants, and provider shipping. Order a representative sample where feasible and review actual quality. Calculate costs per variant and destination, including fees and discounts. Set aside a modest test budget and a cash buffer if fulfillment is charged before payouts arrive.
- Publish a small four-week test. List a focused collection with accurate mockups, sizing, materials, production and delivery estimates, and applicable return terms. Use one main traffic channel and a manageable publishing schedule. If testing ads, set a firm spending limit and stop criteria rather than assuming sales will cover them.
- Review demand, quality, and contribution. Track visits, orders, collected sales or royalties, costs, refunds, replacements, customer questions, and working time. Treat favorites as interest, not purchases. Improve one listing or price variable at a time, and expand only where quality and contribution hold up; a small test may produce no sales.
🎯 KEY TAKEAWAY
A focused collection with clear buyer fit and workable order economics is more useful than a large random catalog. Sales and profit are never guaranteed.
💡 Example: A Four-Week Print-on-Demand Test
- Buyer: Plant enthusiasts looking for an original giftable design
- Product: One tote-bag model with three related original designs
- Quality: A representative sample and checked print files before wider promotion
- Channel: One marketplace or storefront with accurate product information
- Budget: A small capped amount for samples, listing costs, and any optional promotion
- Test: Four weeks of measured listing and traffic work
- Signals: Visits, orders, actual contribution, defects, refunds, and customer feedback
This is a product-learning test, not a promise of sales or hands-off income. Low traffic can make a four-week result inconclusive. Expand only after reviewing rights, product quality, complete costs, and buyer response.
✍️ Write Your One-Line Earnings Test Plan
Use this structure to make the plan easy to review:
“For [buyer niche], I will test [small original collection] on [product and channel] for [period], within [budget]. I will check [rights, sample quality, full costs, visits, orders, and contribution] before expanding.”
✅ Completed example
“For plant enthusiasts, I will test three original tote-bag designs on one sales channel for four weeks, within a capped sample and listing budget. I will verify rights and print quality, state accurate product details, and review visits, orders, refunds, and full order contribution before adding more products.”
🚀 ACTION STEP
Before starting:
Keep the first plan focused. Build a workable process before adding more complexity.
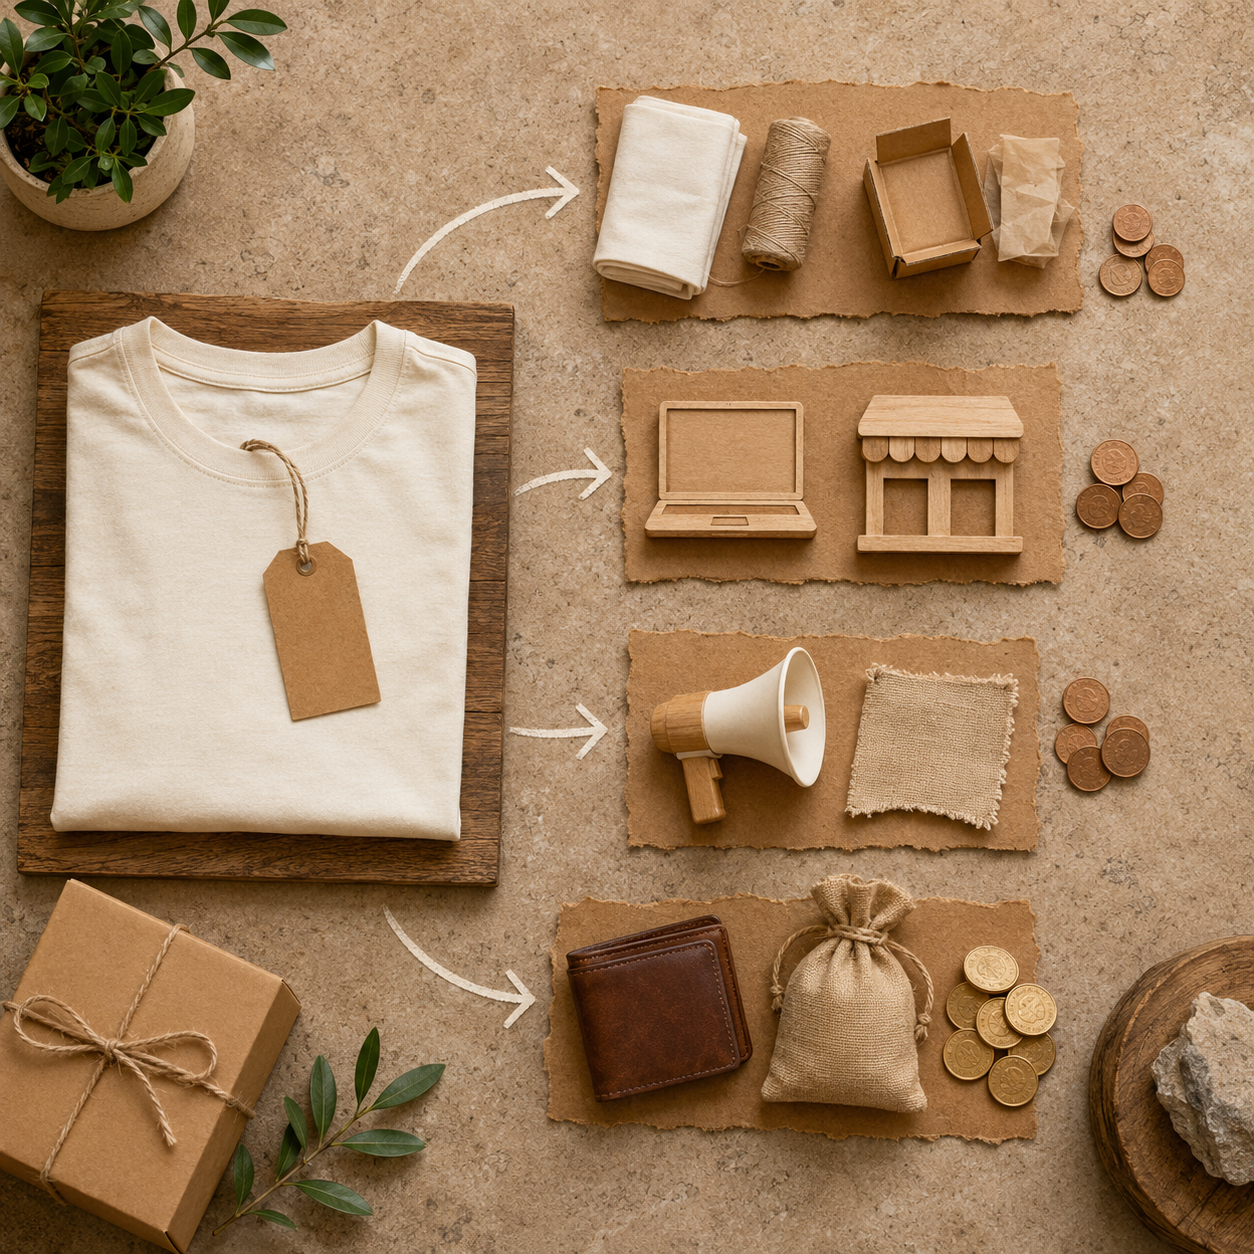
📋 Pricing & Revenue Planning Reference
Treat the existing income stages and per-sale figures as illustrative references, not verified benchmarks or guaranteed timelines. Platform, product variant, shipping destination, fees, discounts, and advertising change margins. The original scenario and stage income labels do not specify identical cost bases; do not interpret them as directly comparable net profit.
💵 What Print-on-Demand Businesses Can Earn
📊 Income Progression by Stage
🚀 Stage | 👕 Store / Listing Level | 💰 Typical Monthly Income | ⏳ Timeline | 📌 What’s Happening |
Beginner | First listings | $0–$200 | 0–3 months | Learning platforms, testing ideas |
Developing | Growing catalog | $200–$1,000 | 3–6 months | Better niches, first repeat sellers |
Established | Proven product-market fit | $1,000–$5,000 | 6–12 months | Stronger SEO, more winning designs |
Scaling | Large catalog / better traffic | $5,000–$15,000+ | 12–24 months | Multiple winners, stronger systems |
Advanced | Brand-level POD business | $15,000+/month | 2+ years | Consistent traffic + optimized offers |
🎯 KEY TAKEAWAY
The stages describe possible progression, not guaranteed income or a required timeline. Use your own capital or business records to plan realistically.
📊 Key Metrics & Margin Snapshot
📈 Order Revenue & Full Costs (Pricing Reality)
📊 What Your Orders Are Actually Worth
Metric | What to Record |
Demand signals | Track visits, orders, and conversion; separate favorites from purchases |
Collected sales or royalties | Record the business model and payout basis explicitly |
Full order costs | Include production, shipping, fees, discounts, and acquisition |
Quality and refunds | Track defects, replacements, refunds, and customer questions |
Contribution and work time | Compare order contribution alongside design, listing, and support hours |
🎯 KEY TAKEAWAY
Measure paid orders and complete economics. More listings, higher revenue, or a good-looking mockup do not prove profit.
💸 POD Profit Per Sale Reference
🧾 POD Profit Per Sale Reference
💡 Product Type | 💰 Typical Profit Per Sale | 📈 Notes |
👕 T-shirts | $5–$15 | Most common POD product |
☕ Mugs | $3–$10 | Lower profit, easier impulse buy |
📓 Journals / notebooks | $4–$12 | Good niche products |
👜 Tote bags | $5–$12 | Strong for lifestyle / niche buyers |
🖼️ Posters / wall art | $8–$25+ | Higher perceived value |
🎯 KEY TAKEAWAY
These per-sale ranges are not guaranteed margins. Confirm which costs are included and calculate your own product, variant, and destination economics.
🧮 Check Your Project & Revenue Economics
Storefront order contribution = collected order revenue − production, absorbed shipping, fees, discounts not already reflected in revenue, acquisition costs, and order-related refunds or replacements.
Avoid subtracting a discount twice if the collected revenue already reflects it. For royalty marketplaces, begin with the royalty actually payable and deduct your own relevant costs instead of subtracting manufacturing again when it is already accounted for. Contribution is not net business profit after fixed costs, samples, design subscriptions, overhead, and taxes.
🚀 ACTION STEP
🗓️ Build a Monthly Print-on-Demand Revenue Snapshot
Use actual records and a sustainable plan—not projections alone—to decide what to continue.
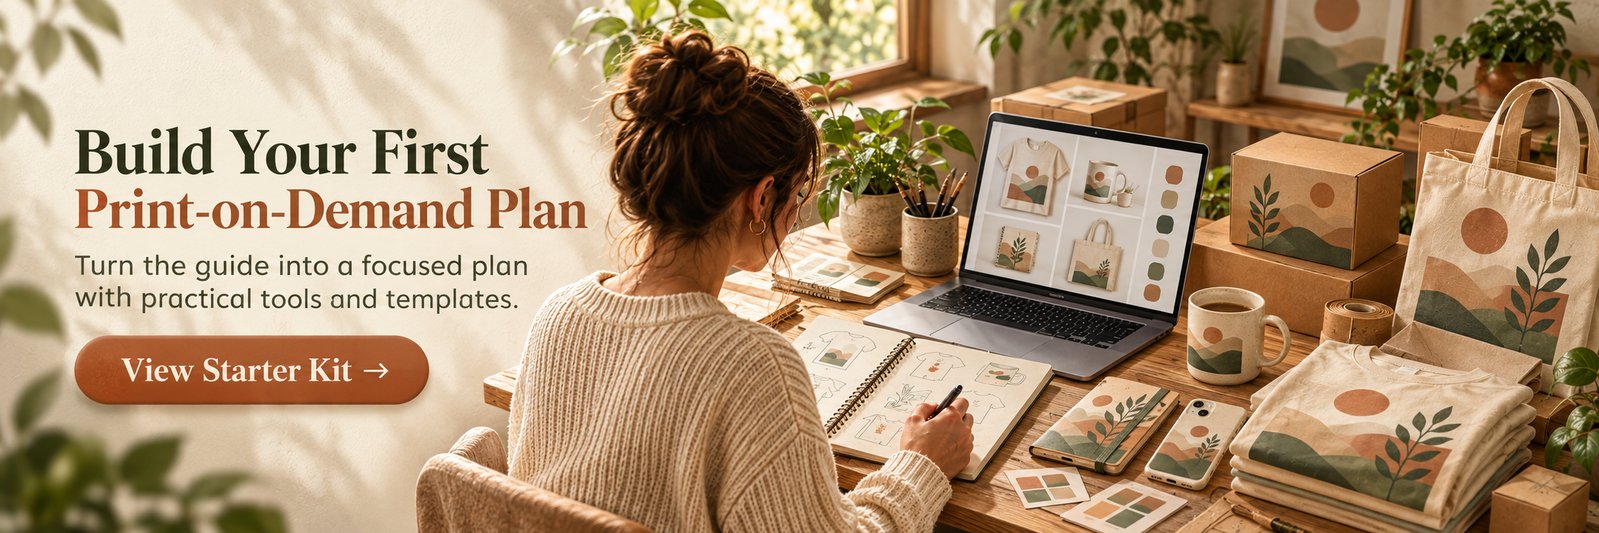
5. Essential Tools, Costs & Design Software
🛠 TOOLS & RESOURCES
You can start this business for $0, then scale as you grow.
💻 Core Setup (Beginner Friendly)
🎨 Best Design Software
🌱 Beginner (Start Here)
- (easiest)
- (free Photoshop alternative)

🌿 Intermediate
- (one-time payment)
- Procreate (iPad)

🌳 Advanced
- (professional vector design)
🧰 Must-Have Supporting Tools
🖼️ Mockups (can help listings look more professional)
- Placeit | Create Amazing Mockups, Logos, Videos & Designs
- Create stunning product mockups | Canva Mockups
- Printify: Build your eCommerce business in minutes.
🎨 Design Assets
- Creative Fabrica - Premium Crafting Fonts, Graphics & More
- Envato® | AI Tools and Unlimited Creative Assets
- Browse Fonts - Google Fonts
🔎 SEO & Research Tools
- eRank — FREE Etsy SEO, Keyword Research, Top Sellers, and Trend Tools (Etsy SEO)
- Pinterest Trends
- Trademark search - Trademark checker (USPTO)
💡 Recommended Starter Stack
- Canva: Visual Suite for Everyone
- Printify: Build your eCommerce business in minutes.
- Awesome products designed by independent artists
- Browse Fonts - Google Fonts
- Free mockups
👉 Upgrade only after you start making money.
6. Popular Print-on-Demand Platforms
Your platform determines your costs, control, traffic, margins, and customer responsibilities. Use this chapter to compare fulfillment partners, built-in marketplaces, storefronts, Amazon Merch, and a practical hybrid approach.
🏭 Full-Service POD — You Sell, They Fulfill
Full-service print-on-demand platforms handle production, printing, packing, and shipping. You connect them to a storefront like Etsy, Shopify, WooCommerce, or eBay, then they fulfill orders automatically.
Platform | Best For | Base Costs | Integrations | Pros | Cons |
Quality-focused sellers | Higher | Etsy, Shopify, WooCommerce | Premium quality, branding options, warehousing | More expensive | |
Budget-conscious sellers | Lower | Etsy, Shopify, eBay, Walmart | Many print partners, competitive pricing | Quality varies by supplier | |
Global sellers | Medium | Shopify, Etsy, WooCommerce | Global fulfillment, faster local shipping, eco-friendly angle | Fewer product options | |
Shopify users | Medium | Shopify-focused | Fast production, simple setup, good mockups | Less flexible than larger POD networks |
👍 Best For
- Sellers who want more control over pricing
- Etsy or Shopify store owners
- Brands that want higher profit margins
- Sellers who want to build a real storefront
- Anyone willing to do marketing and customer service
⭐ Best Beginner Picks
- 💸 Printify if you want lower base costs and better margins
- 🏆 Printful if you want stronger quality control and branding options
- 🌍 Gelato if you plan to sell globally
- 🛍️ SPOD if you are mainly using Shopify
💡 Best Starting Recommendation: Start with Printify for pricing flexibility or Printful if product quality and branding matter more than maximum margin.
🛍️ Built-In Marketplaces — Upload Designs & Earn Royalties
Built-in marketplaces already have shoppers. You upload designs, choose products, and the platform handles the storefront, printing, shipping, and customer service.
The tradeoff: profit per sale is usually lower, and competition is high.
Platform | Traffic | Profit/Sale | Products | Competition | Best For |
High | $2–$5 | 70+ | Very High | Artists, beginners, royalty-style marketplace sales | |
Medium | $2–$4 | 40+ | High | Text designs, quotes, pop culture-style concepts | |
Medium | Low-Medium | Home décor focused | Medium | Art prints, wall art, home goods | |
Medium | $3–$8 | 1,000+ | Medium | Invitations, stationery, gifts | |
Very High | $5–$7 | Apparel-focused | High | Volume sellers and scalable designs | |
Low-Medium | $2–$4 | Apparel | Medium | European market and apparel designs |
👍 Best For
- Beginners who do not want to manage a store
- Artists testing many designs
- People who want marketplace discovery without running a store
- Sellers who want no upfront inventory
- Creators who want to upload once and let the platform handle fulfillment
👍 Pros
- No separate website needed
- No customer service
- No fulfillment setup
- Easy to test many designs
- Built-in marketplace traffic
👎 Cons
- Lower profit per sale
- High competition
- Less brand control
- Platform rules can change
- Harder to build a direct customer list
💡 Best Starting Recommendation: Start with Redbubble because it is easy to set up, then apply for Amazon Merch on Demand if you want access to Amazon’s buyer traffic.
🛒 Etsy & Shopify — More Control and Margin Potential
If you want more control over your brand, pricing, product descriptions, SEO, and customer experience, use a storefront like Etsy or Shopify connected to a POD provider.
🛍️ Etsy
https://www.etsy.com/
Best For:
- Beginners who want buyer traffic
- Niche gifts
- Personalized products
- Shirts, mugs, planners, wall art, stickers
- Seasonal products
Pros:
- Built-in search traffic
- Easier than building a full website
- Strong gift-buying audience
- Works well with Printify and Printful
Cons:
- Listing fees and transaction fees
- High competition
- Customer service required
- SEO and photos matter a lot
🛒 Shopify
https://www.shopify.com/
Best For:
- Brand-building
- Long-term stores
- Paid ads
- Email marketing
- Influencer traffic
- Repeat customers
Pros:
- Full brand control
- Better customer ownership
- More professional storefront
- Strong app ecosystem
- Better for scaling
Cons:
- Monthly cost
- You must drive your own traffic
- More setup required
- Not ideal if you do not have a marketing plan
🧠 Simple Rule
Goal | Best Platform |
Fastest beginner start with buyer traffic | Etsy |
Long-term brand control | Shopify |
Lowest setup complexity | Built-in marketplaces |
Highest margin potential | Shopify or Etsy + Printify |
Best product quality control | Etsy or Shopify + Printful |
🧢 Amazon Merch on Demand — High Traffic, Approval Required
Amazon Merch on Demand lets you sell print-on-demand products directly through Amazon. You upload designs, choose product types, and Amazon handles printing, shipping, and customer service.
💡 Why It’s Powerful
- Access to Amazon’s huge buyer base
- No separate store needed
- Amazon handles fulfillment
- Strong trust and conversion
- Good for scalable apparel designs
⭐ Best Products
- T-shirts
- Hoodies
- Sweatshirts
- PopSockets
- Tote bags
- Phone accessories, depending on availability
💡 Best Design Types
- Text-based designs
- Funny niche sayings
- Hobby-based shirts
- Occupation-based designs
- Seasonal designs
- Sports fan-style designs, without trademark issues
- Family and holiday shirts
- Trend-inspired evergreen designs
⚠️ Important Warnings
- Must apply and be approved
- Avoid copyrighted phrases, logos, celebrities, brands, and trademarked terms
- Accounts can be rejected or terminated for policy violations
- Competition is high
- Design research matters
⚠️ Trademark Rule: Never upload designs using protected brand names, logos, celebrity names, sports teams, TV/movie references, or trademarked phrases unless you have rights.
🔁 Hybrid Strategy — Combine Reach and Control
A hybrid strategy lets you use higher-control stores like Etsy or Shopify while also uploading the same designs to royalty marketplaces.
🔄 Simple Hybrid Workflow
- Create one strong design
- Upload it to Printify or Printful
- List it on Etsy for higher-margin sales
- Upload the design to Redbubble for marketplace discovery
- Upload to TeePublic, Zazzle, or Society6 if the design fits
- Apply to Amazon Merch and upload there if approved
💡 Example
Channel | Role | Potential Profit |
Etsy + Printify | Active sales with SEO and marketing | $10–$20+/sale |
Shopify + Printful | Branded store with full control | Varies by pricing |
Redbubble | Marketplace discovery | $2–$5/sale |
Amazon Merch | High-volume apparel traffic | $5–$7/sale |
💡 Why It Works
- Same design can earn from multiple platforms
- Etsy or Shopify gives higher profit potential
- Marketplaces can add extra discovery
- You reduce reliance on one platform
- Winners can be expanded into full product collections
💡 Key Insight: A design that performs well on one platform can often be reused across several products and marketplaces. One winning idea can become a mini product line.
🧭 Platform Choice — Pick the Right Starting Model
The best platform depends on your goal, budget, design style, and how much control you want.
🎯 Best Match by Goal
Your Goal | Best Starting Platform |
Lowest effort / easiest setup | Redbubble |
Best beginner storefront | Etsy + Printify |
Best product quality | Etsy or Shopify + Printful |
Best pricing flexibility | Printify |
Best global fulfillment | Gelato |
Best long-term brand | Shopify + Printful or Printify |
Best marketplace discovery traffic | Redbubble + Amazon Merch |
Best for invitations/stationery | Zazzle |
Best for art prints/home décor | Society6 |
Best for apparel volume | Amazon Merch on Demand |
🗺️ Recommended Beginner Path
Stage | Focus | Platform Stack |
Month 1 | Learn POD basics | Redbubble + Printify |
Month 2–3 | Build higher-margin sales | Etsy + Printify |
Month 3–6 | Test more products | Etsy + Printful or Gelato |
Month 6+ | Scale what works | Shopify, Amazon Merch, multiple marketplaces |
🚫 Avoid These Beginner Mistakes
- Uploading random designs with no niche research
- Selling on too many platforms before learning one
- Ignoring product mockups
- Pricing too low and losing margin
- Copying trademarked designs
- Not checking print provider reviews
- Using low-resolution artwork
- Depending on one product type only
⚡ Golden Rule: Start with one main platform, learn what sells, then expand winning designs across more products and marketplaces.
7. From Design Idea to Live Product
Choosing a print-on-demand platform is only the setup.
The real work begins when you turn an idea into a product that is original, properly prepared, accurately represented, priced intentionally, and ready for a real customer to order.
Use this workflow:
Research → Create → Check Rights → Match Product → Prepare File → Sample → Mockup → Price → List → QA → Publish → Monitor → Improve
Your goal is not simply to upload more designs. Your goal is to build products worth keeping in your catalog.
Use the seven tabs in order for your first collection, then reopen the phase you need. Chapter 6 covers platform choice; this chapter takes one original idea from buyer research to a live, tracked listing.
🎯 PHASE 1 — Start With the Buyer and Clear Rights
📋 Steps 1–3: Name a specific buyer, research demand without copying, and confirm you have permission to use every design element.
✅ Ready to move on: You can describe one buyer, one occasion, one product, and you have checked rights on every phrase, image, font, template, and asset you plan to use.
🎯 Step 1: Start With the Buyer, Not the Blank Product
Do not begin with:
“I need another T-shirt design.”
Begin with:
“Who would want this, and why?”
Define these four things before you open a design file:
👤 Buyer — Who is the product for?
🎁 Occasion or Identity — What makes the product relevant?
🎨 Message or Style — What should the design communicate?
👕 Product Fit — What type of item makes sense for that buyer?
Specific ideas are easier to design, position, and describe.
🧪 Example: Make the Buyer Specific
📋 REAL-WORLD EXAMPLE
Instead of:
Buyer: Dog owners Product: T-shirt
Get more specific:
Buyer: New golden retriever owners Occasion: First Christmas with the dog Style: Warm, playful, giftable Product: Sweatshirt or mug
Do not try to make one product appeal to everyone. Give one type of buyer a clear reason to care.
🔎 Step 2: Research Demand Without Copying
Research is useful for understanding what buyers already respond to.
It is not permission to recreate someone else's design.
Look for patterns such as:
- 💬 Common buyer language
- 👕 Popular product types
- 🎁 Gift occasions
- 📅 Seasonal demand
- ⚠️ Repeated customer complaints
- 🎨 Common aesthetics
- 🔎 Frequently searched problems
- 🌈 Popular colors or product styles
- 🧩 Gaps in existing products
❓ Ask Better Research Questions
What does the buyer seem to want? What feels overdone? What could I approach differently? What product makes sense for this idea?
🚫 Avoid Copying What Already Exists
💡 PRO TIP
Avoid:
- 🚫 Tracing designs
- 🚫 Recreating competitor layouts
- 🚫 Copying slogans
- 🚫 Slightly changing someone else's artwork
- 🚫 Using protected characters or logos
Research demand. Do not research what to copy.
⚖️ Step 3: Check Your Rights Before You Design Around an Idea
A design can look original and still create intellectual-property problems.
Intellectual property means other people may own phrases, images, characters, names, or artwork. A license is permission to use someone else's work in a specific way.
Before investing time in a product, review anything you plan to use:
- 💬 Phrases
- 🏷️ Logos
- 🏢 Brand names
- 🎭 Character references
- 🏈 Sports teams
- 🌟 Celebrity names or likenesses
- 🎵 Song or movie references
- 🖼️ Stock graphics
- 🔤 Fonts
- 📐 Templates
- 🤖 AI-generated assets
- 🛒 Purchased design elements
❓ Ask Whether You Can Actually Use It
Did I create this?
If not:
Do I have permission or a license that allows this specific commercial print-on-demand use?
If you did not create it, you need permission that covers selling it on merchandise—not just using it for a personal project.
⚠️ Availability Is Not Permission
⚠️ QUICK NOTE
A design element being:
- 🌐 Available online
- 🧰 Included in a design tool
- 🤖 Generated by software
- 📥 Sold as a downloadable asset
- 🛍️ Visible on another marketplace
does not automatically mean you can place it on merchandise and sell it.
When rights are unclear, stop and verify before publishing.
🚀 Your First 5 Actions
🚀 ACTION STEP
Keep the first week focused on one buyer and one clean listing path—not uploading 100 random designs.
🎨 PHASE 2 — Create Designs That Fit the Product
📋 Steps 4–7: Build a small design family, match each design to the right product, and prepare a print-ready file you have actually inspected.
✅ Ready to move on: You have 3 related original designs, they fit the chosen product, the file matches current print specs, and every intended variant looks readable.
🎨 Step 4: Create a Small Design Family
Instead of creating ten unrelated products, begin with a small, coherent collection.
Theme: Gardening humor
Create:
- 🔤 Design A — Typography
- 🖌️ Design B — Illustration
- ✨ Design C — Typography + icon
Then test those designs on one or two appropriate products.
This gives you something much more useful than a random catalog.
📚 Learn From the Collection, Not Catalog Size
A collection helps you learn:
- 💬 Which message performs best
- 🎨 Which visual style works
- 👕 Which product fits the niche
- 🌈 Which colors buyers respond to
- 📈 Which idea is worth expanding
Your first goal is not catalog size. It is finding evidence that an idea deserves more products.
👕 Step 5: Match the Design to the Product
A good design can become a bad product when placed on the wrong item.
Ask:
Would someone naturally want this design on this product?
Consider:
- 📐 Print area
- 🌈 Product color
- 🧵 Material
- 🔷 Shape
- 👀 Viewing distance
- 🛍️ Intended use
- 🎁 Giftability
- 💰 Product price
- 👤 Buyer expectations
🧪 Example: Right Design, Wrong Product
📋 REAL-WORLD EXAMPLE
A detailed illustration might work beautifully as:
- 🖼️ Wall art
- 👜 Tote
- 🖼️ Poster
but become hard to read on:
- 🏷️ Small sticker
- 🧢 Hat embroidery
- 📱 Compact phone-case area
Likewise, a simple phrase may work better on apparel than as large wall décor.
Do not force every design onto every available product.
📐 Step 6: Prepare the Print File Correctly
Before uploading, check the provider's current specifications for the exact product.
Bleed is extra artwork beyond the cut edge so printing does not leave a white border. The safe print area is the inner zone where important text and details should stay.
Review:
- 📐 Required dimensions
- 🔍 Resolution
- 🗃️ File format
- 🖼️ Transparent background requirements
- 🌈 Color considerations
- 🎯 Safe print area
- ✂️ Bleed when applicable
- 💾 Maximum file size
- 🧵 Embroidery or specialty-print requirements
✅ Export a Clean Print File
Before exporting:
- 🔤 Check spelling
- 📏 Check alignment
- 🧹 Remove unintended backgrounds
- 🔎 Inspect small text
- 🎯 Make sure important elements stay inside the print area
- 👀 Review the design at actual viewing size
- 📤 Export the correct version
🗂️ Use Clear File Names
Instead of:
final2_REALFINAL.png
Use:
GoldenRetriever_FirstChristmas_Cream_v1.png
You will thank yourself later when you need the right file, colorway, or version.
🔍 Step 7: Inspect the Product Preview Carefully
Do not click through the product generator on autopilot. Check each variant.
A variant is a size, color, or style option of the same product. What looks correct on one variant may look terrible on another.
Review:
- 📍 Design position
- 📏 Design scale
- 🎯 Centering
- 🧵 Sleeve or seam placement
- ✂️ Cropping
- 🌈 Product color contrast
- 🔤 Text readability
- 📐 Print-area boundaries
- 👕 Front vs. back placement
- 🔄 Variant consistency
⚠️ Watch for Variant Problems
Watch for:
Dark design on dark garment Tiny text on a large shirt Design too close to the collar Artwork accidentally cropped Product colors that destroy contrast
Fix these before you spend time on mockups, samples, or the listing.
📦 PHASE 3 — Sample and Represent the Product Accurately
📋 Steps 8–9: Order a sample when quality is hard to judge digitally, then build mockups that help a customer understand the real product.
✅ Ready to move on: You know whether a sample is needed, any sampled product is something you would be comfortable receiving, and the images match the actual item.
📦 Step 8: Order a Sample When It Matters
Mockups cannot show everything.
A physical sample can reveal:
- 🖨️ Print quality
- 🌈 Color accuracy
- 🧵 Garment feel
- 📍 Placement
- 📏 Sizing
- 📦 Packaging
- 🏭 Production quality
- 🚚 Shipping experience
You do not necessarily need to sample every design and every variant.
🎯 Prioritize Representative Samples
Prioritize representative samples for:
- 👕 Your main product
- 🏭 New providers
- 💎 Premium products
- 🎨 Complex artwork
- 📣 Products you plan to advertise heavily
- 🔎 Products where quality is difficult to judge digitally
📦 Inspect the Sample Like a Customer
When the sample arrives, ask:
Would I be comfortable receiving this as a customer?
If the answer is no, fix the problem before sending more buyers to the listing.
📸 Step 9: Build Mockups That Help the Customer Decide
Mockups are not decoration. They are part of the product explanation.
A mockup is a photo or rendering that shows the design on the product. It is not the printed item itself.
Your images should help answer:
- 👀 What does the product look like?
- 📏 How large is the design?
- 🌈 What colors are available?
- 🛍️ What does it look like in use?
- 🔎 What details should I notice?
- 📐 What size might fit me?
- 📦 What exactly am I buying?
🖼️ Use Images That Answer Buying Questions
🖼️ 1. Primary Product Image — Clean and immediately understandable.
🌿 2. Lifestyle Image — Shows the product in context.
🔍 3. Close-Up — Shows print or design detail.
🌈 4. Variant Image — Shows colors or styles.
📏 5. Sizing / Dimensions — Especially useful for apparel and décor.
📋 6. Information Graphic — Care, materials, or other important product details.
🚫 Keep Mockups Honest
🎯 KEY TAKEAWAY
Avoid:
- 🚫 Misleading mockups
- 🚫 Impossible product colors
- 🚫 Designs shown much larger than the actual print
- 🚫 Images that imply accessories are included when they are not
The listing should make the real product easier to understand—not make the mockup look better than reality.
💰 PHASE 4 — Price From Real Costs and Write for a Human
📋 Steps 10–12: Price from full order costs, write a listing a person can understand, and add search language without stuffing.
✅ Ready to move on: You know the order contribution after fees and shipping, the listing answers what / who / why, and the title reads like a product a person would search for.
💰 Step 10: Calculate the Full Order Economics
Do not price the product from the base manufacturing cost alone.
Use the full-cost thinking from Chapter 4.
Consider:
- 👕 Product base cost
- 🖨️ Printing
- 🚚 Shipping you absorb
- 🛍️ Marketplace fees
- 💳 Payment processing
- 📝 Listing fees
- 🏷️ Discounts
- 📣 Advertising when applicable
- ↩️ Refunds
- 📦 Replacements
- 🧾 Taxes or other seller costs where applicable
🧮 Use Order Contribution, Not Base Cost
Simple planning formula:
Collected Revenue − Full Order Costs = Order Contribution
Order contribution is what remains after all direct costs of that order. That tells you much more than:
Selling Price − Base Product Cost
🔄 Check Variant and Destination Costs
💡 PRO TIP
Different:
- 📏 Sizes
- 👕 Garment types
- 🌈 Colors
- 🌍 Shipping destinations
may have different costs.
A product should still make sense after the real order costs appear.
📝 Step 11: Write the Listing for a Human First
A product description should make it easy to understand:
What is it? Who is it for? Why would they want it? What do they need to know before buying?
📝 Product Opening One or two sentences describing the item and buyer.
📋 Put the Key Details Where Buyers Can Find Them
🔎 Key Details
- 👕 Product type
- 🧵 Materials
- 📏 Fit or dimensions
- 🌈 Available variants
- 🎨 Design details
- 🏭 Production information
🎁 Best For
Explain relevant:
- 💛 Interests
- 👤 Identities
- 🎁 Gift occasions
- 🛍️ Uses
📐 Set Buying and Delivery Expectations
📐 Sizing / Product Information Give the buyer what they need to choose correctly.
🚚 Production & Shipping Set realistic expectations based on your provider and platform.
🧼 Care Instructions Include relevant care guidance.
↩️ Return / Replacement Information Clearly explain applicable policies.
🔎 Step 12: Add Search Language Naturally
If your platform uses search, describe the product using words the buyer might genuinely use.
Think about:
👤 Buyer — Who is shopping?
👕 Product — What are they buying?
🎨 Style — What aesthetic is it?
🎁 Occasion — Why are they buying?
💝 Recipient — Who is it for?
🧪 Example: Natural Title vs Keyword Stuffing
📋 REAL-WORLD EXAMPLE
Instead of stuffing:
dog shirt funny dog mom shirt dog lover gift dog t shirt dog owner
write naturally around a specific product:
Golden Retriever Mom Sweatshirt — Cozy Dog Lover Gift for Retriever Owners
Then use relevant platform fields and tags appropriately.
Search optimization should help the right buyer understand the product—not turn the listing into keyword soup.
✅ PHASE 5 — Verify Fulfillment and Launch a Small Collection
📋 Steps 13–15: Confirm routing, pricing, and policies, run a pre-publish QA, and launch a focused first collection instead of a random catalog.
✅ Ready to move on: Fulfillment settings work, the QA checklist is complete, and you are publishing one niche, one primary product, and 3–5 original designs.
🚚 Step 13: Verify Fulfillment Settings
Before publishing, make sure the operational side works.
Fulfillment is how the ordered item gets printed, packed, and shipped.
Check:
- 🏭 Correct provider
- 👕 Correct product
- 📍 Correct print location
- 🌈 Variants
- 💰 Retail price
- 🚚 Shipping profile
- ⏱️ Production times
- 📦 Delivery expectations
- 📄 Store policies
- 🔄 Order-routing settings
- ✍️ Personalization settings when applicable
🤖 Understand Automated Fulfillment
💡 PRO TIP
If using automated fulfillment, understand:
- 💳 When the provider charges you
- 💰 When the marketplace or storefront pays you
- ↩️ How cancellations work
- 📍 How address changes work
- ⚠️ What happens if production fails
- 📦 What happens if an item is out of stock
- 🔄 How replacements are handled
Print-on-demand removes inventory. It does not remove seller responsibility.
✅ Step 14: Perform a Pre-Publish QA Check
Do not publish straight from the design screen. Run a checklist.
🎨 Design
👕 Product QA
📝 Listing QA
⚙️ Operations QA
Then publish.
🚀 Step 15: Launch a Small Collection—Not 100 Random Listings
Your first collection can be modest.
For example:
One niche One primary product 3–5 original designs
That is enough to test:
- 👤 Buyer response
- 🔎 Search visibility
- 🎨 Design style
- 💰 Pricing
- 📸 Mockups
- 👕 Product quality
- 🚚 Fulfillment
Do not mistake volume for validation.
One hundred listings with no clear audience can teach you less than five focused products with good tracking.
📊 PHASE 6 — Track Results and Improve One Variable
📋 Steps 16–18: Track what customers actually do, change one variable at a time, and decide whether each product should stay, improve, grow, or leave the catalog.
✅ Ready to move on: You have a simple tracker, you can explain what each listing’s signals mean, and every live product has a keep / improve / expand / retire decision.
📊 Step 16: Track What Happens After Publishing
A listing going live is the beginning of the test.
Track signals such as:
- 👀 Views
- 🚶 Visits
- 💛 Favorites or saves
- 🛒 Add-to-cart activity when available
- 📦 Orders
- 📈 Conversion
- 💰 Collected revenue
- 🧮 Order contribution
- ↩️ Refunds
- 🔄 Replacements
- ❓ Customer questions
- ⚠️ Product issues
Favorites are not purchases. Record the figures for a consistent review period so you can compare listings fairly.
🚦 Read the Signals Correctly
👀 No impressions or views May indicate discoverability or demand problems.
🛒 Views but no purchases May point toward product fit, pricing, mockups, listing clarity, or demand.
🧮 Purchases but weak contribution May indicate poor economics.
⚠️ Sales plus complaints May indicate quality, sizing, shipping, or expectation problems.
📈 Sales plus healthy economics and good feedback May justify expansion.
🧪 Step 17: Improve One Variable at a Time
Do not completely rebuild a listing every two days.
If you change:
- 🎨 Design
- 🏷️ Title
- 💰 Price
- 📸 Mockups
- 📝 Description
- 👕 Product
- 🔎 Tags
all at once, you will not know what helped.
🧪 Run One Meaningful Test
🎯 KEY TAKEAWAY
Choose one meaningful improvement.
For example:
Test 1: Better primary mockup Test 2: Clearer title Test 3: Different product color selection Test 4: Stronger listing opening
Give each test enough information to be useful.
Optimization is learning—not random editing.
🚦 Step 18: Keep, Improve, Expand, or Retire
Every product should eventually lead to a decision.
Use the options below after you have enough information to judge the listing. A test with no sales can still teach you something—but low traffic can also make the result inconclusive.
✅ KEEP
The product has acceptable quality, fits the niche, and is worth leaving active.
🛠️ IMPROVE
There are encouraging signals, but something may be holding it back.
Improve:
- 📸 Mockups
- 📝 Listing clarity
- 🔎 Search positioning
- 💰 Pricing
- 👕 Product choice
- 🎨 Design execution
📈 EXPAND
A design or idea produces meaningful positive evidence.
Consider:
- 🌈 Additional colors
- 👕 Related products
- 🎨 Companion designs
- 🎁 Gift variations
- 📅 Seasonal versions
- 🗂️ A broader collection
Expand from evidence—not excitement.
❌ RETIRE
A product may not deserve more attention when:
- 📉 Demand remains weak
- 🧮 Economics do not work
- ⚠️ Quality is poor
- 🏭 The provider is unreliable
- ⚖️ Rights are uncertain
- 🎨 The design no longer fits the brand
You do not need every product to stay forever.
🗂️ PHASE 7 — Learn From the First Collection and Repeat What Works
📋 Steps 19–22: Use five focused listings to learn the workflow, review the collection together, and keep only products that deserve a place in the catalog.
✅ Ready to move on: You have reviewed the first collection, recorded what to keep or stop, and can repeat the same product cycle without lowering quality.
🧪 Step 19: Use Your First Five Listings to Learn the Workflow
Instead of racing toward hundreds of uploads, use your first five listings to learn the workflow. Then review all five together.
This is a learning framework, not a promise of five sales.
🗺️ Listing 1 — Learn the Process
Focus on:
- 📐 Print specifications
- 📤 Uploading
- 👕 Product setup
- 📸 Mockups
- 🚀 Publishing
📝 Listing 2 — Improve the Listing
Focus on:
- 🏷️ Stronger title
- 📸 Better images
- 📝 Clearer description
- 💬 Buyer language
👕 Listing 3 — Improve Product Fit
Ask:
- 👕 Does this design belong on this product?
- 🌈 Are the colors right?
- 🔎 Is the artwork readable?
- 🎁 Would someone actually gift or use this?
🧮 Listing 4 — Improve the Economics
Review:
- 💰 Full costs
- 🔄 Variant costs
- 🚚 Shipping
- 💳 Fees
- 🏷️ Discounts
- 🧮 Contribution
🗂️ Listing 5 — Build the System
Use:
- 🗃️ File naming
- 📝 Listing template
- ✅ QA checklist
- 🔎 Research notes
- 📊 Product tracker
Then review all five together.
📋 Step 20: Complete Your First-Collection Review
After the collection has had a reasonable opportunity to gather information, ask:
- 👀 Which design received the most attention?
- 👕 Which product looked strongest?
- 📸 Which mockup performed best?
- 🔎 Which listing attracted qualified visits?
- 🛒 Did any product sell?
- 🧮 What was the actual contribution?
- ❓ Did customers ask the same questions?
- ⚠️ Were there quality issues?
- 🚚 Did shipping expectations match reality?
- 🎨 Which design was easiest to adapt?
- 📈 Which product should I create more of?
- 🛑 Which idea should I stop pursuing?
Write the three most important findings and one next action. A test with no sales can still teach you something—but low traffic can also make the result inconclusive.
🔄 Step 21: Repeat a Clean Product Cycle
Use the same basic cycle:
Research → Create → Clear Rights → Match → Prepare → Sample → Mockup → Price → List → QA → Publish → Measure → Improve
As that system becomes repeatable, you can produce more without turning your store into a random pile of products.
Your systems should make the next product easier to launch without lowering your quality standard.
🎯 Step 22: Keep Every Product Justified
Your goal is not:
“Upload as many designs as possible.”
It is:
“Build a catalog where every product has a reason to exist.”
- Know the buyer.
- Create original work.
- Protect your rights.
- Choose the right product.
- Check the quality.
- Represent it accurately.
- Price it from real costs.
- Publish carefully.
- Track what customers actually do.
- Then expand the ideas that earn the right to grow.
Build better listings first. Build the bigger catalog second.
⭐ ADVANCED STRATEGY
As you publish more products, create reusable tools. Keep these as optional operating-system choices, not beginner prerequisites.
Your systems should make the next product easier to launch without lowering your quality standard.
🔎 Research
- 💡 Niche idea bank
- 👤 Buyer profiles
- 📅 Seasonal calendar
- 📝 Research notes
🎨 Design
- 📋 Design brief template
- 🗃️ File naming system
- ⚖️ Licensed asset records
- 🗂️ Master artwork archive
👕 Products
- 🏭 Provider comparison
- 📦 Sample log
- 📐 Product-spec sheet
- 🌈 Variant notes
📝 Listings
- 📝 Listing template
- 📸 Mockup checklist
- 🔎 Keyword notes
- 🧮 Pricing worksheet
⚙️ Operations
- 📦 Order tracker
- 💬 Customer issue log
- ↩️ Refund / replacement log
- 🏭 Provider issue log
📊 Performance
- 👀 Listing tracker
- 💰 Sales tracker
- 🧮 Contribution tracker
- 🧪 Test log
🔄 Your POD Product Workflow
Use the same cycle: Research → Create → Clear Rights → Match → Prepare → Sample → Mockup → Price → List → QA → Publish → Measure → Improve
Then use Chapter 8 to improve discovery and marketing. That separation is important: this chapter builds products worth keeping; Chapter 8 helps the right buyers find them.
🎯 The Goal
Your goal is not: “Upload as many designs as possible.” It is: “Build a catalog where every product has a reason to exist.”
Build better listings first. Build the bigger catalog second.
8. Marketing Your POD Store
Marketing a POD store works best in stages: build trust and a strong listing foundation first, add free organic traffic (Sections 4–6), then bring in paid ads once you know what sells (Section 7). Use this chapter to look credible, get found, communicate clearly, and avoid the mistakes that cost new sellers traffic, money, and energy. Chapter 7 gets your first listing live; this chapter helps shoppers find it, trust it, and buy.
⭐ ADVANCED STRATEGY
1️⃣ Build Proof Before You Promote 📁
Non-negotiable
Shoppers cannot touch your product before they buy. Before sending traffic anywhere, make sure a visitor can see what the product is, trust the store, and understand what they will receive.
🛡️ Why Proof Builds Trust
Buyers want evidence that the product is real, well made, and described honestly.
Why this matters:
- They are paying before they see the finished item
- A random, mixed catalog feels risky
- Clear photos reduce guesswork about quality and size
- Reviews and customer photos show real people were happy
- Traffic sent to a weak listing is wasted traffic
☑️ Minimum Store Checklist
- One clear niche and 2–3 product types
- 3–5 related original designs
- A representative sample checked for print quality
- Accurate mockups with white-background and lifestyle photos
- Complete title, tags, and description with materials and sizing
- Production, shipping, and return information
- A short store bio and consistent branding
- Real reviews once you have them
- Rights checked on every design element
🛡️ How to Create Proof Before Your First Sale
🏠 Option 1: Use What You Already Have
Start with the assets from your sample and design work.
What to do:
- Photograph your ordered sample in natural light
- Pick your strongest mockups for the main images
- Group listings by theme or collection
- Add captions that explain the idea behind each design
- Remove products that do not fit your niche
✏️ Option 2: Create Mockup & Lifestyle Content
Show the product in context.
What to do:
- Use free mockups from Canva or similar tools
- Make a clean white-background main image
- Add lifestyle shots that show the product in use
- Include a sizing or detail image
- Keep every image accurate to the real product
🎁 Option 3: Offer a Small Launch Perk
Use a limited perk to earn the first real orders.
What to do:
- Offer a small, clearly labeled launch discount
- Keep the same product quality and policies you will use later
- After delivery, invite buyers to leave honest feedback
- Ask permission before sharing a customer photo
- Return to standard pricing when the launch ends
💡 PRO TIP
A discount should shorten the trust gap, not set your long-term price. Never pay for or incentivize positive reviews, and follow each platform's review rules.
🤝 Option 4: Ask for Honest Feedback From Your Niche
People who already know the niche can become your first reviewers.
What to do:
- Share your designs with a small niche community or friends
- Ask what feels unclear or off
- Treat the feedback like real buyer research
- Ask whether you can show a photo or quote
- Update your listings with what you learn
Avoid:
- Posting fake or purchased reviews
- Using someone else's photos without permission
- Copying competitor listings
2️⃣ Showcase Your Store & Listings 🗂️
🖼️ What to Include in Every Listing
Listing Element | What It Shows |
White-background main photo | The product clearly, at a glance |
Lifestyle photos | How the product looks in real use |
Product preview and detail images | The real design, placement, and quality |
Long-tail keyword title | Exactly who and what the product is for |
Description with materials and sizing | What the buyer will actually receive |
Reviews and customer photos | Other buyers were happy |
Keep it tight:
- Show your best products first
- Group listings into themed collections
- Retire weak listings when stronger ones replace them
- Keep photos clear and consistent
🛡️ Where to Show Your Products
Place | Best For |
Etsy shop | Search traffic from active gift buyers |
Pinterest boards | Visual discovery and long-lived traffic |
Instagram / TikTok | Brand building and process content |
Niche blog | Long-term search traffic |
Email list | Repeat buyers and launches |
Link-in-bio page | Sending social followers to one place |
Display reviews:
- Feature strong reviews in your store announcement
- Share customer photos with permission
- Use a short line like “Fast shipping and great quality!” only if it is a real review
- Place one near your best-selling product
💡 PRO TIP
Label every product image with what it shows. A shopper should understand the product, size, and use within seconds.
3️⃣ Be Recognizable and Honest ✨
Trust is built by what shoppers can see, repeat, and verify.
🎨 Make Your Store Instantly Recognizable
- Use a consistent color palette
- Develop a signature design style
- Keep your logo, banner, and profile images aligned
- Use the same tone in titles, captions, and bios
- Group products into clear collections
Why it works:
- Shoppers recognize your products in a crowded feed
- A clear style makes pricing easier to justify
- Consistent branding builds repeat buyers
📱 Optimize for Social Media
- Use vertical formats such as 1,000 × 1,500 px pins and 9:16 video
- Choose eye-catching first frames and images
- Add overlays like “New design” or “Gift idea”
- Put the strongest product first
- Keep a clear call to action in the caption
Avoid:
- Posting low-resolution images
- Covering the product with text
- Mixing unrelated niches in the same feed
📹 Show Your Process
Process content proves the product is real and helps shoppers connect with it.
What to share:
- 🎨 Behind-the-scenes design process
- 📦 Customer unboxing videos, with permission
- Sample and quality checks
- Short notes about the idea behind each design
🤝 Be Honest About Your Work
Do:
- Use mockups that match the real product
- State sizing, materials, and delivery times accurately
- Disclose gifted or paid creator partnerships as required
- Describe results honestly
Avoid:
- Fake reviews or fake scarcity
- Promising sales or traffic results
- Using designs, fonts, or phrases you do not have rights to sell
4️⃣ Free Traffic: Etsy SEO, Pinterest & Content 🔍
Start with free organic traffic. It teaches you what shoppers respond to before you spend money.
🔍 Etsy SEO (If Selling on Etsy)
- 🔍 Research keywords with eRank or Marmalead
- 📝 Include keywords in the title (all 140 characters), tags (all 13), and description
- 🎯 Use long-tail keywords, such as “funny dog mom shirt” instead of just “dog shirt”
- 📸 Optimize photos with white backgrounds, lifestyle shots, and clear product previews
- 🔁 Renew listings strategically to refresh visibility
📈 Impact: Search can become a major Etsy traffic source, but the share varies by shop.
📌 Pinterest Marketing (Goldmine for POD)
The Best Pinterest Marketing Tool | Tailwind
- 📌 Create vertical pins at 1,000 × 1,500 px
- 🖼️ Include product plus lifestyle context
- 🔗 Link directly to the product page
- 📅 Post 5–10 pins/day or use Tailwind
- 👥 Join group boards in your niche
🏆 Best niches: Home decor, gifts, fashion, wedding, baby
📈 Impact: Can help visual products get discovered, but traffic share varies.
✍️ SEO Content Marketing
- ✍️ Create a blog around your niche
- 🎁 Write posts like “Best Gifts for Dog Moms”
- 👕 Target searches like “Funny Nurse Shirts for 2025”
- 🔗 Link to your products naturally
- 🌳 Treat SEO as a long-term traffic source
📈 Impact: Slow build, but compounds over time.
🧭 Which Free Channel to Start With
If you… | Start With |
Sell on Etsy | Etsy SEO plus Pinterest |
Sell visual or giftable products | Pinterest |
Enjoy making video | Instagram or TikTok |
Enjoy writing | Niche blog and SEO content |
🛠 TOOLS & RESOURCES
Pick one or two channels and give them a real test period. Spreading thin across everything slows learning.
5️⃣ Social, Email & Message Templates 📝
📱 Instagram & TikTok
- 📸 Post product photos and videos with a link in bio
- 🎵 Use trending audio for Reels and TikTok
- 🎨 Show the behind-the-scenes design process
- 📦 Share customer unboxing videos
- #️⃣ Research hashtags such as #etsyseller, #smallbusiness, and niche tags
📈 Impact: Useful for brand building; traffic results vary.
📧 Email Marketing: Advanced
💡 Why it matters: An email list can support repeat sales, but the share varies.
🧲 How to build your list:
- 🎁 Lead magnet: discount code, free design, printable, or style guide
- 🛒 Pop-up on your store (opt-in rates vary)
- 📦 Post-purchase email sequence
📬 Email strategy:
- 👋 Welcome series of 3–5 emails
- 🆕 Weekly or bi-weekly new product announcements
- 🎄 Holiday and seasonal promotions
- 🛒 Abandoned cart emails (Shopify feature)
🧰 Tools: MailerLite (free to 1k subscribers), Kit, Klaviyo
📝 Social Caption Template
Use this for a new product post:
[Hook: gift idea / process reveal / new design]

Meet [Design Name] — made for [specific buyer].
[One line about what makes it special]

Available on [product] in [colors/sizes].
Link in bio to shop.

#[nichetag] #[gifttag] #[smallbusiness]
Keep the first line short and the call to action clear.
📝 Welcome Email Template
Send this when someone joins your list:
Subject: Welcome to [Store Name]!

Hi [Name],

Thanks for joining! Here is your [discount / freebie]:
[code or link]

What we make: [one line about your niche].
Start here: [link to best sellers].

Questions? Just reply to this email.

[Your Name]
Add unsubscribe info and follow email rules in your location.
🤳 Creator Outreach Template
Keep your first message short and specific:
Hi [Name],

I love your [type of content] about [niche].
I run [Store Name], which makes [products] for [audience].

Would you like a free [product] to try?
There is no obligation to post; if you do share it,
please disclose that it was gifted.

I can also include a discount code for your audience.

Thank you,
[Your Name]
☑️ What Your Outreach Should Cover
- Who you are and what you sell
- Why this creator's audience fits
- What you are offering, such as a free product
- Whether any post is expected, and that gifts must be disclosed
- A discount code or unique link to track results
- How you will ship and when
- A clear, polite way to decline
💡 PRO TIP
Personalized messages beat mass copy-paste. Mention something specific you saw in their content.
6️⃣ Marketing Hook Mastery 🎣
Great products still need a reason for people to stop scrolling and buy.
🪝 Hooks That Get Attention
Hook Type | Example |
Process reveal | “Watch this design go from sketch to printed product” |
Unboxing | “A customer opens their first order” |
Gift guide | “Best gifts for dog moms” |
Seasonal offer | “Holiday collection now live” |
Behind the design | “The story behind this nurse-appreciation design” |
Limited promotion | “Weekend sale on bundles” (only with a real end date) |
🧠 Marketing Tactics That Work
📹 Share process content regularly
- Design time-lapses show skill and build trust
- Use niche hashtags where relevant
- Post works in progress too
🎁 Run honest promotions
- Use real limits and real deadlines
- Check your margin before discounting
- Promote bundles carefully
🤳 Influencer / UGC Strategy
📣 Micro-Influencer Outreach
- 🔍 Find Instagram or TikTok creators in your niche with 5K–50K followers
- 🎁 Send a free product in exchange for a post or story
- 🏷️ Include a discount code for their audience
- 🔗 Track performance with unique links
💵 Cost & Impact
- Free product: $15–$30 vs. paid post: $50–$500 per post
- A good post can help, but sales counts are not guaranteed
- Ask creators to disclose gifted or paid partnerships
📧 Build Repeat Buyers
- “Get notified when new designs drop”
- Send collection updates and seasonal promotions
- More reliable than social algorithms
🚀 ACTION STEP
Pick one hook from the table, create one post or pin this week, and include a clear link to the product page.
7️⃣ Paid Advertising & Pre-Launch Checklist ✅
Ads amplify what already works. Start them only after organic sales show what sells.
💸 Paid Advertising: Once Profitable
Platform | Best For | Min Budget | What to Expect |
🛍️ Etsy Ads | Etsy sellers | $1–$5/day | Results vary; start small and track contribution after fees |
Visual products | $10–$20/day | Can work for visual products, but return is not guaranteed | |
Targeted niches | $20–$50/day | Needs testing; many campaigns lose money at first | |
High-intent keywords | $10–$30/day | Competitive; only continue if contribution stays positive |
🚦 When to Start Ads
Once you have 20+ sales organically and know what sells.
🧪 Testing Approach
- 💵 Start with $5–$10/day
- 🎨 Test 3–5 designs
- 🛑 Kill losers, scale winners
- 🎯 Review contribution after ad spend, fees, and product costs before scaling
☑️ Pre-Launch Ad Checklist
Check | What to Verify |
Organic proof | 20+ sales and a clear idea of which designs sell |
Margin | Contribution stays positive after product cost, shipping, fees, and ad spend |
Listing quality | Photos, title, tags, and description are complete and accurate |
Budget cap | A daily limit and a clear stop rule are written down |
Tracking | Unique links or platform reporting show where sales come from |
Rights and policies | No trademarks, and ads follow each platform's rules |
⚠ COMMON MISTAKE
Treating ad revenue as profit. Sale price minus base cost is not complete profit once ads, fees, refunds, and shipping are included.
8️⃣ Niche Focus & Pricing Strategy 🎯
Shoppers usually buy from the store that feels made for them, not the store that sells everything.
🎯 Choose a Direction
Niche | Strong Free Channel | Why It Works |
🏠 Home decor | Pinterest | Visual, saveable, and giftable |
🎁 Gifts | Pinterest and Etsy search | Buyers search by occasion and recipient |
👕 Fashion | Pinterest, Instagram, TikTok | Style content travels well on visual feeds |
💍 Wedding | Pinterest | Planning boards drive discovery |
👶 Baby | Pinterest | Gift and nursery ideas get saved early |
💰 Create Clear Price & Promo Rules
Pricing menu example (adjust to your own costs):

Core product ...................... $[price]
Bundle (2–3 items) ................ $[price]
Seasonal offer .................... [%] off
 (only if margin still holds)

Rules:
Never price below full order cost.
Check shipping, fees, discounts,
refunds, and ad spend first.- Price from the complete order cost, not the base product price alone
- Use bundles and multi-buy offers to improve margins
- Test seasonal and trend-based opportunities
🧭 How to Focus Your Marketing in 5 Steps
1️⃣ Choose a Buyer Niche
Pick one audience and one occasion or identity you can design for.
2️⃣ Define Your Style
Decide your colors, tone, and design look so shoppers know what to expect.
3️⃣ Pick 1–2 Free Channels
Choose where your buyer already searches or browses, then commit.
4️⃣ Build a Simple Content Plan
Plan weekly posts, pins, and listing updates, using scheduling tools where helpful.
5️⃣ Track and Double Down
Review visits, orders, and contribution, then expand what works.
Generic Positioning | Specific Positioning |
“I sell funny shirts” | “Gardening-humor tees and totes for plant lovers” |
“Pet products” | “First-year gifts for new golden retriever owners” |
“Custom merch” | “Graduation gifts for nursing students” |
⭐ ADVANCED STRATEGY
Expand into new products or channels only when a niche is converting, your margins hold, and you have the time to manage another channel well.
9️⃣ Common Mistakes: Listings, Traffic & Positioning ⚠️
The most expensive mistakes are often the ones that feel productive.
❌ Uploading Random Designs With No Niche
The trap: “More listings means more sales.”
The reality: Random catalogs weaken keywords, branding, and buyer fit.
The fix: Focus on a specific niche and a small, related collection.
❌ Weak Listings and Photos
The trap: Publishing quickly and fixing it later.
The reality: Poor titles, tags, and images reduce visibility and conversions.
The fix: Use long-tail keywords, clear photos, and accurate descriptions before promoting.
❌ Posting Everywhere at Once
The trap: Trying every platform to see what sticks.
The reality: Effort is scattered and you cannot tell what worked.
The fix: Start with one or two free channels and give each a fair test.
❌ Expecting Fast Results
The trap: Quitting after a few weeks with little traffic.
The reality: SEO and content are slow builds that compound over time.
The fix: Track results, improve one variable at a time, and keep publishing.
⚠ COMMON MISTAKE
A scattered catalog, weak listings, and no clear buyer all make shoppers work harder to say yes.
🔟 Common Mistakes: Ads, Rights & Burnout ⚠️
Protecting your budget, your rights, and your energy is part of running a professional POD store.
❌ Starting Ads Too Early
The trap: “Ads will bring the first sales.”
The reality: Many campaigns lose money at first, and you cannot optimize without sales history.
The fix: Wait for 20+ organic sales, set a daily cap, and use a clear stop rule.
❌ Ignoring Full Order Costs
The trap: Counting revenue as profit.
The reality: Ads, fees, shipping, discounts, and refunds all reduce what you keep.
The fix: Review contribution after ad spend, fees, and product costs before scaling.
❌ Using Designs You Cannot Sell
The trap: Promoting a trending phrase, character, or brand.
The reality: Trademark and copyright problems can cost you listings, accounts, and money.
The fix: Use original designs or assets licensed for POD use, and verify before publishing.
❌ Fake Reviews or Undisclosed Partnerships
The trap: Shortcuts to social proof.
The reality: They can break platform rules and damage trust.
The fix: Earn real reviews and ask creators to disclose gifted or paid posts.
❌ Burning Out on Daily Posting
The trap: Posting constantly without a system.
The reality: Inconsistent, exhausting effort hurts quality and enjoyment.
The fix: Batch content, schedule with tools like Tailwind, and keep a sustainable pace.
❌ Not Tracking Results
The trap: Guessing what is working.
The reality: You repeat weak tactics and miss winners.
The fix: Use unique links, review visits and orders weekly, and double down on what sells.
🚀 ACTION STEP
Save your caption, welcome email, and outreach templates plus your ad checklist as reusable files this week, then use them every time you launch a product.
9. Learning, Templates & Resources
🛠 TOOLS & RESOURCES
Print-on-Demand brings together original design, print quality, product economics, and reliable listings. You do not need to master everything at once. Choose resources that help you complete the next practical step.
🎓 Learning (Free & Paid)
Start with one source that fits your current level. Practice what it teaches before collecting more courses or tools.
🎬 Print-on-Demand Tutorials & YouTube
Watch design-to-product walkthroughs to understand file preparation, mockups, and supplier workflows.
Watch Detour Shirts (YouTube Channel) for tutorials, examples, and practical ideas you can apply to print-on-demand selling.
🟢 Beginner
Watch Printify (YouTube Channel) for tutorials, examples, and practical ideas you can apply to print-on-demand selling.
🟢 Beginner
Watch Wholesale Ted (YouTube Channel) for tutorials, examples, and practical ideas you can apply to print-on-demand selling.
🟢 Beginner
Watch Ryan Hogue Passive Income (YouTube Channel) for tutorials, examples, and practical ideas you can apply to print-on-demand selling.
🟡 Intermediate

Watch Shimmy Morris (YouTube Channel) for tutorials, examples, and practical ideas you can apply to print-on-demand selling.
🟡 Intermediate
🆓 Free Print-on-Demand Learning
Learn print specifications, original design, and product costs before launching a large catalog.
Use Etsy Seller Handbook to learn beginner concepts, examples, and workflows before starting print-on-demand selling.
🟢 Beginner
Use Creative Fabrica Blog to learn beginner concepts, examples, and workflows before starting print-on-demand selling.
🟢 Beginner
Use Printful Blog to learn beginner concepts, examples, and workflows before starting print-on-demand selling.
🟢 Beginner
Use Printify Blog to learn beginner concepts, examples, and workflows before starting print-on-demand selling.
🟢 Beginner
Use Shopify POD Guide to learn beginner concepts, examples, and workflows before starting print-on-demand selling.
🟢 Beginner
💬 Print-on-Demand Communities & Forums
Compare supplier experiences and listing problems, then confirm current terms and quality through direct checks.
Use Printful Community to ask questions, study real examples, and network with people doing print-on-demand selling.
🟢 Beginner
Use r/EtsySellers to ask questions, study real examples, and network with people doing print-on-demand selling.
🟢 Beginner
Use r/printondemand to ask questions, study real examples, and network with people doing print-on-demand selling.
🟢 Beginner
Use r/shopify to ask questions, study real examples, and network with people doing print-on-demand selling.
🟡 Intermediate
Use Ecom Crew to learn ecommerce best practices and get operator-level feedback you can apply to improve your 👕 Print-on-Demand store’s traffic, conversion, and margins.
🔴 Advanced
Use EcommerceFuel to ask questions, study real examples, and network with people doing print-on-demand selling.
🔴 Advanced
💰 Paid Print-on-Demand Courses
Look for specific design or product-production instruction rather than promises of automatic sales from trending niches.

Use Skillshare — Print-on-Demand Classes for structured training, courses, or credentials that build confidence in print-on-demand selling.
🟢 Beginner
Use Udemy — Print-on-Demand Courses for structured training, courses, or credentials that build confidence in print-on-demand selling.
🟢 Beginner

Use Coursera — Ecommerce Courses for structured training, courses, or credentials that build confidence in print-on-demand selling.
🟡 Intermediate

Use LinkedIn Learning — Ecommerce for structured training, courses, or credentials that build confidence in print-on-demand selling.
🟡 Intermediate
📝 QUICK NOTE
Use communities for ideas and troubleshooting, but verify legal, tax, licensing, and platform information through authoritative sources. Check current terms and costs before relying on a tool or course.
📝 What Should You Learn First?
Follow this order:
1️⃣ Buyer & product
Choose a specific audience and one product type to test.
2️⃣ Design rights
Create original artwork and verify any fonts, graphics, and trademarks before listing.
3️⃣ Print specifications
Learn canvas sizing, resolution, bleed, placement, and supplier requirements.
4️⃣ Samples & costs
Order a sample where feasible and account for production, shipping, fees, and returns.
5️⃣ Listing & fulfillment
Use accurate mockups, descriptions, delivery expectations, and customer policies.
6️⃣ Measured tests
Review actual sales, quality issues, and margins before expanding the range.
🎯 KEY TAKEAWAY
Learn through a small, realistic practice task. Build confidence in the core workflow before adding more tools, paid courses, or commitments.
📄 Four Practical Starting Templates
Create these in a document, spreadsheet, or Notion page. They are working outlines—not ready-made legal agreements or professional advice. Use fictional data for practice and keep real records secure.
Product Idea Brief
Record: Audience | Occasion/use | Design concept | Evidence | Rights checks
Evaluate an idea before creating many variations.
Design & Print QA
Record: File | Dimensions | Resolution | Placement | Color check | Sample result
Use before publishing a product.
Product Cost Sheet
Record: Price | Production | Shipping | Fees | Refunds | Marketing cost
Estimate and revisit contribution margin.
Listing & Order Review
Record: SKU | Listing status | Supplier | Issue | Customer update | Next change
Connect listing changes to fulfillment feedback.
🚀 ACTION STEP
Choose one learning resource and draft your Product Idea Brief. Use a small practice example to identify the next skill you need before taking on live work or spending more money.
🧰 Resources
Use these resources to put your print-on-demand learning into practice. Start with a small, dependable setup and add a tool only when its purpose, cost, and limitations are clear.
🧢 POD Fulfillment Platforms
Compare production partners, product quality, shipping, and returns. Review a sample before setting expectations for buyers.
Use Printful to create, mock up, fulfill, or sell products for print-on-demand or art-based offers.
🟢 Beginner
Use Printify to create, mock up, fulfill, or sell products for print-on-demand or art-based offers.
🟢 Beginner
Use Gelato to create, mock up, fulfill, or sell products for print-on-demand or art-based offers.
🟡 Intermediate
Use Gooten to create, mock up, fulfill, or sell products for print-on-demand or art-based offers.
🟡 Intermediate
Use Merchize to create, mock up, fulfill, or sell products for print-on-demand or art-based offers.
🟡 Intermediate
🛒 Marketplaces & Storefronts
Choose where buyers will find and purchase your products. Compare fees, listing rules, and fulfillment compatibility.
Use Etsy to build a storefront or website that presents and sells your print-on-demand selling offer.
🟢 Beginner
Use Redbubble to build a storefront or website that presents and sells your print-on-demand selling offer.
🟢 Beginner
Use TeePublic to build a storefront or website that presents and sells your print-on-demand selling offer.
🟢 Beginner
Use Shopify to build a storefront or website that presents and sells your print-on-demand selling offer.
🟡 Intermediate
Use Amazon Merch on Demand to build a storefront or website that presents and sells your print-on-demand selling offer.
🔴 Advanced
🎨 Design & Creative Tools
Create original, print-ready artwork. Verify commercial rights for fonts and supporting assets before listing.
Use Photopea to create visuals, templates, mockups, portfolios, or branded assets for print-on-demand selling.
🟢 Beginner
Use Canva / Canva Mockups to create visuals, templates, mockups, portfolios, or branded assets for print-on-demand selling.
🟢 Beginner

Use Kittl to create visuals, templates, mockups, portfolios, or branded assets for print-on-demand selling.
🟢 Beginner
Use Adobe Illustrator to create visuals, templates, mockups, portfolios, or branded assets for print-on-demand selling.
🔴 Advanced
Use Adobe Photoshop to create visuals, templates, mockups, portfolios, or branded assets for print-on-demand selling.
🔴 Advanced
🖼️ Mockups & Product Visuals
Show products clearly and accurately. Check mockups against the actual print placement and available variants.
Use Printful Mockup Generator to create visuals, templates, mockups, portfolios, or branded assets for print-on-demand selling.
🟢 Beginner
Use Printify Mockup Generator to create visuals, templates, mockups, portfolios, or branded assets for print-on-demand selling.
🟢 Beginner
Use Smartmockups to create visuals, templates, mockups, portfolios, or branded assets for print-on-demand selling.
🟢 Beginner
Use Placeit to create visuals, templates, mockups, portfolios, or branded assets for print-on-demand selling.
🟢 Beginner
Use Creative Market to create visuals, templates, mockups, portfolios, or branded assets for print-on-demand selling.
🟡 Intermediate
🔍 Product Research & SEO
Research buyer language and competing products. Use findings to test focused concepts without copying protected designs.
Use Etsy Search / Etsy to research keywords, niches, competitors, or content ideas that support print-on-demand selling.
🟢 Beginner

Use Google Trends to research keywords, niches, competitors, or content ideas that support print-on-demand selling.
🟢 Beginner
Use Pinterest Trends to research keywords, niches, competitors, or content ideas that support print-on-demand selling.
🟢 Beginner
Use eRank to research keywords, niches, competitors, or content ideas that support print-on-demand selling.
🟡 Intermediate
Use EverBee to research keywords, niches, competitors, or content ideas that support print-on-demand selling.
🟡 Intermediate
📣 Marketing & Social Platforms
Bring suitable buyers to a small product range. Start with one channel and evaluate costs as well as clicks.
Use Instagram to promote your offer, capture leads, and build an audience around print-on-demand selling.
🟢 Beginner
Use Pinterest to promote your offer, capture leads, and build an audience around print-on-demand selling.
🟢 Beginner
Use TikTok to promote your offer, capture leads, and build an audience around print-on-demand selling.
🟢 Beginner
Use Google Ads to promote your offer, capture leads, and build an audience around print-on-demand selling.
🟡 Intermediate
Use Meta Ads Manager to promote your offer, capture leads, and build an audience around print-on-demand selling.
🟡 Intermediate
📋 Business & Workflow Tools
Track designs, listings, suppliers, and updates. Use clear file names and SKU records to prevent fulfillment mistakes.
Use Google Sheets to compare, buy, or organize the tools and supplies needed for print-on-demand selling.
🟢 Beginner
Use Notion to compare, buy, or organize the tools and supplies needed for print-on-demand selling.
🟢 Beginner
Use Trello to compare, buy, or organize the tools and supplies needed for print-on-demand selling.
🟢 Beginner
Use Airtable to compare, buy, or organize the tools and supplies needed for print-on-demand selling.
🟡 Intermediate
💳 Payments & Finance
Record payouts, fees, refunds, and production costs. Review margin after the full cost of each sale.
Use PayPal Business to handle payments, invoices, income tracking, or taxes for your print-on-demand selling work.
🟢 Beginner
Use Wave to handle payments, invoices, income tracking, or taxes for your print-on-demand selling work.
🟢 Beginner
Use Stripe to handle payments, invoices, income tracking, or taxes for your print-on-demand selling work.
🟡 Intermediate

Use Quickbooks to handle payments, invoices, income tracking, or taxes for your print-on-demand selling work.
🟡 Intermediate
Use TurboTax Self-Employed to handle payments, invoices, income tracking, or taxes for your print-on-demand selling work.
🟡 Intermediate
10. Your First 6 Months Print-on-Demand Plan
Your first 6 months in print-on-demand should be focused on building design research skills, product testing habits, niche selection, and a repeatable upload system.
The goal is to move from:
Niche → Design Ideas → Product Mockups → Store Listings → Traffic → Sales Data → Improvement
By the end of 6 months, you should know what niches show demand, what designs people respond to, which products are worth listing, and how to improve your store based on views, clicks, favorites, and sales.
🎯 6-Month Goal
By the end of your first 6 months, aim to have:
✅ One clear niche or audience
✅ 50–150 design ideas researched
✅ 30–100 products listed
✅ A simple print-on-demand store created
✅ Strong mockups and product descriptions
✅ Basic SEO and keyword research started
✅ A repeatable design and upload workflow
✅ Sales, views, favorites, and conversion data tracked
✅ A plan to double down on winning designs or niches
🎯 KEY TAKEAWAY
Print-on-demand is not just making designs. It is testing what specific audiences want to wear, gift, display, or buy.
📅 Month 1: Choose Your Niche & Research Design Ideas
🎯 Main Goal
Pick a niche and research what people are already buying before creating random designs.
✅ What to Do
- Choose 1–3 niche ideas to test
- Study successful print-on-demand shops
- Research trending designs, quotes, styles, and product types
- Create a list of 50–150 design ideas
- Check for trademark issues before using phrases
- Decide what products you want to start with
- Choose your print-on-demand platform
- Create a simple design folder system
🏁 Month 1 Success Looks Like
- You picked a niche direction
- You researched buyer demand
- You created a large idea list
- You know what phrases or designs to avoid
- You are ready to start creating your first designs
⚠️ Beginner Mistake: Creating designs without research. A design can look good and still fail if no specific buyer wants it.
🧭 Print-on-Demand Niches to Consider
Niche | Why It Works |
Pets | Strong emotional buying and gift potential |
Hobbies | Passionate buyers and repeat ideas |
Fitness | Motivational designs and lifestyle products |
Professions | Nurses, teachers, truckers, military families, trades |
Holidays | Seasonal buying demand |
Family roles | Moms, dads, grandparents, siblings |
Sports fans | Team-style energy without using protected logos |
Motivation | Simple quotes and broad appeal |
Funny sayings | Giftable and shareable designs |

📅 Month 2: Create Your First Designs & Product Listings
🎯 Main Goal
Create your first batch of designs and publish them on products with clean mockups and descriptions.
✅ What to Do
- Create 10–25 simple designs
- Test different design styles
- Add designs to shirts, mugs, stickers, totes, or posters
- Create strong product mockups
- Write clear titles and descriptions
- Add relevant keywords and tags
- Organize listings by niche or collection
- Publish your first products
🏁 Month 2 Success Looks Like
- Your store is live
- Your first products are published
- Your mockups look clean
- Your titles and tags are organized
- You understand the upload process better
🎯 KEY TAKEAWAY
Simple designs can sell if they match a clear buyer. Do not assume complicated designs are automatically better.
💡 Beginner Product Types
Product Type | Why It Works |
T-shirts | Most common POD product |
Hoodies | Higher price point |
Mugs | Gift-friendly and easy to design |
Stickers | Low-cost impulse purchase |
Tote bags | Useful and simple |
Posters | Good for quotes and art |
Phone cases | Niche and style-driven |
Sweatshirts | Strong seasonal demand |
🔒 What to Lock In Early
- Readable design style
- Clean mockups
- Strong titles
- Relevant tags
- Product grouping by niche
- Simple upload process
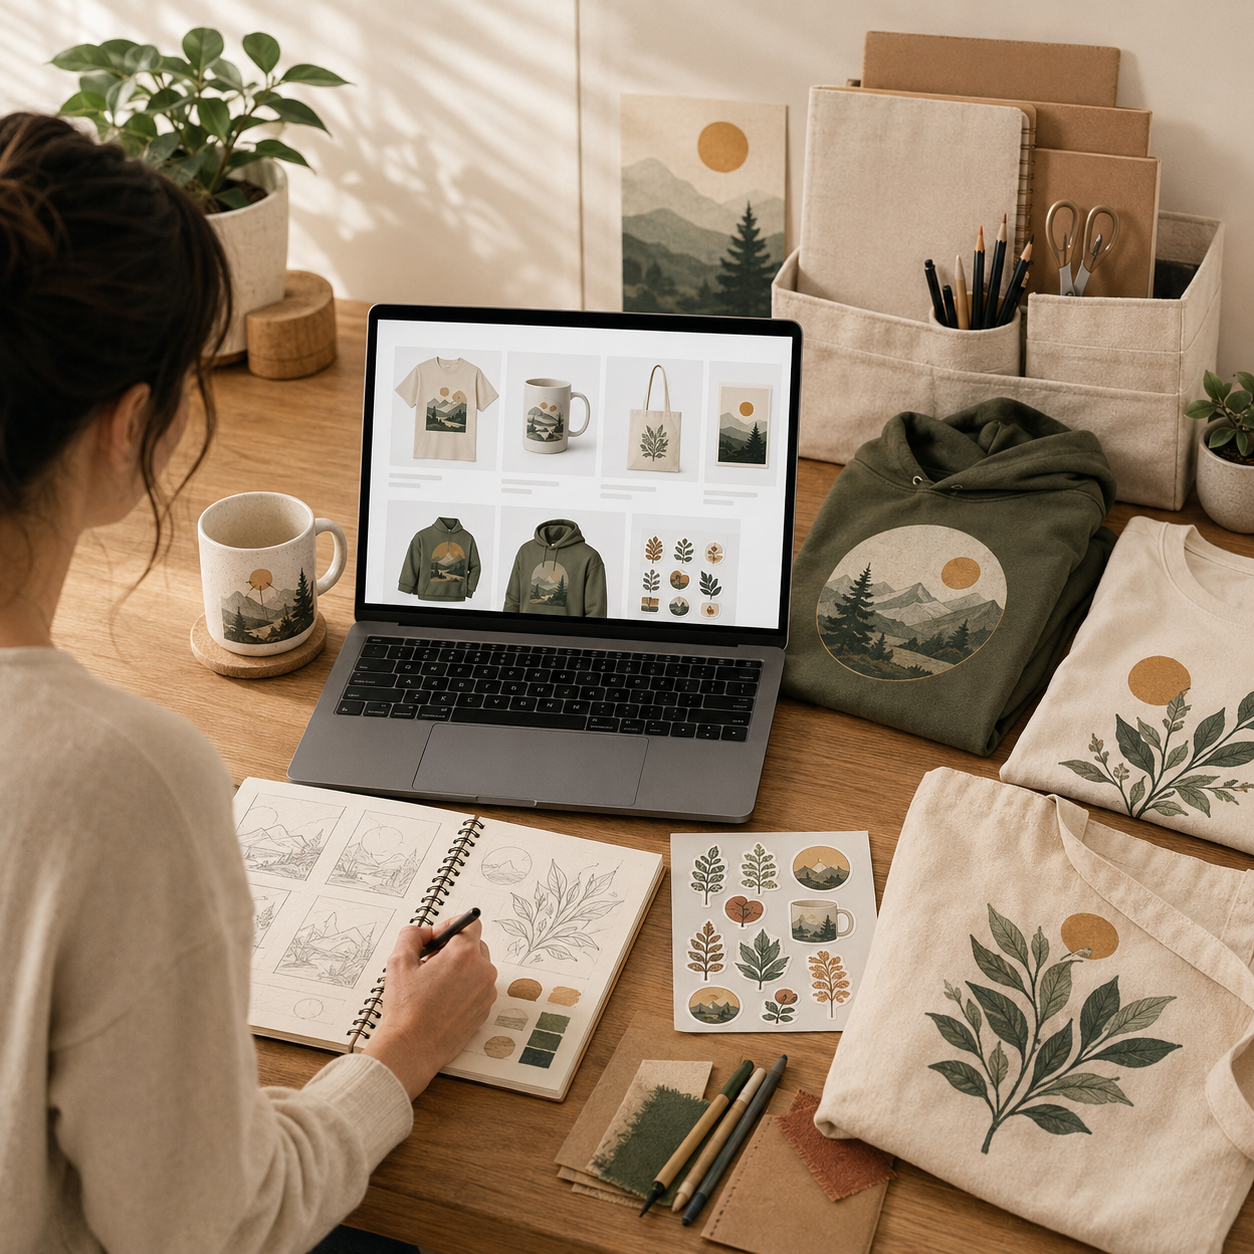
📅 Month 3: Improve SEO, Mockups & Store Presentation
🎯 Main Goal
Make your listings easier to find, understand, and trust.
✅ What to Do
- Review your product titles
- Improve tags and keywords
- Upgrade weak mockups
- Create collections by niche or product type
- Add clearer product descriptions
- Improve your store banner and profile
- Track views, favorites, clicks, and sales
- Create more designs around your strongest ideas
🏁 Month 3 Success Looks Like
- Your listings look more professional
- Your keywords are more specific
- Your store is easier to browse
- You know which designs get early interest
- You have 20–50 products listed
🎯 KEY TAKEAWAY
If a design gets favorites but no sales, test it on different products, improve the mockup, or adjust the price.
📈 Listing Metrics to Watch
Metric | What It Tells You |
Views | Whether people are finding the listing |
Favorites | Whether shoppers like the design |
Clicks | Whether the title, image, or mockup attracts interest |
Sales | Whether the offer converts |
Conversion rate | Whether views are turning into buyers |
Search terms | What shoppers are looking for |
Product type performance | Which products fit your niche best |
🛠️ What to Improve First
- Weak product photos
- Titles with no clear keywords
- Tags that are too broad
- Descriptions with missing details
- Designs that do not target a specific buyer
- Products with poor mockups
- Listings with views but no sales
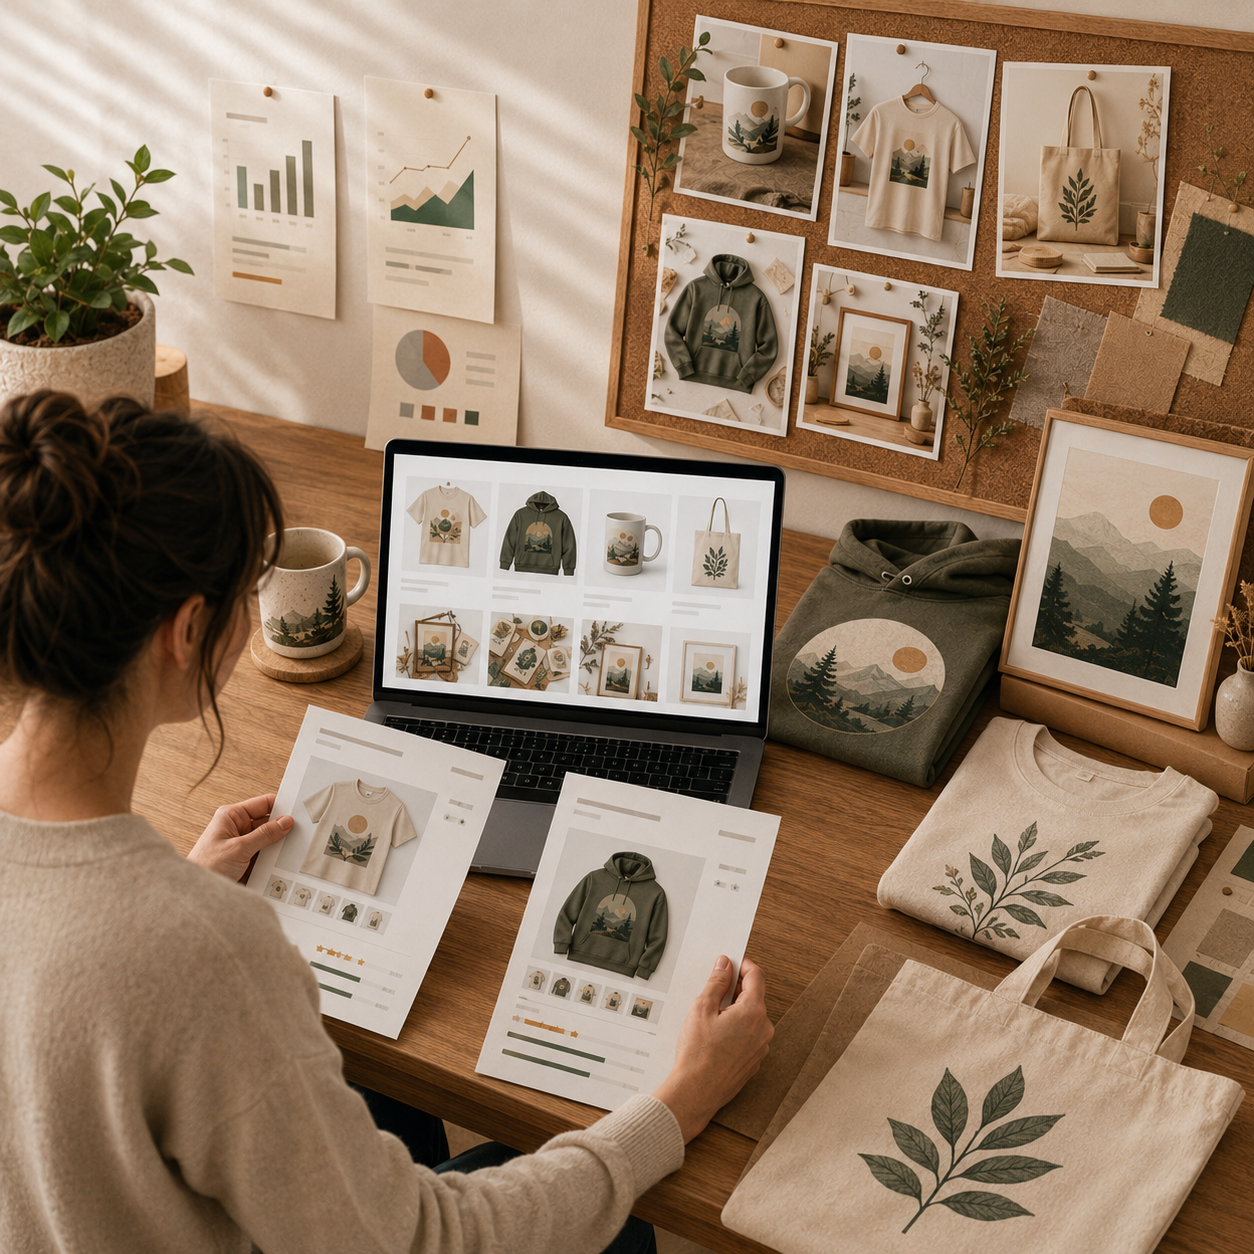
📅 Month 4: Build a Repeatable Design & Upload System
🎯 Main Goal
Create a system for researching, designing, uploading, and improving products consistently.
✅ What to Do
- Batch design ideas by niche
- Create design templates
- Create mockup templates
- Upload products on a weekly schedule
- Track each design in a spreadsheet or Notion
- Create seasonal design batches
- Remove or improve weak listings
- Repurpose winning designs across product types
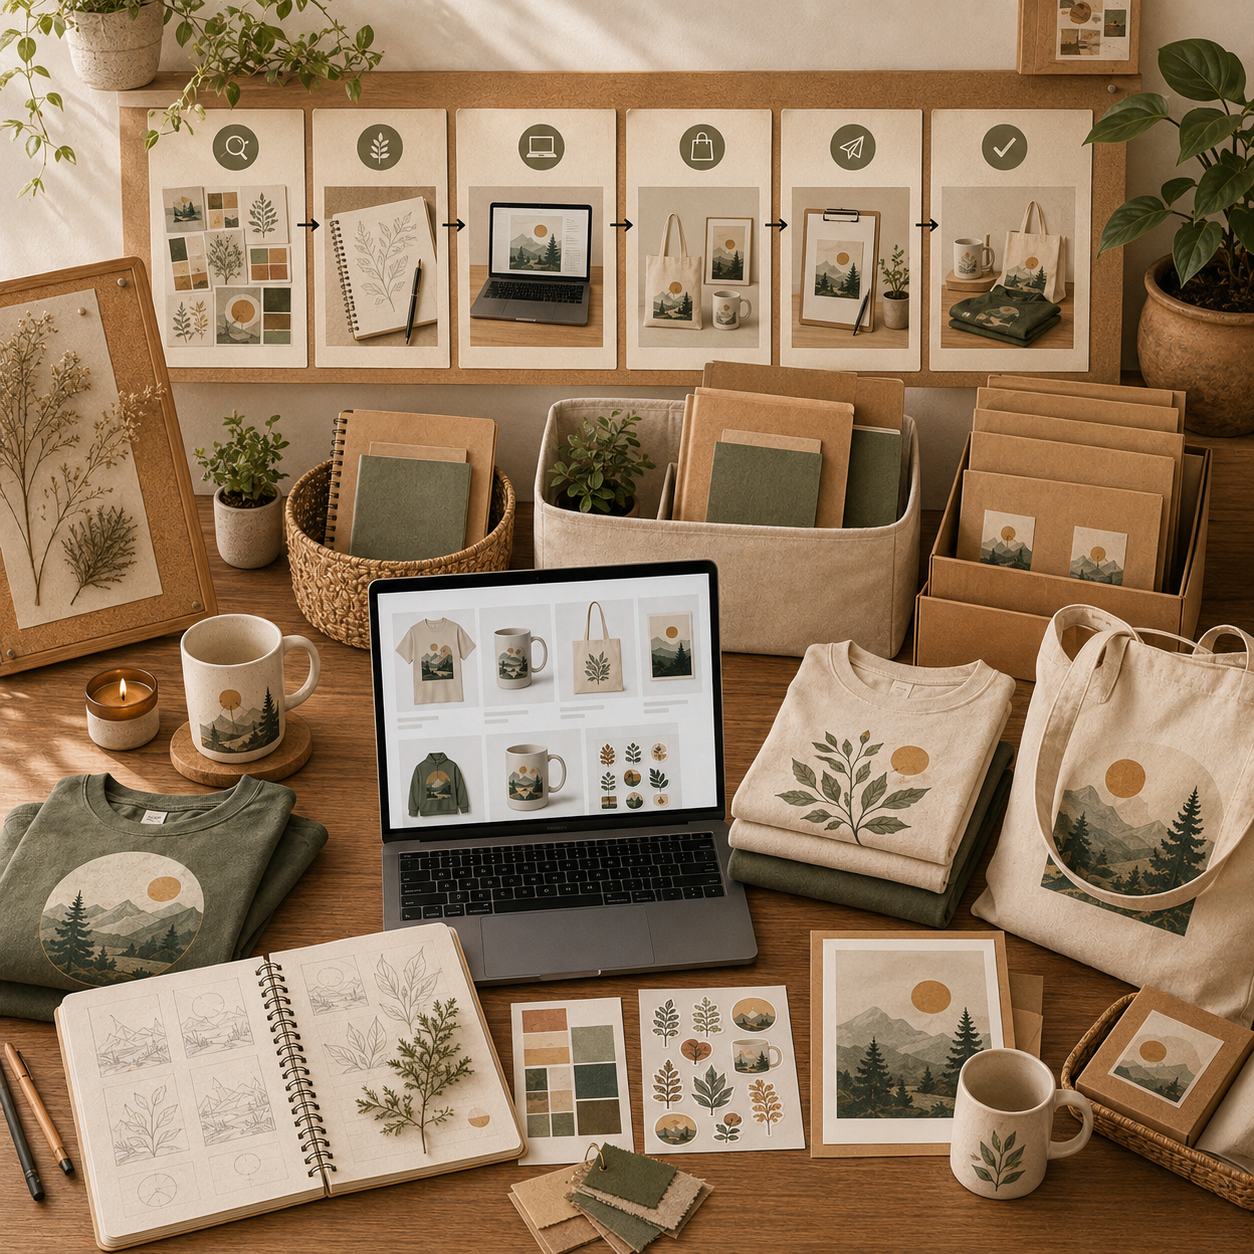
🏁 Month 4 Success Looks Like
- You are uploading consistently
- Your workflow is faster
- Your designs are better organized
- You are tracking what performs
- You have 40–75 products listed
⚠️ Scale Smart: Do not upload hundreds of random designs with no tracking. Quality, niche fit, and data matter more than blind volume.
🗓️ Simple Weekly Workflow
Day | Task |
Monday | Research niches, keywords, and trends |
Tuesday | Create design concepts |
Wednesday | Finalize designs and mockups |
Thursday | Upload and optimize listings |
Friday | Review stats and improve weak listings |
Weekend | Plan seasonal or new niche designs |
🔄 Simple Print-on-Demand Workflow
Step | What Happens |
Niche research | Find buyer groups and product ideas |
Keyword research | Identify phrases shoppers may search |
Design creation | Make simple, readable designs |
Mockups | Place designs on products clearly |
Listing setup | Add title, description, tags, and price |
Publish | Add products to store |
Track | Monitor views, favorites, clicks, and sales |
Improve | Update weak listings and repeat winners |
📅 Month 5: Test Traffic & Double Down on Strong Designs
🎯 Main Goal
Start bringing more attention to your store and focus on designs that show buyer interest.
✅ What to Do
- Identify designs with views, favorites, or sales
- Create variations of your strongest designs
- Test related products in the same niche
- Share products on Pinterest, TikTok, Instagram, or Facebook
- Create seasonal collections
- Improve product images for your best listings
- Test small discounts or bundles if available
- Avoid spending heavily on ads before having proof
🏁 Month 5 Success Looks Like
- You know which designs deserve more effort
- You have started testing outside traffic
- Your strongest listings are improved
- You are creating related designs instead of random ones
- You have 60–100 products listed
🎯 KEY TAKEAWAY
A design with signs of interest is valuable data. Make variations before abandoning the niche.
📈 Ways to Grow Traffic
Traffic Method | Best Use |
Marketplace SEO | Long-term search discovery |
Pinterest pins | Visual product traffic |
TikTok videos | Trend and product discovery |
Instagram posts | Brand and niche audience building |
Facebook groups | Careful niche promotion where allowed |
Email list | Repeat buyers and product launches |
Seasonal collections | Holiday and event-based demand |
Small paid ads | Only after products show interest |
📅 Month 6: Review, Refine & Plan Your Next 90 Days
🎯 Main Goal
Review your first 6 months and decide which niches, products, and designs are worth scaling.
✅ What to Do
- Review all products listed
- Identify your most-viewed listings
- Identify your most-favorited listings
- Identify your first sales or strongest interest signals
- Review which products performed best
- Remove or improve weak listings
- Create more designs in proven niches
- Build a 90-day plan for months 7–9
❓ 6-Month Review Questions
- Which niche got the most attention?
- Which product type performed best?
- Which designs got favorites or sales?
- Which keywords brought views?
- Which mockups looked strongest?
- Which designs were easiest to create?
- Which products had views but no sales?
- What should you stop making?
- What should you create more of?
🏁 Month 6 Success Looks Like
- You know your strongest niche
- You understand which products fit your designs
- Your store has a clearer direction
- You are improving based on data
- You have a 90-day plan to grow your listings and traffic
🎯 KEY TAKEAWAY
Print-on-demand grows when you stop guessing and start creating more of what buyers already show interest in.
📊 Decision Table
If This Happens | Do This |
One niche gets most views | Build a larger collection around it |
Designs get favorites but no sales | Improve mockups, pricing, or product selection |
One product type sells best | Create more designs for that product |
No listings get views | Improve keywords and niche research |
Seasonal products perform well | Plan holiday designs earlier |
Store feels too broad | Narrow into clearer collections |
Social traffic works | Create more posts around products |
Designs are hard to scale | Use templates and repeatable design styles |
✅ 6-Month Success Checklist
By the end of 6 months, check whether you have:
✅ Picked one main niche or audience
✅ Researched design ideas
✅ Checked for trademark risks
✅ Created first designs
✅ Published products
✅ Created clean mockups
✅ Improved titles, descriptions, and tags
✅ Tracked views, favorites, clicks, and sales
✅ Created a repeatable upload workflow
✅ Tested traffic sources
✅ Identified your strongest designs or niche
✅ Created a plan for the next 90 days
⚠️ What Not to Do During the First 6 Months
Avoid these mistakes:
❌ Using trademarked phrases, logos, characters, or brand names
❌ Copying another seller’s design
❌ Uploading random designs with no niche
❌ Using hard-to-read text
❌ Creating poor mockups
❌ Ignoring product descriptions and tags
❌ Listing too many unrelated products
❌ Expecting instant sales from a small store
❌ Spending too much on ads before testing demand
❌ Giving up before enough designs are uploaded and tested
⚠️ Reminder: Print-on-demand rewards research, consistency, and buyer-focused designs. Create for a specific audience, track what works, and keep improving.
🧭 Simple 6-Month Milestone Tracker
Month | Main Focus | Target Output |
Month 1 | Niche research | 50–150 design ideas |
Month 2 | First listings | 10–25 products published |
Month 3 | SEO & mockups | 20–50 total products |
Month 4 | Upload system | 40–75 total products |
Month 5 | Traffic testing | 60–100 total products |
Month 6 | Review & scale | 90-day growth plan created |
🚀 Final 6-Month Strategy
Your first 6 months should follow this simple path:
Month 1: Choose your niche and research design ideas
Month 2: Create your first designs and listings
Month 3: Improve SEO, mockups, and store presentation
Month 4: Build a repeatable design and upload system
Month 5: Test traffic and double down on strong designs
Month 6: Review results and plan your next 90 days
The print-on-demand sellers who grow fastest are not just creative. They research buyers, test designs, improve listings, and keep building around proven demand.
11. Get the Print-on-Demand Starter Kit
🎁 Your Print-on-Demand Toolkit
The Print-on-Demand Starter Kit provides 12 browser-based studios covering niche research, designs, listing creation, advertising tests, pricing, mockups, launch planning and order support.
The 12 components:
✅ 1. Print-on-Demand Niche Evaluator — Research demand and compare focused product audiences before choosing a niche.
✅ 2. Design Template Library — Personalize 24 original artwork starters for your product concepts.
✅ 3. 100 Product Ideas Explorer — Explore 100 product concepts and plan evidence-based demand checks.
✅ 4. Print Platform Comparison — Compare print-on-demand marketplaces and fulfillment services.
✅ 5. Etsy Listing SEO Builder — Draft product titles, relevant tags and listing copy for review before publishing.
✅ 6. Pinterest Marketing Planner — Plan Pins, small marketing experiments and result tracking.
✅ 7. Artwork Sizing Guide — Check artwork dimensions, resolution and safe areas against supplier specifications.
✅ 8. Product Profit Calculator — Model product costs, overhead, margins and break-even using your own assumptions.
✅ 9. 30-Day Shop Launch Checklist — Track your first month of shop-launch milestones and readiness checks.
✅ 10. Trademark Research Checklist — Organize research on potential trademark conflicts; checks do not provide legal clearance.
✅ 11. Product Mockup Guide — Review mockups and listing images for an accurate representation of the product.
✅ 12. Order Fulfillment Playbook — Plan how to handle order issues and communicate with buyers.
Also included in the editable master: A central dashboard, Start Here guide and supporting resources are also included.
The kit does not create or host a store or fulfill orders. Trademark checks are not legal clearance, and platform policies, supplier specifications and profitability require your own verification.
12. Frequently Asked Questions
🎨 Do I need design skills to succeed?
No! Canva makes design easy, and you can also hire designers on Fiverr for around $5–$20/design.
Many successful sellers use:
- ✍️ Text-based designs
- 🎯 Simple graphics
- 🧠 Niche-specific phrases
- 🎨 Canva templates
- 📦 Reusable design styles
💡 You do not need to be a professional designer to start.
⏳ How long until I make my first sale?
It depends on the platform, niche, design quality, and number of listings.
There is no set timeline.
- 🛍️ Marketplace sales can take weeks, or longer
- 🛒 Etsy still depends on search, photos, and competition
- 📈 Stronger niche fit can help, but it is not a shortcut
- 🐢 Generic designs often take longer — or never sell
👉 Keep uploading and improving. One design rarely proves anything.
©️ Can I use any images or fonts?
No. Only use images and fonts with commercial-use rights.
Safe starting points:
- 🖼️ Unsplash
- 📸 Pexels
- 🔤 Google Fonts
- 🎨 Canva commercial-use elements, depending on license terms
Avoid:
- 🚫 Copyrighted characters
- 🚫 Brand names
- 🚫 Logos
- 🚫 Celebrity images
- 🚫 Song lyrics
- 🚫 Trademarked phrases
💡 Always verify commercial rights before uploading.
🏢 Do I need an LLC or business license?
Not to start.
You can usually report income as self-employment income.
Consider forming an LLC as income and risk grow:
- 💰 When sales and expenses become more regular
- 🛡️ If you want liability protection
- 📈 If you’re treating it like a serious business
- 🧾 If you want cleaner business finances
💡 Consult a tax professional once income becomes consistent.
📉 What if my design doesn't sell?
That is normal.
Most designs will not sell.
Your job is to test enough designs to find winners.
General rule:
- 📦 Create 50–100 designs first
- 📊 Track what gets views and sales
- 🔁 Make variations of winners
- 🗑️ Ignore or improve designs that get no traction
💡 Often, the top 10% of your designs generate 80% of your sales.
🔁 Can I sell the same design on multiple platforms?
Yes.
You can sell the same design on:
- 🛍️ Redbubble
- 🛒 Etsy
- 👕 TeePublic
- 📦 Amazon Merch
- 🖨️ Printify/Printful stores
This creates multiple revenue streams from the same design.
⚠️ Just make sure you own the rights and have no exclusivity agreement.
⚖️ How do I avoid copyright/trademark issues?
Avoid using:
- 🚫 Brand names, such as Nike or Disney
- 🚫 Character names
- 🚫 Celebrity names
- 🚫 Song lyrics
- 🚫 Sports team logos
- 🚫 Movie quotes
- 🚫 Trademarked slogans
Before uploading, check:
- 🔍 USPTO.gov
- 🔎 Marketplace search results
- 📄 Platform rules
- 🧾 Commercial-use licenses
💡 When in doubt, don’t upload it.
🎯 Should I focus on niches or trending topics?
Both can work.
Evergreen niches provide consistent sales:
- 🐶 Dog moms
- 👩⚕️ Nurses
- 🧑🏫 Teachers
- 🎣 Fishing
- 🏋️ Fitness
- ☕ Coffee lovers
Trending topics can create short-term spikes:
- 🔥 Viral memes
- 🎄 Holidays
- 📅 Seasonal events
- 📱 Social media trends
💡 Best strategy: build evergreen income, then test trends for boosts.
📦 How many designs do I need to make good money?
Catalog size is not an income formula:
- 🌱 More listings can create more chances to be found
- 📈 A larger catalog still needs demand, traffic, and workable margins
- 🚀 High monthly totals are possible, not typical, and not tied to a design count
But quality matters more than quantity.
A smaller portfolio with strong niche targeting can beat hundreds of generic designs.
🧑💻 Can I outsource design creation?
Yes.
Once profitable, you can hire designers on:
- 💼 Fiverr
- 🧑💻 Upwork
- 🎨 Design communities
- 📱 Freelancer platforms
Typical cost:
- 💵 $5–$20/design for simple graphics
- 💰 $25–$50/design for more detailed work
💡 You can focus on niche research, keywords, and marketing while outsourcing design creation.
13. Important Considerations
Before you jump in, understand the realities — this is what separates casual sellers from consistent earners.
🎯 Most Designs Will NOT Sell
- 📉 80–90% of your designs may never get traction
- 🧪 Your goal is to test, learn, and iterate quickly
- 📦 Focus on creating more, not perfecting one design forever
👉 Data tells you what works.
⏳ This Takes Time
There is no required timeline:
- 🌱 First sale: some shops sell in weeks; others take months or never convert
- 📈 Repeatable sales, if they come, often take longer than the first listing
- 🚀 Scaling depends on demand, traffic, and whether contribution stays positive
💡 Print-on-demand compounds slowly through more listings, better niches, and stronger SEO.
🧠 Competition Is High
Generic designs usually struggle.
To stand out, focus on:
- 🎯 Specific niches
- 🔥 Trends
- 👥 Target audiences
- 💬 Buyer-specific phrases
- 🎨 Better mockups and presentation
Example:
- ❌ “Dog Lover”
- ✅ “Rescue Dog Mom With Anxiety and Coffee”
⚖️ Copyright & Trademark Risks
Avoid:
- 🚫 Brand names
- 🚫 Logos
- 🚫 Celebrities
- 🚫 Song lyrics
- 🚫 Sports teams
- 🚫 Movie/TV references
- 🚫 Trademarked phrases
👉 Always check trademarks before listing.
📉 Traffic Is NOT Guaranteed
Marketplaces bring some traffic, but not enough to rely on completely.
Real growth comes from:
- 🔍 SEO
- 📱 Social media
- 📢 Ads
- 🔁 More listings
- 🧪 Better niche research
💡 Uploading is only one part of the business.
🔁 Consistency Is Everything
Uploading 5–10 designs usually won’t work.
You need:
- 📦 Enough tested listings to learn what gets views
- 📈 More designs only help if they fit a real buyer
- 🔁 Regular uploads can improve your odds, not guarantee sales
💡 Consistency beats random bursts of motivation.
😵 Burnout Is Real
Designing and uploading can get repetitive.
Avoid burnout by:
- 🗂️ Creating in batches
- 🎨 Using templates
- 🔁 Making design variations
- 🧑💻 Outsourcing when possible
- 📅 Setting a realistic weekly upload goal
👉 Build a system, not just a hobby.
💸 Profit Margins Vary by Platform
Different platforms produce different profit levels.
General comparison:
- 🛍️ Marketplaces = easier, lower profit, often $2–$5/sale
- 🛒 Etsy/Shopify = harder, higher profit, often $10–$25+/sale
- 📦 Amazon Merch = strong reach, competitive approval process
- 🖨️ Printify/Printful = more control, more setup
💡 Start simple, then move toward higher-margin platforms.
🔍 Data > Personal Preference
What you like may not be what sells.
Use data from:
- 👀 Views
- ❤️ Favorites
- 🛒 Sales
- 🔎 Search terms
- 📊 Conversion rates
- 📌 Pinterest clicks
👉 Let performance guide your next designs.
🚧 This Is NOT Hands-Off at the Start
Print-on-demand requires upfront effort:
- 🎨 Designing
- 📝 Listing
- 🔍 Keyword research
- 📸 Mockups
- 📊 Optimization
- 📣 Promotion
It can become more hands-off only after you have listings, traffic, and systems — and even then, quality and promotion still need attention.
🏁 Final Reality Check
Sellers with steadier income are not always more talented.
They are more consistent.
They:
- 📦 Upload hundreds of designs
- 📊 Learn from failures
- 🔁 Double down on what works
- 🎯 Study niches
- 📈 Keep improving listings
14. Your Next Steps
🚀 ACTION STEP
📍 Today
- 📦 View the starter kit above
- 🎯 Choose your niche, starting with one you know or love
- 🎨 Create a free Canva account
📅 This Week
- 🔍 Research 20 best-selling products in your niche on Etsy/Redbubble
- 🎨 Create your first 5 designs in Canva
- 🛍️ Sign up for Redbubble, the easiest platform to start
- 📤 Upload your first 5 designs
🗓️ This Month
- 📦 Create 30–50 designs total
- 🛒 Set up an Etsy shop + Printify integration
- 📝 List 20 products on Etsy with optimized SEO
- 📌 Create 10 Pinterest pins
- 🎯 Goal: a clearer picture of views, listing quality, and whether anything converts
🚀 Months 2–3
- 🎨 Create 30 new designs per month, reaching 100+ total
- 📊 Analyze best sellers and create variations
- 🛍️ Expand to a second marketplace, such as TeePublic or Amazon Merch
- 📢 Test paid ads once you have proven sellers
- 🎯 Goal: a small set of listings with tracked views, costs, and contribution
15. The Bottom Line
🎯 KEY TAKEAWAY
Print-on-demand is a practical no-inventory model you can test with a small budget. The trade-off: designs only sell when niche research, listing quality, and traffic line up.
🙋 If you:
✔ Start free on a marketplace like Redbubble or TeePublic
✔ Research niches instead of only designing what you like
✔ Test many designs and double down on the sellers
✔ Stay clear of trademarks and copyrighted phrases
🏗️ You can build:
💰 Per-sale profit and monthly totals vary with niche, traffic, fees, and refunds — not a set ladder
🔁 A listing can keep selling after you upload it, if people keep finding and buying it
📈 A larger catalog or brand can help only after something has real demand
🚀 Pick a niche, check your rights, and publish a small original collection when the files are ready.
16. Recommended Websites & Tools
🛠 TOOLS & RESOURCES
You do not need every resource listed below. This directory brings together the major platforms, tools, and resources from this guide, along with additional research and learning options, so you can find them in one place when you need them.
Start with the essentials. Add tools only when your store develops a specific need for them.
🏭 Print-on-Demand Fulfillment Platforms
- Printful — Quality-focused POD fulfillment platform for printing, packing, shipping, branding options, and integrations with storefronts like Etsy, Shopify, and WooCommerce.
- Printify — Budget-friendly POD platform with multiple print providers, lower base costs, product mockups, and integrations with Etsy, Shopify, eBay, and Walmart.
- Gelato — Global print-on-demand platform for local production, faster international fulfillment, and eco-conscious global selling.
- SPOD — Shopify-focused print-on-demand platform mentioned for fast production, simple setup, and product mockups.
💡 PRO TIP
Order a sample before scaling any product. Print quality varies by provider and even by product line.
🛍️ Built-In POD Marketplaces
- Redbubble — Beginner-friendly POD marketplace where artists upload designs and earn royalties while the platform handles printing, shipping, and customer service.
- Spring / TeeSpring — Creator merch platform for selling custom apparel, mugs, and products without managing inventory or fulfillment.
- Amazon Merch on Demand — Amazon’s POD marketplace for uploading apparel designs and earning royalties from Amazon’s customer base.
- TeePublic — POD marketplace for text designs, quote shirts, pop-culture-style concepts, apparel, stickers, and simple merch ideas.
- Society6 — Art-focused marketplace for wall art, home decor, lifestyle products, and design-driven POD items.
- Zazzle — POD marketplace for invitations, stationery, gifts, customizable products, and personalized items.
- Spreadshirt — Apparel-focused POD marketplace mentioned for clothing designs and broader international selling.
📝 QUICK NOTE
Marketplaces bring their own traffic — perfect for testing designs free. Move your winners to your own store for higher margins.
🌐 Storefronts & E-Commerce Platforms
- Etsy — Marketplace for selling POD products like shirts, mugs, stickers, journals, invitations, wall art, and personalized gifts.
- Shopify — E-commerce platform for building a branded POD store, connecting fulfillment apps, running ads, and owning the customer experience.
- WooCommerce — WordPress e-commerce option for sellers who want more control over their POD store, plugins, SEO, and checkout setup.
🎨 Design, Mockup & Creative Asset Tools
- Canva — Beginner-friendly design tool for creating POD graphics, text-based designs, mockups, listing images, and social media content.
- Photopea — Free browser-based Photoshop alternative for more advanced editing, file cleanup, and design adjustments.
- Affinity Designer — Vector design software mentioned as an intermediate design tool for cleaner graphics and scalable artwork.
- Procreate — iPad drawing app mentioned for creating hand-drawn artwork, illustrations, lettering, and original POD designs.
- Adobe Illustrator — Professional vector design software for advanced typography, scalable illustrations, and polished commercial designs.
- Placeit — Mockup platform for creating product previews, apparel mockups, lifestyle images, and listing visuals that can increase buyer trust.
- Canva Mockups — Canva’s mockup tool for placing designs on products and creating cleaner product listing graphics.
- Creative Fabrica — Design asset marketplace for fonts, graphics, SVGs, illustrations, and commercial-use creative resources.
- Envato Elements — Subscription asset library for fonts, graphics, mockups, templates, photos, and design resources.
- Google Fonts — Free font library for finding typography that can support text-based POD designs when licensing is appropriate.
- Unsplash — Free photo resource mentioned as a possible commercial-use image source when licenses are checked carefully.
- Pexels — Free stock photo resource mentioned for commercial-use design inspiration and approved image sourcing when licenses are verified.
🔍 Product Research, SEO & Trademark Checks
- Google Trends — Trend research tool for checking niche demand, seasonal interest, product ideas, and rising search topics.
- Pinterest — Visual research and traffic platform for studying trends, product ideas, seasonal design concepts, and buyer interests.
- eRank — Etsy SEO research tool for finding keywords, checking competition, and improving POD listing visibility.
- Marmalead — Etsy keyword research tool for validating product terms, listing ideas, and search demand.
- USPTO Trademark Search — Trademark checker for researching protected terms before uploading designs or listing products.
- USPTO.gov — U.S. trademark and intellectual property resource mentioned for checking legal risks before selling designs.
📝 QUICK NOTE
Check trademarks before publishing anything. One strike can close a shop you spent months building.
📣 Marketing, Ads & Traffic Tools
- Tailwind — Pinterest scheduling tool for planning pins, posting consistently, and building traffic to POD listings.
- TikTok — Short-form video platform for product demos, design process videos, niche content, and organic POD traffic.
- Instagram Ads — Paid promotion channel for visual product campaigns, niche targeting, and retargeting buyers.
- Etsy Ads — Etsy advertising option for testing paid visibility on proven listings inside the Etsy marketplace.
- Pinterest Ads — Paid advertising platform for visual products, gift niches, home decor, wedding products, and evergreen POD traffic.
- Facebook Ads — Paid ad platform for testing product audiences, retargeting shoppers, and promoting niche POD items.
- Google Ads — Paid advertising platform for high-intent keyword searches connected to gifts, apparel, and specific product terms.
📧 Email, Workflow & Scaling Support
- MailerLite — Email marketing platform for building a customer list, sending promotions, and announcing new POD products.
- Kit — Creator-focused email platform for growing an audience, promoting launches, and connecting POD products to a broader creator brand.
- Klaviyo — E-commerce email and SMS platform for abandoned carts, product promotions, customer retention, and Shopify-style email flows.
- Notion — Workspace mentioned for tracking designs, niches, product ideas, upload status, and POD workflow organization.
- Fiverr — Freelance marketplace for hiring designers, mockup creators, or support help once your POD store starts scaling.
- Upwork — Freelance marketplace for outsourcing design creation, listing help, marketing tasks, and store support.
🎯 KEY TAKEAWAY
You do not need every tool on this page. One fulfillment platform, one marketplace, and one free design tool are enough to make your first sale.
🧭 How to Use This Directory
🧰 Start With a Simple Setup
Do not start by creating accounts with every service listed above. For most beginners, a simple setup is enough:
- One fulfillment platform
- One marketplace or storefront
- One free design tool
That is enough to start building. Add tools only when you can name the specific problem they will solve.
🎯 KEY TAKEAWAY
Tools support the business. They are not the business.
Your biggest advantages will come from:
Niche research → Consistent designs → SEO → Traffic
17. Explore Similar Side Hustles
 Selling Digital Products — Sell digital versions of your designs with zero fulfillment cost.
 Stock Photography: Make Money Selling Your Photos Online — License your photos as artwork for products — or as stock itself.
- Dropshipping: Start an Online Store Without Holding Inventory — Another no-inventory model — test product demand before designing your own.
 Selling Crafts & Handmade Goods — Add handmade pieces alongside your printed products.
- UGC Creation — Get paid to create brand content while your listings gain traction.
- Faceless Video Content Creation: Go Viral Without Showing Your Face — Promote your products with faceless TikTok and YouTube channels.